This Portable Pi May Not Be What You Expect

In the years since the Raspberry Pi and other similar inexpensive Linux-capable single board computers came to the market, we have shown you a huge variety of projects using them at the heart of portable computers. These normally take the form of a laptop or tablet project, but today we have one that starts from a completely different perspective.

The “Kindleberry Pi Zero W” from [Ben Yarmis] does not attempt to create an enclosure or form factor for a portable computing solution. Instead it’s fair to say that it is more of a software hack than a hardware one, as he’s created something of an ad-hoc portable Raspberry Pi from other off-the-shelf pieces of consumer hardware.

The Zero W is a particularly useful computer for this application because of its tiny size, lowish power consumption, on-board Bluetooth, and wireless networking. He has taken a W and put it in the official Pi case, with a portable battery pack. No other connections, that’s his computer. As an input device he has a Bluetooth keyboard, and his display is a jailbroken Kindle Touch tied to the Pi using his Android phone as a WiFi router. We suspect with a little bit of configuration the Pi could easily serve that function on its own, but the phone also provides an Internet connection.

The result is a minimalist mobile computing platform which probably has a much longer battery life and higher reliability than portable Pi solutions using LCD displays, and certainly takes up less space than many others. Some might complain that there’s no hack in wirelessly connecting such devices, but we’d argue that spotting the possibility when so many others embark on complex builds has an elegance all of its own. It has the disadvantage for some users of providing only a terminal based interface to Raspbian, but of course we’re all seasoned shell veterans for whom that should present no problems, right?

Notable portable Pi solutions we’ve shown you before include this beautiful Psion-inspired project, and this one using the shell of an old laptop.

Bartop Arcade Cabinet Build Skips The Kit

An arcade cabinet is one of those things that every gamer wants at home, but few ever get. Getting a real arcade cabinet is usually expensive, and building one yourself is no small feat. There are kits you can get now which help the process along, generally taking the form of pre-cut cabinet parts, but with them comes the quiet shame of kit-building. What if your friends found out you used a kit instead of designing it yourself? The drama is almost too much to think about.

That’s how [Bogdan Berg] felt about it, at least. Not content with just getting a pre-cut cabinet kit from eBay, he decided to design and build his own bartop arcade machine in just one week: fast enough for him to fit the whole thing into his Christmas vacation. We don’t know what Christmas was like for his friends and family this year with him toiling away on this beautiful build the whole time, but we can confidently say his Christmas was awesome.

He designed the cabinet in Fusion 360, working around the limitation that the laser cutter he had access to had a work area of 24 inches by 18 inches. Some interesting design choices were made here, including going with a tab and slot construction method. While [Bogdan] admits that this aesthetic isn’t always popular, he liked how sturdy it makes the final product.

He was originally going to use plywood for the cabinet, but owing to the fact that he couldn’t find any pieces that weren’t warped locally, he switched over to MDF. Using MDF did mean he had to seal all the cut pieces with shellac before painting, but in the end he’s happy with the final lacquer paint job; even if it did take more work and materials than he anticipated.

The hardware is pretty much the standard for DIY arcades these days: a 17 inch LCD monitor he had laying around is used for the display, a two player joystick and button kit from Amazon provides the user interface, and emulation is provided by a Raspberry Pi 3 running RetroPie. A recessed door in the rear allows him to get into the machine will still maintaining a finished look on the backside.

While the size of them may vary wildly, DIY arcade cabinets are always a popular project. Whether shamelessly emblazoned with our logo or playing host to glorious LED lighting, it seems like the design of these cabinets provide as much entertainment as the games they play.

Continue reading “Bartop Arcade Cabinet Build Skips The Kit”

Color Changing Clock Gets A Pi Zero Heart

Hackaday reader [Don] dropped by the tip line recently to let us know about the latest version of his color-changing LCD clock project. This is his second version of the hardware which makes some pretty big improvements over the original, including moving from the Pi B to the Pi Zero and an internal simplification of the wiring. He mentions the next revision of the project will focus on Google Home integration, which should be interesting to see.

As a father of two pre-school age children, he was looking for a way to help his kids understand the concept of time and scheduled activities. Colors and shapes come fairly easy to children of this age, but time and how it relates to the day is a bit more difficult for them especially as their comprehension of numbers is still developing. [Don] reasoned that even if they couldn’t read the numbers on the clock yet, if he had the display change colors to indicate different periods of the day (sleep, play, cleanup, etc), it would not only keep them on schedule, but reinforce the meaning of the numbers on the screen.

ShiftBrite installed in the projector.

The project was made infinitely easier by a lucky find at a local retailer. For $10 he got a kid-friendly looking clock that utilized a simple projector to backlight the LCD display. This meant [Don] would just need to swap out the stock lighting module for a controllable RGB LED, and the hardware modifications would essentially be complete.

Even the Pi Zero fits perfectly inside the case of the clock, the only modification necessary was cutting a little hole in the back for the Pi’s micro USB port. His earlier version used an external Pi B connected to the clock via CAT5, so getting it all integrated into the one device is a huge improvement, especially when little kids are involved. Moving the Pi and its 5 V pins into the clock itself also allowed [Don] to drop the voltage regulator required previously.

With the basic hardware for a color changing LCD clock together, the rest of the project was just a matter of software. After some research, [Don] came across RPi-ShiftBrite by [Hive13] and made his own fork which added some features necessary for his project, namely the ability to quickly set the ShiftBrite to a specific color on the command line. To schedule the color changes, he used the very slick minicron: a web-based tool to create and monitor Linux cron jobs.

The Pi itself does not actually interface with the clock, and with no onboard RTC it’s necessary to keep it updated with NTP or else the times will become desynchronized. It can be necessary to sync the Pi’s clock to the Internet as often as every hour to make sure the colors shift at the appropriate times. The addition of a RTC module like the DS1307 could alleviate this issue and might be something to consider for a future revision.

All told, a fantastic project and something we’ll be sure to keep our eyes on as it progresses. We’ve seen our share of unique Raspberry Pi powered clocks, and even a few color changing ones, but this approach is easily the most straight-forward we’ve seen.

Continue reading “Color Changing Clock Gets A Pi Zero Heart”

Raspberry Pi Ain’t Afraid Of No Spectre And Will Not Meltdown

While there’s broad agreement that Meltdown and Spectre attacks are really bad news at a fundamental level, there is disagreement on its immediate practical impact in the real world. Despite reassurance that no attacks have been detected in the wild and there’s time to roll out the full spectrum of mitigation, some want to find protection right now. If you’re interested in an usable and easy to set up modern desktop that’s free of Meltdown or Spectre threats, a Raspberry Pi can provide the immunity you seek.

[Eben Upton] explained the side channel attacks using fragments of Python for illustration, which was an enlightening read independent of the Raspberry Pi pitch. While these ARM cores perform speculative instruction fetches, they don’t speculatively execute them or modify the cache. Under the current circumstances, that makes all the difference in the world.

A clever security researcher may yet find a way to exploit speculative fetches in the future, and claiming that Raspberry Pi has superior security would be a stretch. The platform has its own set of security problems, but today Meltdown/Spectre is not among them. And that just might be enough to sway some decisions.

If you need to stay in the x86 world, look over what it’d take to to rewind back to an Intel 486.

Thanks to [D00med] for sharing the link in a comment to our overview article.

Bark Back IoT Pet Monitor

Does your pet get distressed when you’re not home? Or, perhaps their good behaviour slips when you’re not around and they cause a ruckus for the neighbours. Well, [jenfoxbot] has just such a dog, so she built a ‘bark back’ IoT pet monitor to keep an eye on him while she’s out.

The brains and backbone of the pet monitor is the ever-popular Raspberry Pi 3. A Sparkfun MEMS microphone breakout board listens for any unruly behaviour, with an MCP3002 analog to digital converter chip reading the mic input. Some trial-and-error coding allowed her to set a noise threshold that — once exceeded — will trigger an audio file, shushing her dog. It also logs events and uploads any status updates to a CloudMQTT server to be monitored while away from home. Her Imgur build album can be found here, and the GitHub project page is here if you want to build your own!

Check out the demo video after the break, that was probably confusing for her good dog, Marley.

Continue reading “Bark Back IoT Pet Monitor”

An IoT Christmas Tree For Your Hacker-Mas Celebrations

Smart Christmas trees may soon come to mean something more than a fashionably decorated tree. Forging ahead with this new definition, [Ayan Pahwa], with help from [Akshay Kumar], [Anshul Katta], and [Abhishek Maurya] turned their office’s Christmas Tree into an IoT device you can watch live!

As an IoT device, the tree relies on the ever-popular ESP8266 NodeMCU — activated and controlled by Alexa, as well as from a web page. The LEDs for the tree — and the offline-only tree-topper controlled by an Arduino Pro Mini — are the similarly popular Neopixels.

For those viewing online, a Raspberry Pi and camera have been attached to this project to check out the tree’s lighting. To make that possible, [Pahwa] had to enlist the use of ngrok to make the Pi’s –normally — LAN-only camera server accessible over the internet. The aforementioned web page was coded in Javascript/CSS and hosted on a server running an instance of Ubuntu 16.04.

Continue reading “An IoT Christmas Tree For Your Hacker-Mas Celebrations”

Laptop With Raspberry Pi Inside Learns To Speak Battery

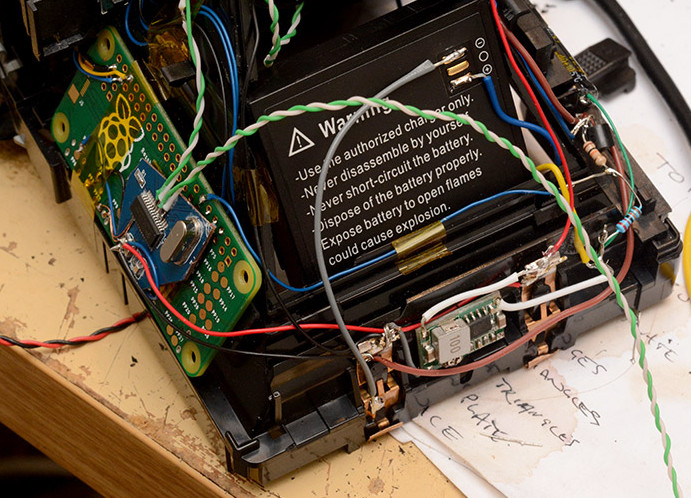
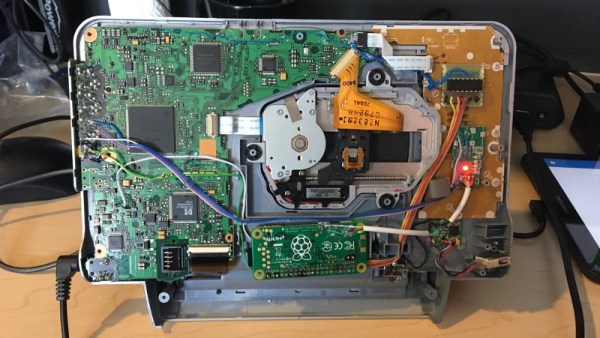
Early in November we took a look at a one of the best Raspberry Pi laptops we had ever seen, using the shell of a Sony VAIO. Laptops used to be hulking beasts, and that played into [Frank Adams’] hands as he got rid of the motherboard and had enough space to replace it with a Raspberry Pi and a few other support boards. This took advantage of the laptop’s screen, keyboard, LEDs, etc. But what’s a laptop without battery power? [Frank] hadn’t cracked that nut until now.

Inside of Sony VAIO laptop turned Raspberry Pi computer
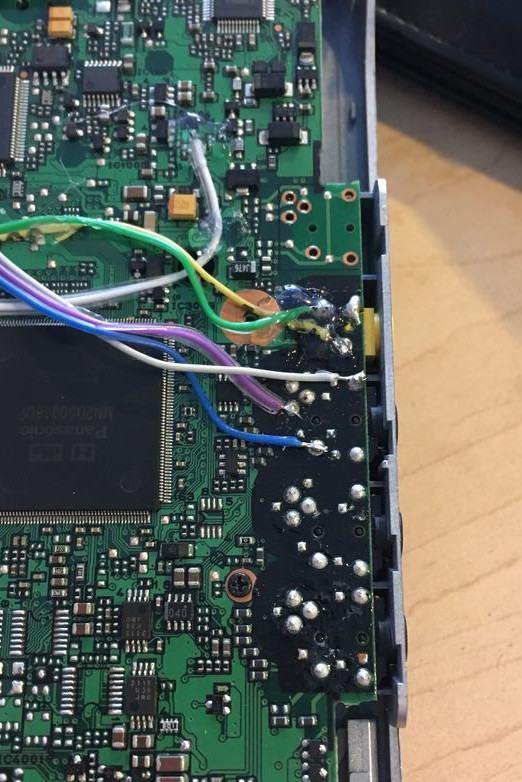
VAIO battery and charging PCB seen to lower left

Adding battery power is trickier that it sounds, but [Frank] managed to get the Raspberry Pi to talk to the original Sony VAIO internal battery. His work on the project is shared, but this part of the story is best found starting on page 29 of his PDF project details.

Using the original battery is a good move since it’s designed to fit and has a charger ready to interface with the port on the laptop case. But these batteries have logic inside them, and there’s the rub. Communications use the 2-wire System Management Bus (SMBus) which is well documented. But the when trying to use the Pi’s I2C [Frank] couldn’t figure out to send a repeated start command.

He ended up writing his own C program that bit-bangs the communications he needed and now has the Pi speaking to the battery and listening to what it hears coming back. Reading through his description of this is fun since he includes his observations from a logic analyzer captures. He suspects an occasional bad read is due to Linux interrupting code execution. He watches for and catches these bad reads in software and can now reliably read all the battery vitals.

The hack leaves him with a system that functions in much the same way the original computer did: plug it in and it charges. He did add some hardware that lets him take a voltage reading from the battery using an ADC on the Teensy that was already present to control the keyboard and case LEDs. This adds a small constant draw on the battery, but for now he doesn’t leave the battery connected when the laptop is not in use.

If you’d like to read our original coverage of this laptop, here it is.