Unlike many modern microcontrollers, RP2040 doesn’t come with a native capacitive touch peripheral. This doesn’t mean you can’t do it – the usual software-driven way works wonderfully, and only requires an external pullup resistor! In case you wanted a demonstration or you have a capacitive touch project in mind, this lighthearted video by [Jeremy Cook] is a must watch, and he’s got a healthy amount of resources for you in store, too!
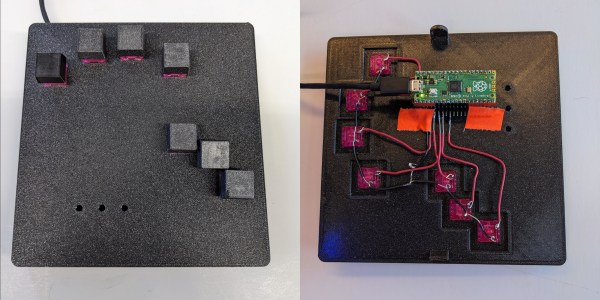
In this video, [Jeremy] presents you with a KiCad schematic and an PCB design you can use to quickly add whole 23 capacitive touch sensing inputs to a Pi Pico! The board is flexible mechanically, easy to assemble as [Jeremy] demonstrates, and all the pins involved can still be used as regular GPIOs if you’d like. Plus, it’s fully open-source, can easily be assembled on your own, and available on Tindie too!
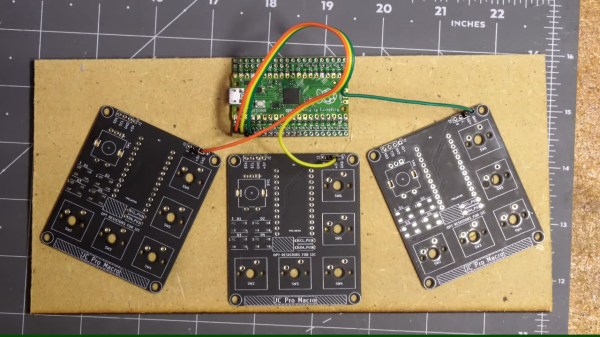
Of course, such a board doesn’t get created for no reason – [Jeremy] has a healthy amount of musical creations and nifty ideas to show off. We quite liked the trick of using old PCBs as capacitive touch sensing, using copper fills as electrodes – which has helped create an amusing “macropad of macropads”, and, there’s quite a bit more to see.
If capacitive touch projects ever struck a chord with you and you enjoy music-related hacking, [Jeremy]’s got a whole YouTube channel you ought to check out. Oh, and if one of the musical projects in the video caught your eye, it might just be the one we’ve featured previously! Continue reading “Give Your Pi Pico Captouch Inputs For All Your Music Needs”