Building A Cyberpunk Multi-Touch Input Device

This multi-touch touch panel built by [thiagesh D] might look like it came from the retro-futuristic worlds of Blade Runner or Alien, but thanks to a detailed build video and a fairly short list of required parts, it could be your next weekend project.

The build starts with a sheet of acrylic, which has a grid pattern etched into it using nothing more exotic than a knife and a ruler. Though if you do have access to some kind of CNC router, this would be a perfect time to break it out. Bare wires are then laid inside the grooves, secured with a healthy application of CA glue, and soldered together to make one large conductive array. This is attached to a capacitive sensor module so it’ll fire off whenever somebody puts a finger on the plastic.

With RGB LED strips added to the edges, you could actually stop here and have yourself a very cool looking illuminated touch sensitive panel. But ultimately, it would just be a glorified button. There’s plenty of interesting applications for such a gadget, but it’s not going to be terribly useful attached to your computer.

To turn this into a viable input device, [thiagesh D] is using a Raspberry Pi and its camera module to track the number and position of fingertips from the other side of the acrylic with Python and OpenCV. His code will even pick up on specific gestures, like a three finger drag which changes the colors of the LEDs accordingly in the video below. The camera’s field of view unfortunately means the box the panel gets mounted to has to be fairly deep, but if recessed into the surface of a desk, we think it could look incredible.

Custom multi-touch panels have been a favorite project of hackers for years now, and we’ve got examples going all the way back to the old black and white days. But larger and more modern incarnations like this one have the potential to change how we interface with technology on a daily basis.

Continue reading “Building A Cyberpunk Multi-Touch Input Device”

Weather Alert Lamp Keeps An Eye On What’s Brewing

Whether you’re getting ready for work in the morning, or heading out on a camping trip in the woods, it’s nice to know what to expect when the weather rolls over the horizon. To keep abreast of things, [natethecoder] built a lamp system to stay across weather alerts.

A Raspberry Pi 3 acts as the heart of the system, with Node Red responsible for running the show. Querying the web every 5 minutes for updated weather data, it keeps track of weather alerts, as well as incoming snowfall. For a basic weather watch, a yellow lamp is lit, while there’s a red lamp for more serious warnings. A Christmas decoration serves as the indicator for snow. The lamps are all controlled by mains-rated solid state relays, making it easy to swap out the lamps for other devices if so desired down the track. There’s also a lamp test subroutine that fires on startup to ensure everything is working correctly.

It’s a handy way to get your weather info at a glance, and would prove useful to anyone living in a storm-prone area. For something more portable, consider this umbrella that tells you the weather.

A Web API For Your Pi

There are many ways to attach a project to the Internet, and a plethora of Internet-based services that can handle talking to hardware. But probably the most ubiquitous of Internet protocols for the average Joe or Jane is the web browser, and one of the most accessible of programming environments lies within it. If only somebody with a bit of HTML and Javascript could reach a GPIO pin on their Raspberry Pi!

If that’s your wish, then help could be at hand in the form of [Victor Ribeiro]’s RPiAPI. As its name suggests, it’s an API for your Raspberry Pi, and in particular it provides a simple web-accessible endpoint wrapper for the Pi’s GPIO library from which its expansion port pins can be accessed. By crafting a simple path on the address of the Pi’s web server each pin can be read or written to, which while it’s neither the fastest or most accomplished hardware interface for the platform, could make it one of the easiest to access.

Security comes courtesy of Apache password protected directories via .htaccess files, so users would be well-advised to consider the implications of connecting this to a public IP address very carefully. But for non experts in security it still has the potential to make a very useful tool in the armoury of ways to control hardware from the little single board computer. It’s not the first try at this idea as we’ve seen a PHP example early in the Pi’s lifetime as well as one relying upon MySQL, but it does seem to be a simpler option than the others.

Meet MutantC: Raspberry Pi Sidekick Complete With Sliding Screen, QWERTY

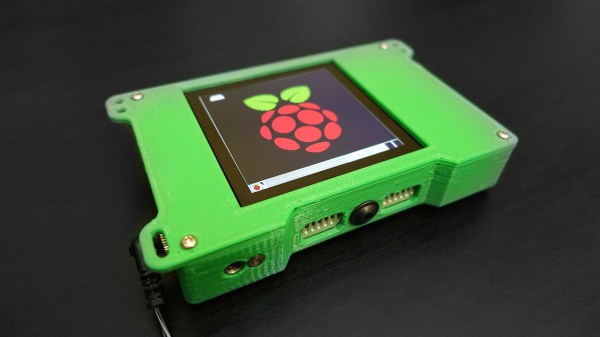
Over the years we’ve seen the Raspberry Pi crammed into almost any piece of hardware you can think of. Frankly, seeing what kind of unusual consumer gadget you can shoehorn a Pi into has become something of a meme in our circles. But the thing we see considerably less of are custom designed practical enclosures which actually play to the Pi’s strengths. Which is a shame, because as the MutantC created by [rahmanshaber] shows, there’s some incredible untapped potential there.

The MutantC features a QWERTY keyboard and sliding display, and seems more than a little inspired by early smartphone designs. You know, how they were before Apple came in and managed to convince every other manufacturer that there was no future for mobile devices with hardware keyboards. Unfortunately, hacking sessions will need to remain tethered as there’s currently no battery in the device. Though this is something [rahmanshaber] says he’s actively working on.

The custom PCB in the MutantC will work with either the Pi Zero or the full size variant, but [rahmanshaber] warns that the latest and greatest Pi 4 isn’t supported due to concerns about overheating. Beyond the Pi the parts list is pretty short, and mainly boils down to the 3D printed enclosure and the components required for the QWERTY board: 43 tactile switches and a SparkFun Pro Micro. Everything is open source, so you can have your own boards run off, print your case, and you’ll be well on the way to reliving those two-way pager glory days.

We’re excited to see where such a well documented open source project like MutantC goes from here. While the lack of an internal battery might be a show stopper for some applications, we think the overall form factor here is fantastic. Combined with the knowledge [Brian Benchoff] collected in his quest to perfect the small-scale keyboard, you’d have something very close to the mythical mobile Linux device that hackers have been dreaming of.

Continue reading “Meet MutantC: Raspberry Pi Sidekick Complete With Sliding Screen, QWERTY”

Keeping Kids In School The Smart Way

For institutions with high traffic, such as schools and movie theaters, it can be difficult to keep track of individuals moving in and out, especially without a critical mass of security. For schools especially, keeping track of student attendance and preventing kids from leaving campus in the middle of the day can be a costly problem.

The solution that Tunisian engineers [Michael Djimeli], [Darius Koliou], and [Jinette Tankoua] came up with was to create a smart gate that only turns when checks are carried out by designated security officers. The design is retrofitted to existing school turnstiles in his hometown of Monastir, Tunisia, and uses an RFID card, biometric devices, and a host of access controls to ensure that the student attempting to turn the turnstile is validated first.

The smart gate uses a few methods for identification – either by RFID, fingerprint, facial recognition, or by reading a QR code. An external database stores each user’s data and their transaction history, effectively storing their attendance data. In addition to relaying the information to an administrator, the smart gate also checks the credit of the user — whether they’ve paid the entrance fee for a movie theater, or whether they’re permitted to exit school grounds as a student.

A Raspberry Pi is used as the card collector, relaying information on transaction data over WiFi. Meanwhile local identification information via biometric devices and key fobs are relayed to the processor over Bluetooth. There are also plans to develop a mobile app to track the status of the smart gate remotely.

While the full systems integration isn’t published yet, there are several photos of the control box, which shows the components used for the first smart gate. The mechanical design was successfully tested on the IUC Douala Cameroon university campus (with 35-45 students identified per minute), and the project will hopefully be repeated within more schools in the coming year.

Using PoE With A Raspberry Pi 3 For About Two Bucks

When the Raspberry Pi 3 Model B+ was announced in March of 2018, one of its new features was the ability to be (more easily) powered via Power-over-Ethernet (PoE), with an official PoE HAT for the low price of just twenty-one USA bucks. The thing also almost worked as intended the first time around. But to some people this just isn’t good enough, resulting in [Albert David] putting out a solution he calls “poor man’s PoE” together for about two bucks.

His solution makes it extra cheap by using so-called passive PoE, which injects a voltage onto the conductors of the network cable being used for PoE, without bothering with any kind of handshake. In general this is considered to be a very reliable (albeit non-standard) form of PoE that works great until something goes up in smoke. It’s also ridiculously cheap, with a PoE injector adapter (RJ-45 plug & 2.1×5.5 mm power jack to RJ-45 jack) going for about 80 cents, and a DC-DC buck converter that can handle the input of 12V for about 50 cents.

The rest of the $2 budget is mostly spent on wiring and heatshrink, resulting in a very compact PoE solution that plugs straight into the PoE header on the Raspberry Pi 3 board, with the buck converter outputs going into the ground and +5V pins on the Raspberry Pi’s GPIO header.

A fancier solution would implement any of the standard PoE protocols to do the work of negotiating a suitable voltage. Maybe this could be the high-tech, $5 solution featuring an MCU and a small PCB?

Hypnotic Visuals Synthesizer

Ever wanted to make some seriously trippy retro graphics to go along with your lo-fi hip hop beats? Now you can, with [teafella]’s aptly named Hypno Video Synthesizer, a Raspberry Pi-based video synthesizer that digitally emulates and extends analog video workflows through colorization, shape generation, and feedback, patching the modifications into a compact interface. The device allows music creators to perform with live visuals, or alternatively to create a unique visual source for a video setup. Once the CV input is plugged in, all it requires is a composite display and power to start working.

Hypno takes input through a control voltage (CV) jack using a MCP3008 ADC via SPI, with voltages scaled from -5-5V to 0-5V. The device attaches on top of a Raspberry Pi, using Raspbian for the operating system and the Pi Zero GPIO to interface with an OpenGL Engine. The input parameters are taken from knobs through a multiplexer into a single channel of the ADC, with values offset in software based on the CV inputs.

Using the Hypno ends up being fairly straight forward, as the controls are organized onto two mirrored sides for the two oscillators A & B, with global controls in the center. There are knobs that control polarization, rotation, shape, feedback modes (regular, hyper digital, zooming, rotating zoom), clock in/clock out, frequency, root hue, and master gain, as well as RGB LEDs that provide visual feedback.

A single jack outputs the composite result, although a micro-HDMI plug can also be used on the back. For advanced functionality, Hypno allows for patching, which mixes effects on top of one another and allows for shapes such as oscillator cross modulation. There are also alt-controls that open up self modulation and other shapes. Examples include bipolar drift (smoothly scrolls the oscillator) and mirroring (mirrors the oscillator’s shape in different patterns for a kaleidoscope-eque tiled madness).

The software is written in C++ and GLSL, with the main engine running with one plane in OpenGL, drawing the output of a GLSL shader. The CV and knob inputs are fed into shader uniforms that are used to change the visuals in the engine.

[teafella], a self-professed Arduino user, uses WiringPi for the GPIO interactions. The Shader system is inspired by analog video synthesis, with every shape having a simulated “scan” over the screen and function mapped to it that can be transformed into polar coordinates.

The setup for Hypno is fully compatible with analog CV equipment such as Eurorack synthesizers, which makes it easy for music creators to plug and play. Here’s a couple of sample outputs from some soundtracks inputted into Hypno:

Too many combinations to even imagine? Check out a demo of Hypno in action!

Continue reading “Hypnotic Visuals Synthesizer”