Grate Design On This Cutting Edge Raspberry Pi Case

Love ’em or hate ’em, you’ve got to hand it to Apple: they really know how to push people’s buttons with design. Their industrial designers can make a product so irresistible – and their marketing team can cannonball the hype train sufficiently – that people will stand in line for days to buy a new product, and shell out unfathomable amounts of money for the privilege.

But what if you’re a poor college student without the budget for such treasures of industrial design? Simple – you take matters into your own hands and stuff a Raspberry Pi into a cheese grater. That’s what a group of engineering students from the University of Aveiro in Portugal called [NeRD-AETTUA] did, in obvious homage to the world’s most expensive cheese grater. The video below for the aptly named RasPro is somewhat less slick that Apple’s promos for the Mac Pro, but it still gets the basics across. Like the painstakingly machined brushed aluminum housing on the Mac, the IKEA cheese grater on the RasPro is just a skin. It covers a 3D-printed chassis that houses a beefy power supply and fan to go along with the Raspberry Pi 3. There’s also a speaker for blasting the tunes, which seems to be the primary use for the RasPro.

All things considered, the cheese grater design isn’t really that bad a form factor for a Pi case. If that doesn’t appeal, though, take your pick: laser-cut plywood, an Altoids tin, or even inside your PC.

Continue reading “Grate Design On This Cutting Edge Raspberry Pi Case”

Pi Zero Streams Video From “Fake” Security Camera

Fake security cameras are advertised as a cheap way to deter anyone who might be up to no good. This isn’t a crime and punishment blog, so we’re not really in a position to say how accurate that claim actually is, but we see enough of these things for sale that somebody out there must believe they’re worth having. Though if it were us, we’d take this tip from [Daniel Andrade] and convert our “fake” camera into a real one with the Raspberry Pi and WebRTC.

There are an untold number of makes and models of these fake cameras out there, but it seems that many of them share a fairly common design in that the enclosure they use is actually pretty useful for putting your own hardware in. They’re hollow, relatively well protected from the elements, and as most of them use a blinking LED or some other feature to make them look more authentic, they already have a functional battery compartment.

As it turns out, the one that [Daniel] picked up for $9 USD is pretty much perfect for the Raspberry Pi Zero and its camera module. He even wired the blinking LED up to the Pi’s GPIO pins so it will still look the part, though replacing it with an RGB LED and appropriate scripts to drive it would be a nice way to get some visual feedback on what the system is doing.

The software side of things is done with Balena, a suite of tools for setting up and managing Linux Internet of Things devices. They provide everything from the SD card image that runs on the Pi itself to the cloud infrastructure that pulls all the data together. [Daniel] dove a little deeper into the software stack when he created his Bitcoin traffic light last year.

For any readers who may feel a sense of déjà vu looking at this project, you aren’t going crazy. We recently saw a similar project that used an ESP8266 and a PIR sensor to add motion sensing capabilities to one of these fake cameras. Now all we need is somebody to put an Arduino in one of them, and we’ll have the Holy Trinity represented.

Shorting Pins On A Raspberry Pi Is A Bad Idea; PMIC Failures Under Investigation

You may have noticed, we’re fans of the Raspberry Pi here at Hackaday. Hardly a day goes by that we don’t feature a hack that uses a Pi somewhere in the build. As useful as the Pis are, they aren’t entirely without fault. We’ve talked about the problems with the PoE hat, and multiple articles about keeping SD cards alive. But a new failure mode has popped that is sometimes, but not always, caused by shorting the two power rails on the board.

The Pi 3 B+ has a new PMIC (Power Management Integrated Circuit) made by MaxLinear. This chip, the MxL7704, is a big part of how the Raspberry Pi foundation managed to make the upgrades to the Pi 3 without raising the price over $35.

A quick look at the Raspberry Pi forum shows that some users have been experiencing a specific problem with their new Raspberry Pi 3 B+ units, where the power LED will illuminate but the unit will not boot. The giveaway is zero voltage on the 3v3 pin. It’s a common enough problem that it’s even mentioned in the official boot problems thread.

Make sure the probe you are measuring with does not slip, and simultaneously touches any of the other GPIO pins, as that might instantly destroy your PI, especially shorting the 3V3 pin to the 5V pin will prove to be fatal.

Continue reading “Shorting Pins On A Raspberry Pi Is A Bad Idea; PMIC Failures Under Investigation”

HestiaPi: A Stylish Open Hardware Thermostat

A common complaint about open hardware and software is that the aesthetic aspects of the projects often leave something to be desired. This isn’t wholly surprising, as the type of hackers who are building these things tend to be more concerned with how well they work than what they look like. But there’s certainly nothing wrong with putting a little polish on a well designed system, especially if you want “normal” people to get excited about it.

For a perfect example, look no further than the HestiaPi Touch. This entry into the 2019 Hackaday Prize promises to deliver all the home automation advantages of something like Google’s Nest “smart” thermostat without running the risk of your data being sold to the highest bidder. But even if we take our tinfoil hat out of the equation, it’s a very slick piece of hardware from a functional and visual standpoint.

As you probably guessed from the name, the thermostat is powered by the Raspberry Pi Zero, which is connected to a custom PCB that includes a couple of relays and a connector for a BME280 environmental sensor. The clever design of the 3D printed case means that the 3.5 inch touch screen LCD on the front can connect directly to the Pi’s GPIO header when everything is buttoned up.

Of course, the hardware is only half the equation. To get the HestiaPi Touch talking to all the other smart gadgets in your life, it leverages the wildly popular OpenHAB platform. As demonstrated in the video after the break, this allows you to use the HestiaPi and its mobile companion application to not only control your home’s heating and air conditioning systems, but pretty much anything else you can think of.

The HestiaPi Touch has already blown past its funding goal on Crowd Supply, and the team is hard at work refining the hardware and software elements of the product; including looking at ways to utilize the unique honeycomb shape of the 3D printed enclosure to link it to other add-on modules.

Continue reading “HestiaPi: A Stylish Open Hardware Thermostat”

This Clapperboard Prints Movie Posters

The clapperboard is a device used in video to synchronize audio and video. Its role in movies is well known and its use goes back in one form or another to the 1920s. [Gocivici] is a big movie fan and created a clapperboard that is able to print out posters of recently announced movies when the clapper is clapped.

The poster is not a big, full color job, but rather a black and white one, roughly the size of a movie ticket. [Gocivici] keeps his movie tickets in a journal and wanted to be able to keep small posters in there along with them. A thermal printer is used to print the poster along with the title, the release date, and some information about the movie. In addition to the printer, the hardware involved is a Raspberry Pi, a switch, and an LED. The clapperboard itself is 3d printed and then painted. A bit of metal is used to keep the clappers apart and give a bit of resistance when pressing them together. A nice touch is a metal front, so you can use magnets to keep your posters on the board.

[Gocivici] has detailed build instructions up along with a video (available after the break) showing the printer in action. The 3d models are available as well as the code used to create the posters after grabbing data from TMDb. If you need your clapperboard to be as accurate as possible, take a look at this atomic clock clapperboard.

Continue reading “This Clapperboard Prints Movie Posters”

Doom On The NES

“But can it run Doom?” is perhaps the final test of hacking a platform. From calculators to thermostats, we’ve seen Doom shoehorned into a lot of different pieces of hardware. Many times we’re left scratching our heads at the mashup, and this is no exception.

[TheRasteri] wasn’t satisfied with the existing ports of Doom, so he decided to bring the classic game to a classic console, the NES. In the video embedded after the break, he helpfully points out the system requirements for running Doom, and compares them with the specifications of the NES. Spoilers: not nearly enough.

How did he manage the feat? Taking inspiration from Nintendo’s own SuperFX chip, he embedded a co-processor in the cartridge, and fed the video stream from the cartridge back into the NES. It might not be fair to call it a co-processor, since it’s a Raspberry Pi with thousands of times the processing power of the 6502 that powers the NES. The idea might seem familiar, and in fact it was partially inspired by [Tom7]’s similar hack last year.

Using a Cypress USB controller to feed the graphics bus, [TheRasteri] is able to run Doom on the Raspberry Pi, take the visuals from the game, and convert them into blocks of graphics the NES expects to load from the cartridge. The best trick is that he apparently managed to squeeze everything into a normal NES cartridge. He plans to release a build video on his channel, so keep an eye out.

Meanwhile, don’t forget to take a look at those calculators and thermostats we mentioned.

Continue reading “Doom On The NES”

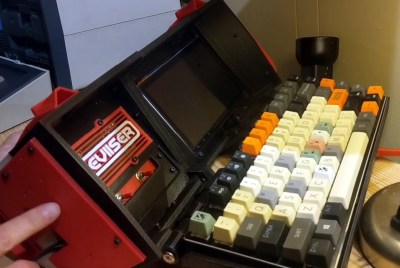
Mobile SIGINT Hacking On A Civilian’s Budget

Signals Intelligence (SIGINT) refers to performing electronic reconnaissance by eavesdropping on communications, and used to be the kind of thing that was only within the purview of the military or various three letter government agencies. But today, for better or for worse, the individual hacker is able to pull an incredible amount of information out of thin air with low-cost hardware and open source software. Now, thanks to [Josh Conway], all that capability can be harnessed with a slick all-in-one device: the RadioInstigator.

In his talk at the recent 2019 CircleCityCon, [Josh] (who also goes by the handle [CrankyLinuxUser]) presented the RadioInstigator as an affordable way to get into the world of wireless security research beyond the traditional WiFi and Bluetooth. None of the hardware inside the device is new exactly, it’s all stuff the hacking community has had access to for a while now, but this project brings them all together under one 3D printed “roof” as it were. The end result is a surprisingly practical looking device that can be used on the go to explore huge swaths of the RF spectrum at a cost of only around $150 USD.

So what has [Josh] packed into this wireless toybox? It will probably come as little surprise to find out that the star of the show is a Raspberry Pi 3 B+, combined with a touch screen display and portable keyboard so the user can interface with the various security tools installed.

To help the RadioInstigator surf the airwaves there’s an RTL-SDR and a 2.4 Ghz nRF24LU1+ “Crazyradio”, both broken out to external antenna connectors on the outside of the device. There’s even an external SMA connector hooked up to the Pi’s GPIO pin, which can be used for low-power transmissions from 5 KHz up to 1500 MHz with rpitx. Everything is powered by a beefy 10,000 mAh battery pack which should give you plenty of loiter time to perform your investigations.

[Josh] has also written several Bash scripts which will get a trove of radio hacking tools installed on the Pi automatically, either by pulling them in through the official repositories or downloading the source and compiling them. Getting the software environment into a known-good state can be a huge time sink, so even if you don’t build your own version of the RadioInstigator, his scripts are still worth checking out.

You can do some pretty incredible things with nothing more than a Pi and an RTL-SDR, but we can’t help but notice there’s still plenty of room inside the RadioInstigator for more gear. It could be the perfect home for a Mult-RTL setup, or maybe even a VGA adapter for spoofing cell networks.

Continue reading “Mobile SIGINT Hacking On A Civilian’s Budget”