A few years back, there were some studies on the chemical and particle emissions coming out of the hotends of 3D printers. Although they galvanized a lot of people in the community, the science wasn’t entirely conclusive — one paper made it sound like you needed a hazmat suit for 3D printing, and the other suggested that cooking a meal in a kitchen was worse for you. That’s because they were measuring different things.
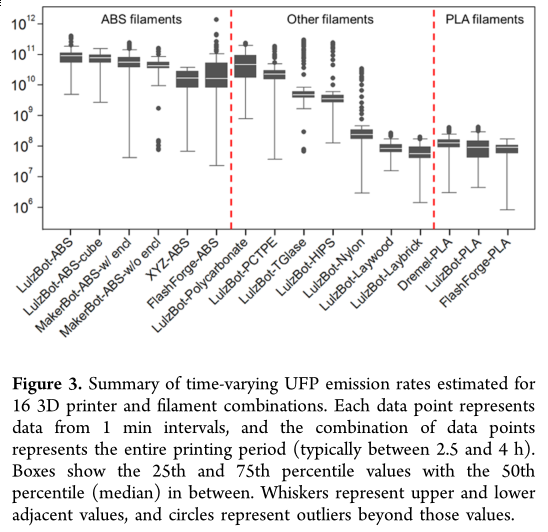
This new research paper on the emissions of 3D printers covers all the bases. They examined a variety of different materials printed in different printers. They also measured both chemical emissions and Ultrafine Particles (UFP) which can be hazardous even when the material itself is not.
We read the paper (PDF) so that you don’t have to. Here’s our takeaways:
There was no significant variation across brands of 3D printers. (Duh?)
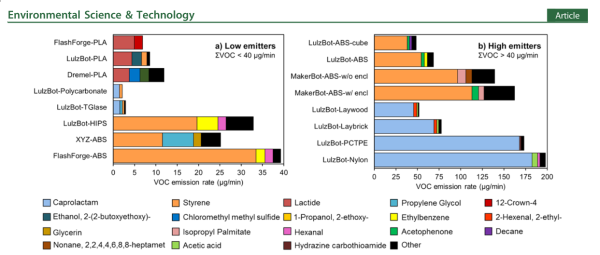
ABS and similar materials outgas styrene at levels you should probably be worrying about if you’re running your printer for a few hours a day in an unventilated office.
PLA emitted significantly less overall, and most of it was a non-hazardous chemical, lactide. PLA doesn’t look like a problem.
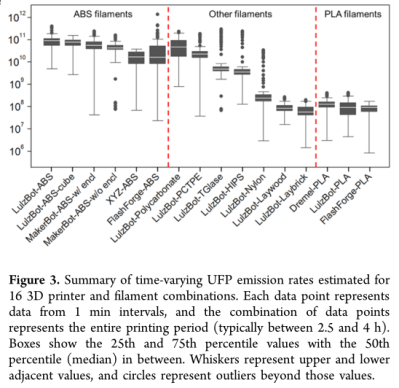
All of the materials resulted in increased UFP exposure. These levels are above normal household background levels, but lower than certain “microclimates” which (if you follow the references) include principals’ offices with carpet, automobiles, restaurants, and rooms with burning candles or running hair dryers. In short, the UFP exposure doesn’t look like it’s going to be a big deal unless you’re sitting right next to the printer and running it continually.
So what would we do? It now looks like it’s prudent to print ABS only in a well-ventilated room. Or enclose the printer in a box and vent whatever you can outside — which can also help prevent breezes cooling the piece down unevenly and adding to ABS’s warping problems. Or just stick to PLA. It looks essentially harmless.
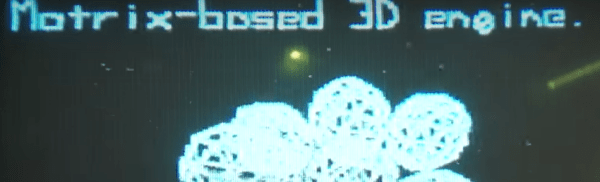
We’ve seen a lot of ESP8266 projects in the past, but this one most definitely qualifies as a hack. [Cnlohr] noticed that the ESP8266, when overclocked, could operate the I2S port at around 80MHz and still not lose DMA data. He worked out how to create bit patterns that generate RF around 60MHz. Why is that interesting? Analog TVs can receive signals around that frequency on channel 3.
As you can see in the video below, the output is monochrome only and is a little snowy. It also will lose frames on some WiFi events, but this is all forgivable when you consider this very inexpensive module isn’t meant to do video output at all.
Here’s the Scenario: you need to get somewhere in a hurry. The problem is that your car has a dead battery and won’t turn over. The Obvious solution would be to call a friend for a jump. But is the friendless hacker out of luck in such a situation? Not if you can whip up a quick parts bin jump starter.
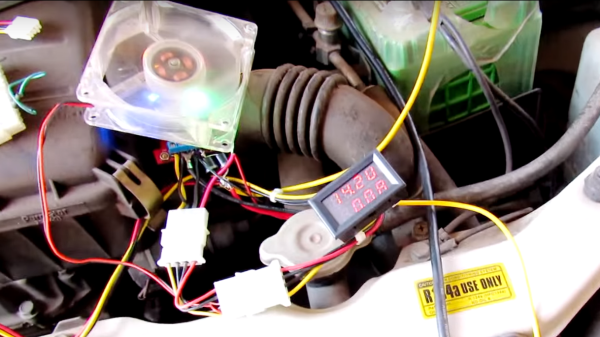
Clearly, [Kedar Nimbalkar]’s solution would be practical only under somewhat bizarre circumstances, so we’ll concentrate on what we can learn from it. A spare PC power supply provides the electrons – [Kedar]’s 250W supply pushes 15A at 12 volts, which is a pretty respectable amount of current. The voltage is a little anemic, though, so he pops it up to 14.2 volts with a 150W boost converter cooled with a PC fan. A dual panel meter reads out the voltage and current, but a VOM could substitute in a pinch. About the only thing you might not have on hand is a pair of honking 10A diodes to keep current from creeping back into the boost converter. [Kedar] claims he got enough of a charge back in the battery in five minutes to start his car.
As jump-starting goes, this hack is a bit of a stretch. It’s not the first time we’ve seen a MacGyver’d jump starter, though, and you never know when the principles and hardware behind these hacks will come in handy.
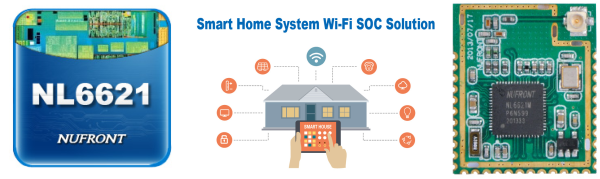
We’ve seen rumors floating around the Twittersphere about a new integrated microprocessor and WiFi SOC: the NL6621 from Nufront. Details are still scarce, but that doesn’t seem to be because the chip is vaporware: you could buy modules on Taobao.com and eBay right now for between two-and-a-half and three bucks, and Nufront’s website says they’ve produced a million modules since 2013.
The NL6621 WiFi SOC is powered by a 160 MHz ARM Cortex-M3 with 448 KB of RAM, and everything else is integrated in the SOC. The module has 32 GPIOs, SPI, I2C, I2S digital audio, and most of the peripherals that you’d expect. They say they have a completely open source SDK, but we can’t find a link to it anywhere. An English-language forum has sprung up in anticipation of the next new thing, and they say that they’ve contacted Nufront about the SDK, so that’s probably as good a place as any to lurk around if you’re interested. With an ARM core, it shouldn’t be long before someone gets GCC working on these things anyway.
It’s also worth noting that we’ve announced ESP8266 killers before, and it hasn’t come to pass. The mixture of community and official support that (eventually) came out of Espressif seems to be the main factor determining the ESP8266’s success, and we don’t see that yet with the NL6621. So take the question mark in the title seriously, but if this turns out to be the next big thing, remember where you heard it first, ok?
Though we’ve never used their cables, [Blue Jeans Cable] out of Seattle, WA sure does seem to take the black art of cable manufacture seriously. When they read the Cat 6 specification, they knew they couldn’t just keep building the cables the way they used to. So they did some research and purchased a Fluke certification tester for a measly 12,000 US dollars. While they were purchasing the device, they ran across an interesting tidbit in the fluke knowledge base. Fluke said that 80% of the consumer Cat 6 cables they tested didn’t begin to meet the Cat 6 specification.
This is the part where [Blue Jeans Cable] earns our respect; like good scientists, they set out to replicate Fluke’s results. Sure enough, 80% of the Cat 6 cables they tested from big box stores etc. failed the specification. More surprising, many of them didn’t even pass the Cat 5e specification. [Blue Jeans Cable] asserts that this is possible because the Ethernet cable specification is policed via the honor system, allowing manufacturers to be fairly brazen about what they label as Cat 6.
Despite tuning my extruder steps perfectly, and getting good results instantly on larger prints. I was still having a ton of trouble with smaller parts. PLA is the favored printing material for its low odor, low warping, and decent material properties. It also has many downside, but it’s biggest, for the end user, lies in its large glass transition temperature range. Like all thermoplastics, it shrinks when it cools, but because of this large range, it stays expanded and, getting deep into my reserve of technical terms, bendy for a long time. If you don’t cool it, the plastic will pile up in its expanded state and deform.
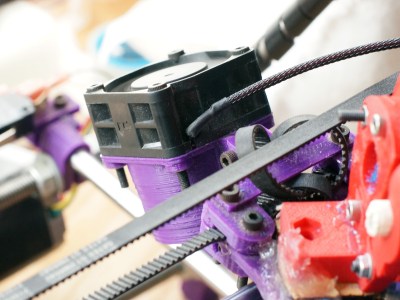
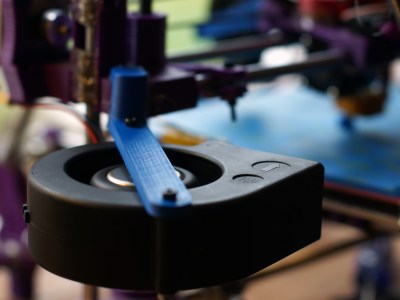
The old cooling fan on my trusty and thoroughly battered Prusa i2.
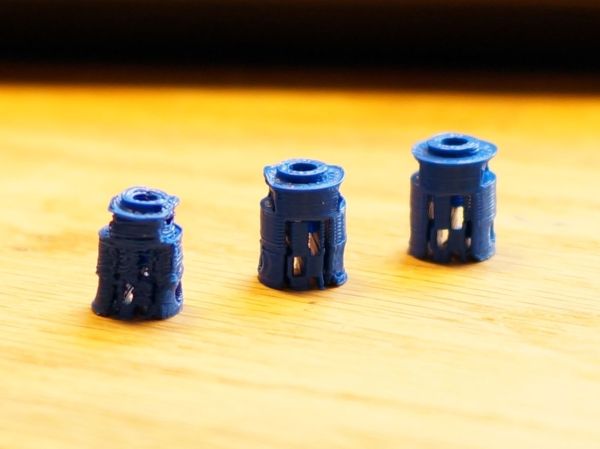
I am working on a project that needs a tiny part, pictured above. The part on the left is what I was getting with my current cooling set-up and temperature settings. It had very little semblance with the CAD file that brought it into this world.
The bond between layers in a 3d print occurs when the plastic has freshly left the nozzle at its melting point. Almost immediately after that, the plastic crosses from the liquid state into a glass state, and like pressing two pieces of glass together, no further bonding occurs. This means that in order to get a strong bond between the print layers, the plastic has to have enough thermal mass to melt the plastic below it. Allowing the polymer chains to get cozy and hold hands. Nozzle geometry can help some, by providing a heat source to press and melt the two layer together, but for the most part, the fusing is done by the liquid plastic. This is why large diameter nozzles produce stronger parts.
What I’m getting at is that I like to run my nozzle temperature a little hotter than is exactly needed or even sensible. This tends to produce a better bond and sometimes helps prevent jamming (with a good extruder design). It also reduces accuracy and adds gloopiness. So, my first attempt to fix the problem was to perhaps consider the possibility that I was not 100% right in running my nozzle so hot, and I dropped the temperature as low as I could push it. This produced a more dimensionally accurate part, but a extraordinarily weak one. I experimented with a range of temperatures, but found that all but the lowest produced goopy parts.
After confirming that I could not get a significant return on quality by fine tuning my temperature, I reduced the speed of the nozzle by a large percentage. By reducing the speed I was able to produce the middle of the three printed parts shown in the opening image. Moving the nozzle very slowly gave the ambient air and my old cooling fan plenty of time to cool the part. However, what was previously a five minute part now took twenty minutes to print. A larger part would be a nightmare.
This will do.
So, if I can’t adjust the temperature to get what I want, and I can adjust the speed; this tells me I just need to cool the part better. The glass state of the plastic is useless to me for two reasons. One, as stated before, no bonding occurs. Two, while the plastic remains expanded and bendy, the new layer being put down is being put down in the wrong place. When the plastic shrinks to its final dimension is when I want to place the next layer. Time to solve this the traditional way: overkill.
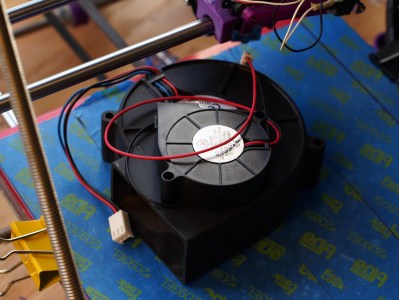
A while back my friend gifted me a little squirrel cage fan he had used with success on his 3d printer. Inspired by this, I had also scrounged a 12v, 1.7A fan from a broken Power Mac G5 power supply. When it spins up I have to be careful that it doesn’t throw itself off the table.
I should have added a rib to this bracket, this fan is heavy!
I printed out mounts for the fans. The big one got attached to the Z axis, and the little one rides behind the extruder. I fired up the gcode from before and started to print, only to find that my nozzle stopped extruding mid way. What? I soon discovered I had so much cooling that my nozzle was dropping below the 160C cold extrusion cut-off point and the firmware was stopping it from damaging itself. My heated bed also could no longer maintain a temperature higher than 59C. At this point I felt I was onto something.
I wrapped my extruder in fiberglass insulation and kapton tape, confidently turned the nozzle temperature up, set the speed to full, and clicked print. With the addition of the overkill cooling I was able to get the part shown to the right in my three example prints. This was full speed and achieved full bond. Not bad! Thus concludes this chapter in my adventures with cooling. I was really impressed by the results. Next I want to try cooling ABS as it prints. Some have reported horrible results, others pretty good ones, I’m interested. I also wonder about cooling the plastic with a liquid at a temperature just below the glass state as it is deposited. Thoughts?
Security researchers can be a grim crowd. Everything, when looked at closely enough, is insecure at some level, and this leads to a lot of pessimism in the industry. So it’s a bit of a shock to see a security report that’s filled with neither doom nor gloom.
We’d previously covered Somerset Recon’s initial teardown of “Hello Barbie” and were waiting with bated breath for the firmware dump and some real reverse engineering. Well, it happened and basically everything looks alright (PDF report). The Somerset folks desoldered the chip, dumped the flash ROM, and when the IDA-dust settled, Mattel used firmware that’s similar to what everyone else uses to run Amazon cloud service agents, but aimed at the “toytalk.com” network instead. In short, it uses a tested and basically sound firmware.
The web services that the creepy talking doll connected to were another story, and were full of holes that were being actively patched throughout Somerset’s investigation, but we were only really interested in the firmware anyway, and that looked OK. Not everything is horror stories in IoT security. Some stories do have a happy ending. Barbie can sleep well tonight.

 There was no significant variation across brands of 3D printers. (Duh?)