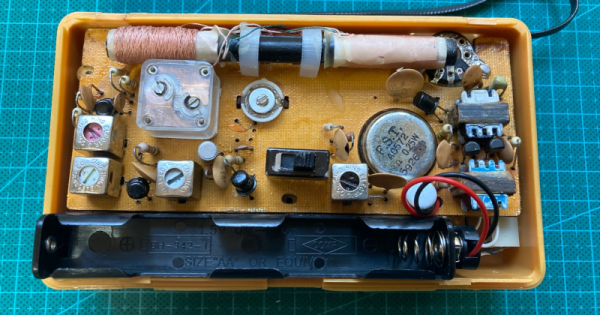
If you are a certain age, it is hard to wrap your head around the fact that an old radio might have transistors — the old ones all had tubes, right? But a radio from the 1960s or 1970s is reaching the 60+ year mark and people are restoring old transistor sets. [Adam] picked up his first old radio, a 1970s vintage Ajax Command S-74.
He was fortunate. The only repair needed was to replace a corroded battery holder and clean up the mess from the batteries. You can hear the radio doing its thing in the video below.
At the risk of dating myself, I will tell you that grew up in the 80s — that decade of excess that was half drab and half brightly colored, depending on where you looked, and how much money you had for stuff like Memphis design. Technology seemed to move quickly in almost every aspect of life as the people of the Me decade demanded convenience, variety, and style in everything from their toilet paper (remember the colors?) to their telephones. Even though long distance cost a fortune back then, we were encouraged to ‘reach out and touch someone’.
A Healthy Fear of Bears
Looking back, it’s easy to see how all that advanced technology and excess filtered down to children. I may be biased, but the 80s were a pretty awesome time for toys, and for children’s entertainment in general. Not only were the toys mostly still well-made, even those that came in quarter machines — many of them were technologically amazing.
Take Teddy Ruxpin, which debuted in 1985. Teddy was the world’s first animatronic children’s toy, a bear that would read stories aloud from special cassette tapes, which moved his eyes and mouth along with the words. One track contained the audio, and the other controlled three servos in his face.
I remember watching the commercials and imagining Teddy suddenly switching from some boring bedtime story over to a rockin’ musical number a là the animatronic Rock-afire Explosion band at ShowBiz Pizza (a Chuck E. Cheese competitor). That’s the kind of night I wanted to be having.
The current lineup of the Rock-afire Explosion. Image via Servo Magazine
Which brings us to KC Bearifone, an animatronic teddy bear telephone. Honestly, part of the reason I bought the Bearifone was some sort of false nostalgia for Teddy. The main reason is that I wanted to own a Teleconcepts unit of some kind, and this one seemed like the most fun to mess around with. A robot teddy bear that only does speakerphone? Yes, please.
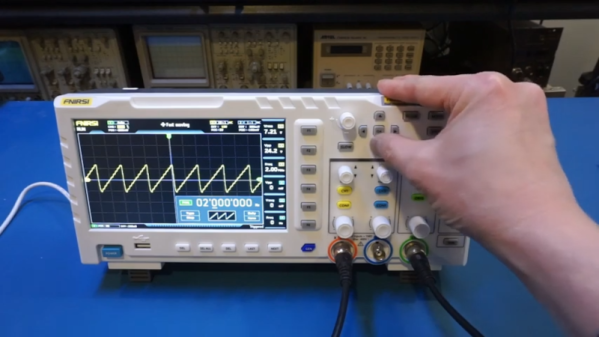
We always enjoy watching [Kerry Wong] put an oscilloscope through its paces. His recent video is looking at a very inexpensive FNIRSI 1014D ‘scope that you can also find rebranded. You can usually find these for well under $200 at the usual places. Can you get a reasonable scope for that cost? [Kerry] has a list of issues with the scope ranging from short memory depth to low sensitivity. He did, however, like that it is USB powered so it can be operated from a common battery pack, which would make it truly floating.
The ‘scope looks like a lot of other inexpensive ‘scopes, but you can see some concessions to price. For example, the encoder knobs don’t have a push button function, making the scope more difficult to operate. While the specs are relatively modest, [Kerry] wasn’t sure the instrument was even living up to them.
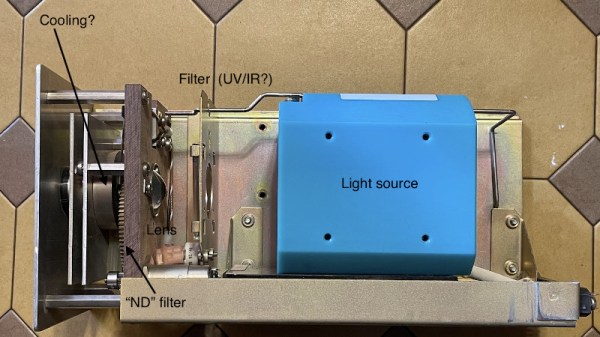
While originally designed to put light where the sun don’t shine for medical purposes, [Nava Whiteford] says the Wolf 5151 Xenon endoscopic light source also works well for microscopy and general optical experiments, especially since you can get them fairly cheap on the second hand market. His cost just $50 USD, which is a steal when you consider a replacement for its 300 watt Olympus-made bulb will run you about 200 bucks alone.
That said, [Nava] recently moved on to a more compact light source, and figured that was a good enough excuse to crack open the Wolf 5151 and see what makes it tick. In this particular post he’s just looking at the optical side of things, which is arguably the most interesting aspect of the device. Helpfully, the whole assembly is mounted to its own sled of sorts that can be pulled from the light source for a closer examination.
A Steampunk dimmer switch.
Beyond that expensive bulb we mentioned earlier, there’s a thick piece of what appears to be standard plate glass being used as an IR and UV filter. [Nava] suspects this component is responsible for keeping the rest of the optics from overheating, which is backed up by the fact that the metal plate its mounted to appears to feature a K-type thermocouple to keep an eye on its operating temperature. Forward of that is a unique aspheric lens that features a rough spot to presumably scatter the light at the center of the beam.
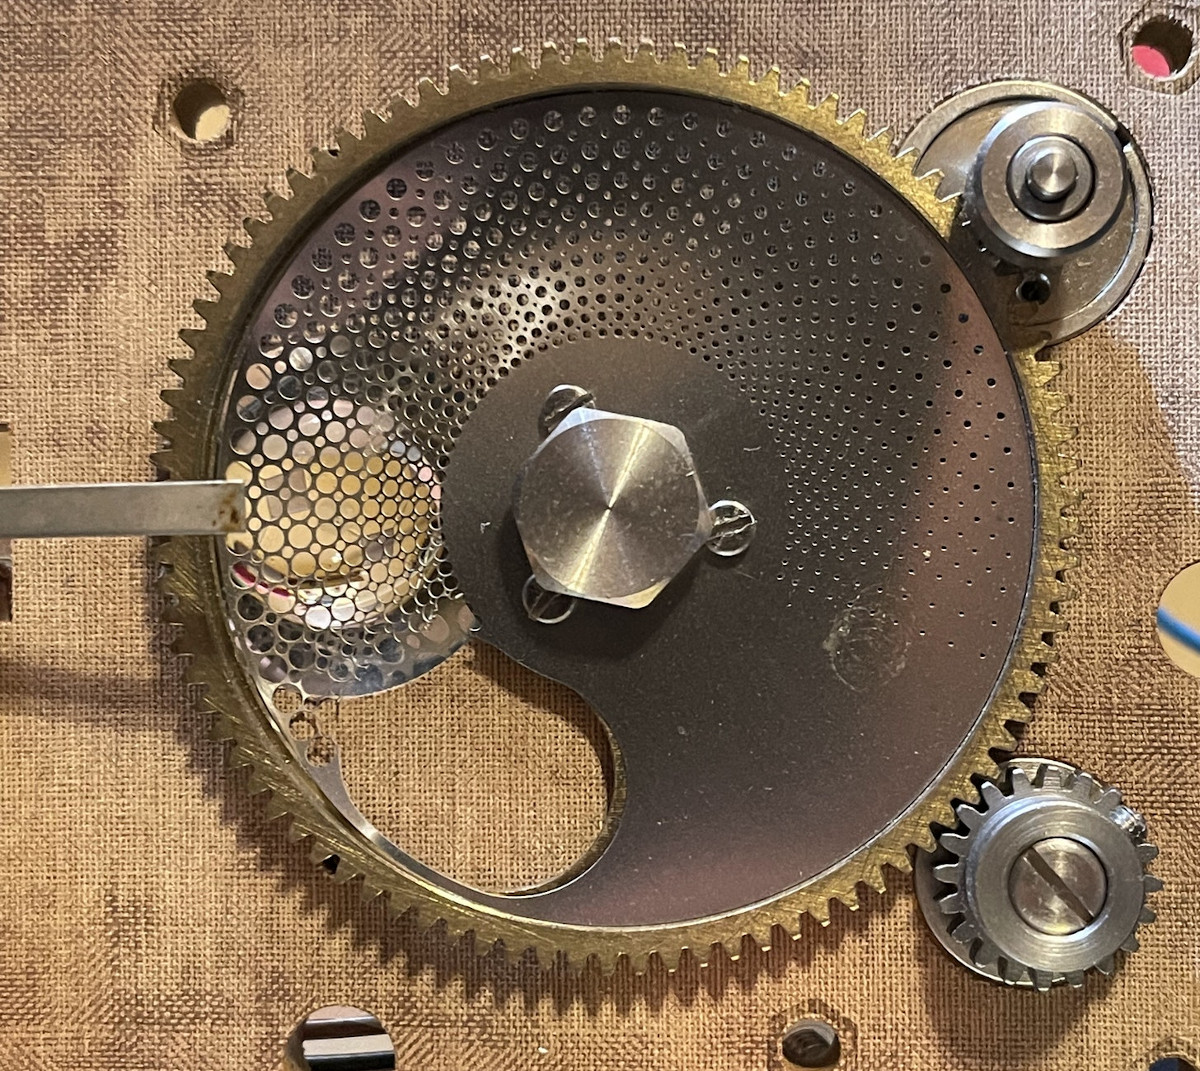
Our vote for the most fascinating component has to go to the Neutral Density (ND) filter, which is used to control the intensity of the light. In a more pedestrian light source you could just dim the bulb, but in this case, the Wolf 5151 uses a metal disk with an array of holes drilled into it. By rotating the disc with a DC motor, the lens can be variably occluded to reduce the amount of light that reaches the aperture, which connects to the fiber cable.
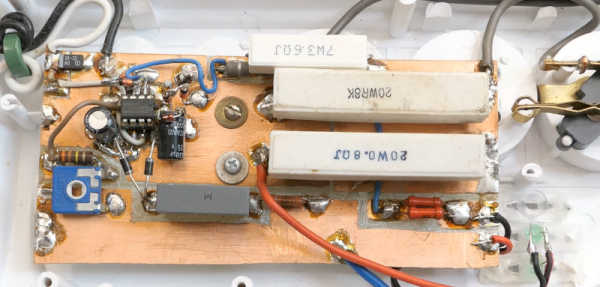
The idea behind watts seems deceptively simple. By definition, a watt is the amount of work done when one ampere of current flows between a potential of one volt. If you think about it, a watt is basically how much work is done by a 1V source across a 1Ω resistor. That’s easy to say, but how do you measure it in the real world? [DiodeGoneWild] has the answer in a recent video where he tears a few wattmeters open.
There are plenty of practical concerns. With AC, for example, the phase of the components matters. The first 11 minutes of the video are somewhat of a theory review, but then the cat intervenes and we get to see some actual hardware.
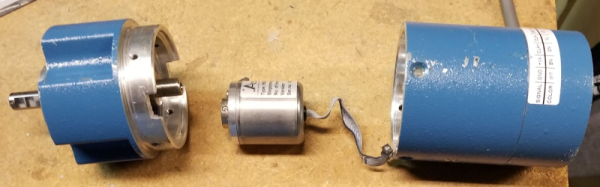
According to [Lee Teschler], the classic representation of encoders showing code rings is out of date. His post says that most industrial absolute encoders use a special magnetic sensor known as a Wiegand wire to control costs. To demonstrate he does a teardown of an encoder made by Nidec Avtron Automation, and if you’ve ever wondered what’s inside something like this, you enjoy the post.
This is a large industrial unit and when you open it up, you’ll get a surprise. Most of the inside is empty! There is a very small encoder inside. The main body protects the inside and holds the large bearings. The real encoder looks more like a toy car motor than anything else.
The inner can is nearly empty, too. But it does have the part we are interested in. There’s a Melexis Hall effect sensor The Weigand wire is a special magnetic wire with an outer sheath that is resistant to having its magnetic field reversed and an inner core that isn’t. Until an applied magnetic field reaches a certain strength, the wire will stay magnetized in one direction. When the field crosses the threshold, the entire wire changes magnetic polarity rapidly. The effect is independent of the rate of change of the applied magnetic field.
In other words, like old core memory, the wire has strong magnetic hysteresis. Between pulses from the Weigand wire and information from the Hall effect sensor, you can accurately determine the position of the shaft.
It is always amazing to us how many modern pieces of gear are now mostly empty with the size of the device being driven by physical constraints and not the electronics within.
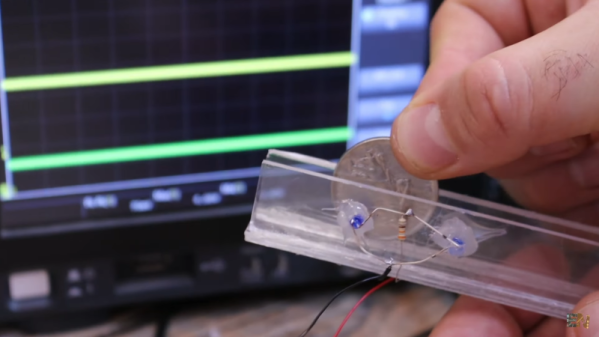
Coin-operated machines have a longer history than you might think. Ancient temples used them to dispense, for example, holy water to the faithful in return for their coins. Old payphones rang a bell when you inserted a coin so the operator knew you paid. Old pinball machines had a wire to catch things with holes in the middle so you couldn’t play with washers. But like everything else, coin acceptors have advanced quite a bit. [Electronoobs] shows a unit that can accept coins from different countries and it is surprisingly complex inside. He used what he learned from the teardown to build his own Arduino-based version.
For scale, there is the obligatory banana. Inside the box there are several induction coils and some photo electronics. In particular, there are two optical sensors that watch the coin roll down a ramp. This produces two pulses. The width of the pulse indicates the diameter of the coin, and the time between the pulses tells its speed.