A bench power supply is one of those things that every hacker needs, and as the name implies, it’s intended to occupy a place of honor on your workbench. But with the addition of USB-C support to his DPH5005 bench supply, [Dennis Schneider] is ready to take his on the road should the need ever arise.
 The build started with one of the common DPH5005 bench power supply kits, which [Dennis] says he was fairly happy with aside from a few issues which he details in the post on his blog. Even if you aren’t looking to modify your own kit with the latest and greatest in the world of Universal Serial Bus technology, it’s interesting to read his thoughts on the power supply kit if you’ve been considering picking one up yourself.
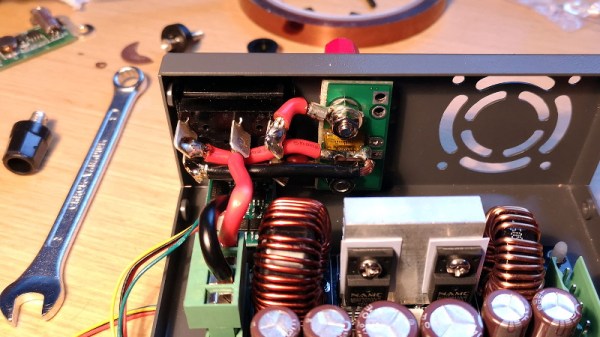
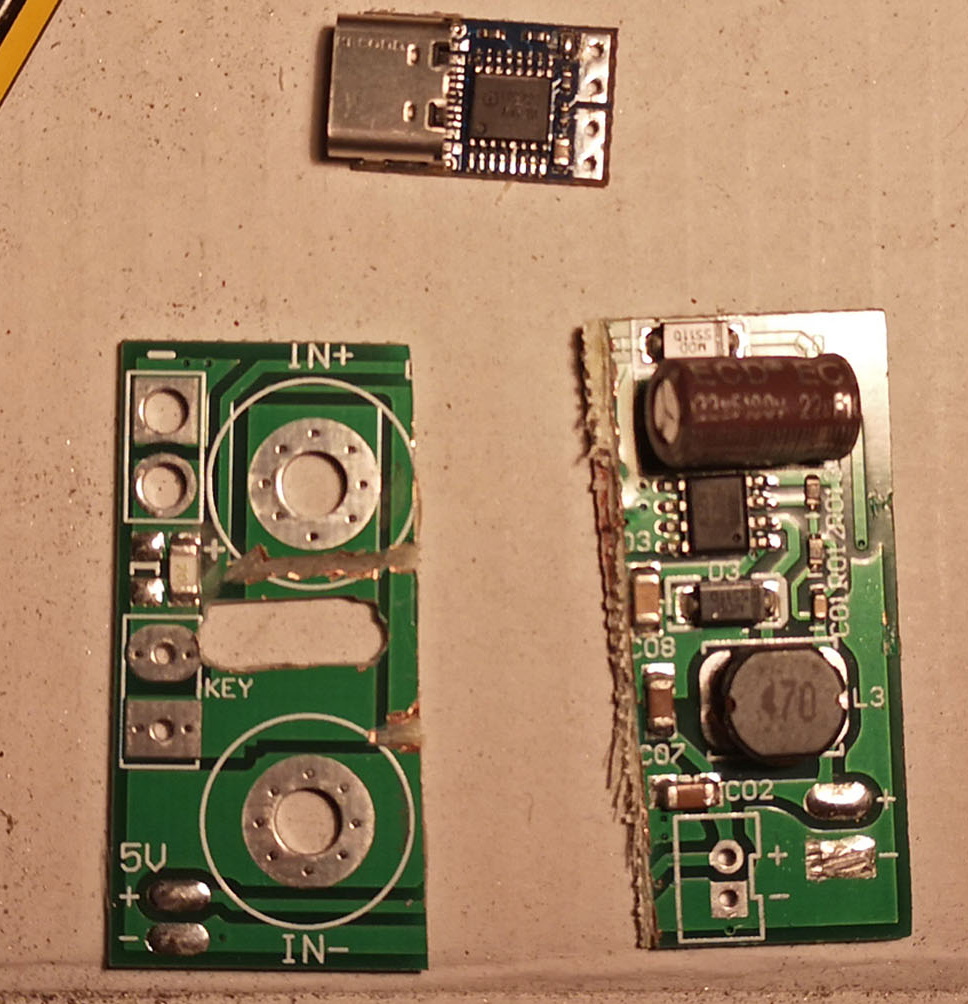
Under normal circumstances you are supposed to give the DPH5005 DC power via the terminals on the back panel of the supply, which in turn is regulated and adjusted via the front panel controls. To add support for USB-C, all [Dennis] had to do was install a USB-PD trigger module configured to negotiate 20 VDC in the back of the case and connect it to the DC input. To hold it in place while isolating it from the metal case, he used a piece of scrap PCB carefully cut and wrapped in Kapton tape.
This actually isn’t the first portable bench power supply we’ve seen. Last year we saw one that got its input power from Makita portable tool batteries, but we think all things considered, the USB-C option is probably a bit more convenient.