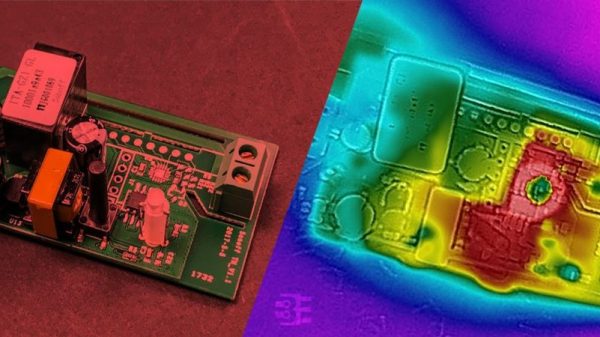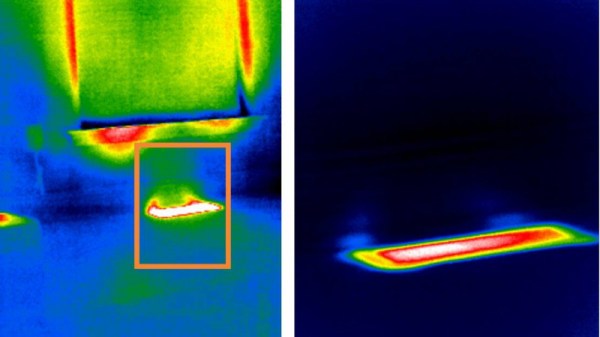
[David Prutchi] writes in to tell us about his recent experiments with building lenses for thermal imaging cameras, which to his knowledge is a first (at least as far as DIY hardware is concerned). With his custom designed and built optics, he’s demonstrated the ability to not only zoom in on distant targets, but get up close and personal with small objects. He’s working with the Seek RevealPro, but the concept should work on hardware from other manufacturers as well.
 In his detailed whitepaper, [David] starts by describing the types of lenses that are appropriate for thermal imaging. Glass doesn’t transmit the wavelengths that thermal camera is looking for, so the lenses need to be made of either germanium or zinc selenide. These aren’t exactly the kind of thing you can pick up at the local camera shop, and even small lenses made of these materials can cost hundreds of dollars. He suggests keeping an eye out on eBay for surplus optics you could pull them out of to keep costs down.
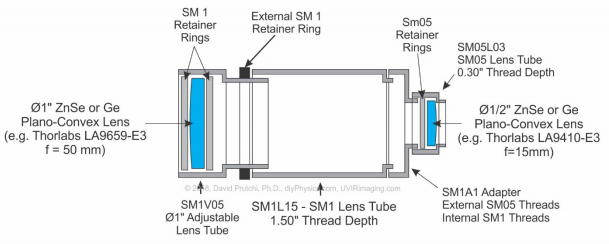
Creating the macro adapter is easy enough, you simply put a convex lens in front of the thermal camera. But telephoto is a bit more involved, and the rest of the whitepaper details the math and construction techniques used to assemble it the optics. [David] gives a complete bill of materials and cost breakdown for his telephoto converter, but prepare for a bout of sticker shock: the total cost with all new hardware is nearly $500 USD. The majority of that is for the special lenses though, so if you can score some on the second-hand market it can drop the cost significantly.
We’ve seen an impressive array of thermal camera hacks and projects recently, no doubt due to the falling prices of consumer-level imaging hardware. Given their utility as a diagnostic tool, a thermal camera might be something worth adding to your bag of tricks.