One of the biggest advantages of e-readers such as the Kindle is the fact that it doesn’t weigh as much as a traditional hardcover book, much less the thousands of books it can hold in digital form. Which is especially nice if you drop the thing on your face while reading in bed. But as light and easy to use as the Kindle is, you still need to hold it in your hands and interact with it like some kind of a baby’s toy.
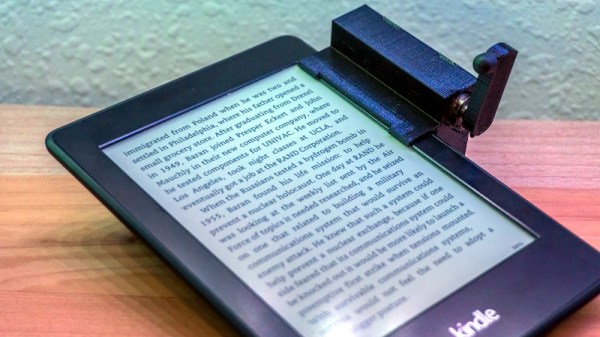
 Looking for a way to operate the Kindle without having to go through the exhaustive effort of raising their hand, [Alex Mikes] designed and built a clip-on device that makes using Amazon’s e-reader even easier. At the press of a button, the device knocks on the edge of the screen which advances the book to the next page. Going back a page will still require you to extend your meaty digit, but that’s your own fault for standing in the way of progress.
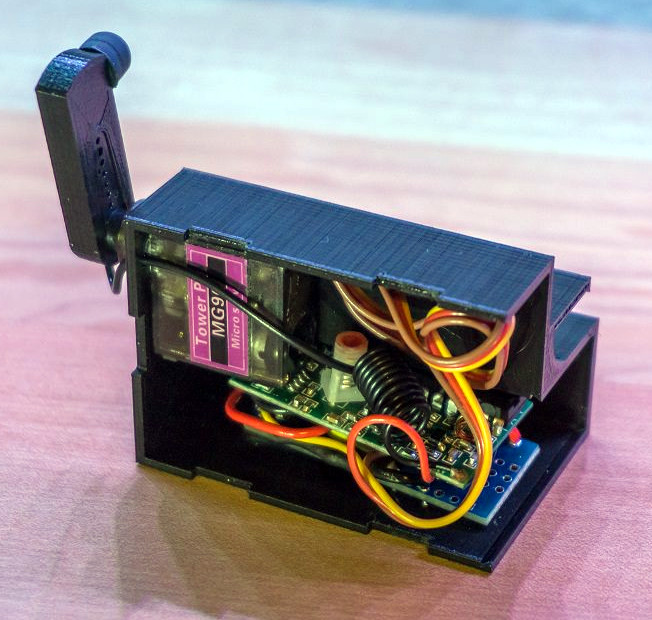
The 3D printed case holds an Arduino and RF receiver, as well as a small servo to power the karate-chop action. There’s no battery inside, meaning the device needs to stay plugged in via a micro USB connection on the back of the case. But let’s be honest: if you’re the kind of person who has a remote-controlled Kindle, you probably aren’t leaving the house anytime soon.
To fool the Kindle into thinking a human finger is tapping the screen, the page turner’s arm has a stylus tip on the end. A channel is designed into the 3D printed arm for a wire to run from the tip to the Arduino’s ground, which triggers the capacitive screen to register a touch.
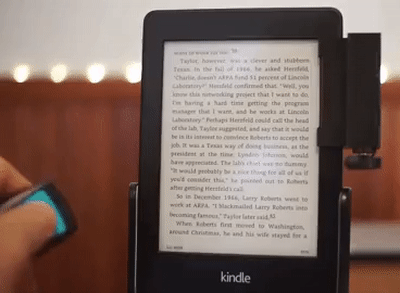 All joking aside, the idea holds promise as an assistive technology for individuals who are unable to lift an e-reader or operate its touch screen controls. With the Kindle held up in a mount, and this device clipped onto the side, anyone who can push a button (or trigger the device in whatever method they are physically capable) can read a book on their own. A simple pleasure that can come as a huge comfort to a person who may usually be dependent on others.
In the past we’ve seen physical buttons printed for touch screens, and an Arduino used to control a touch screen device. But this particular combination of physical and electrical interaction is certainly a unique way to tackle the problem without modifying the target device.