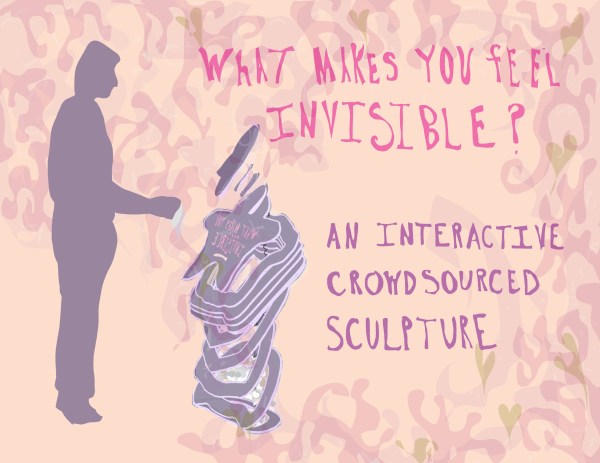
[Kate Reed] found a quote by a homeless person that said “No one sees us”, which led her to exploring what it actually means to be invisible — and if we actually choose to be invisible by hiding away our emotions, sexual preference, race or income. She realized that too often, we choose to only see what we want to see, rendering all the rest invisible by looking away. Her public art campaign and Hackaday Prize entry “Invisible” aims to increase social awareness and strengthening the community by making hidden thoughts, feelings and needs visible.
acrylic139 Articles
A Fountain Of Superhydrophobic Art
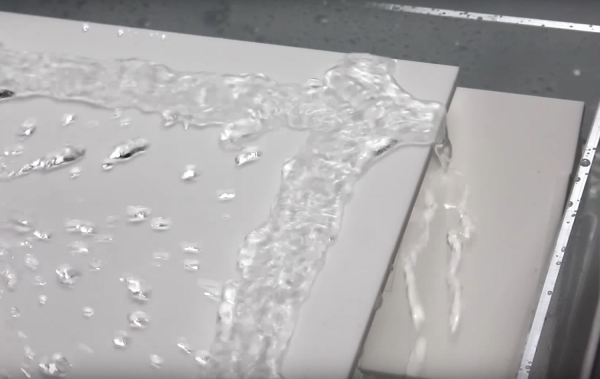
Superhydrophobic coating finds a new application in art through [Arthur Carabott] in the form of a bizarre fountain.
A Master’s student in the Global Innovation Design course at the London Royal College of Art, [Carabott] achieved the effect by leaving parts of the laser-cut acrylic untouched by Rust-oleum’s NeverWet Multisurface coating. A 3d printed spigot mounted high above the surface imparts greater velocity to the impacting water so as it hits the acrylic the liquid forms into channels giving the impression of something surreal. Indeed — his design is inspired by the optical illusions of Japanese mathematician Kokichi Sugihara which attempt to realize the impossible artwork of M.C. Escher. The effect is worthy of a double take.
Raspberry Pi Cluster Build Shows How And What
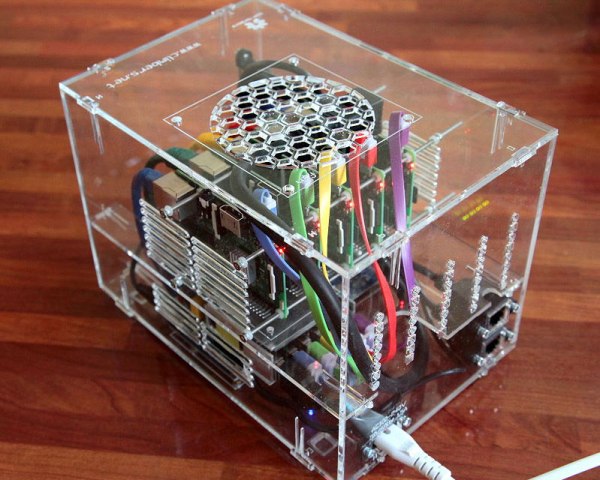
Raspberry Pi clusters are a dime a dozen these days. Well, maybe more like £250 for a five-Pi cluster. Anyway, this project is a bit different. It’s exquisitely documented.
[Nick Smith] built a 5-node Pi 3 cluster from scratch, laser-cutting his own acrylic case and tearing down a small network switch to include in the design. It is, he happily admits, a solution looking for a problem. [Smith] did an excellent job of documenting how he designed the case in CAD, prototyped it in wood, and how he put the final cluster together with eye-catching clear acrylic.
Of interest is that he even built his own clips to hold the sides of the case together and offers all of the files for anyone who wants to build their own. Head over to his page for the complete bill of materials (we didn’t know Pis were something you could order in 5-packs). And please, next time you work on a project follow [Nick’s] example of how to document it well, and how to show what did (and didn’t) work.
If 5 nodes just doesn’t do it for you, we suggest this 120-node screen-equipped monster, and another clear-acrylic masterpiece housing 40 Pis. This stuff really isn’t only for fun and games. Although it wasn’t Pi-based, here’s a talk at Hackaday Belgrade about an ARM-based SBC cluster built to crunch numbers for university researchers.
Custom Case Lends Retro Look To Smart TV
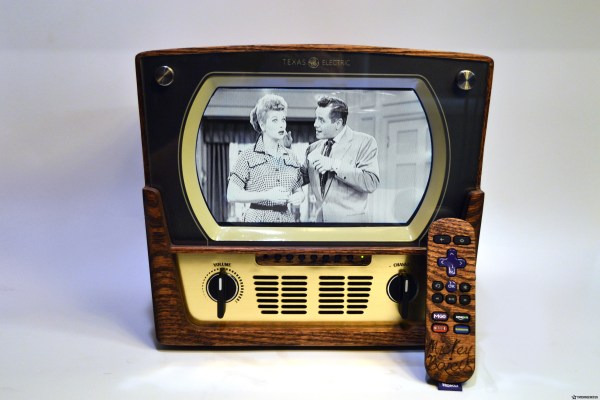
Refits of retro TVs and radios with the latest smart guts are a dime a dozen around Hackaday. And while a lot of these projects show a great deal of skill and respect for the original device, there’s something slightly sacrilegious about gutting an appliance that someone shelled out a huge portion of their paycheck to buy in the middle of the last century. That’s why this all-new retro-style case for a smart TV makes us smile.
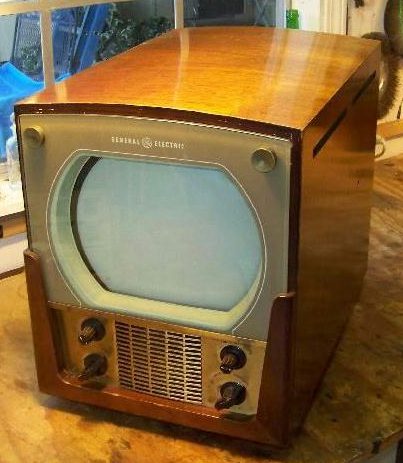
Another reason to smile is the attention to detail paid by [ThrowingChicken]. His inspiration came from a GE 806 TV from the 1940s, and while his build isn’t an exact replica, we think he captured the spirit of the original perfectly. From the curved top to the deep rectangular bezel, the details really make this a special build. One may quibble about not using brass for the grille like the original and going with oak rather than mahogany. In the end though, you need to work with the materials and tooling you have. Besides, we think the laser cut birch ply grille is pretty snazzy. Don’t forget the pressure-formed acrylic dome over the screen – here’s hoping that our recent piece on pressure-forming helped inspire that nice little touch.
This project was clearly a labor of love – witness the bloodshed after a tangle with a tablesaw while building the matching remote – and brought some life to an otherwise soulless chunk of mass-produced electronics.
[via r/DIY]
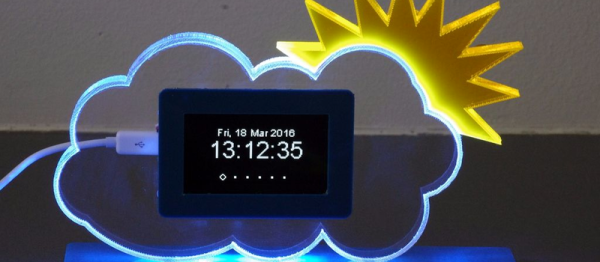
Beautiful Weather Station Uses Acrylic, RGB LED, And And ESP8266
Everyone knows there’s form and there’s function. It isn’t fair, but people do judge on appearance, sometimes even overriding all other concerns. So while your Makerspace buddies might be impressed by your weather station built on a breadboard, your significant other probably isn’t. [Dennisv15] took an ordinary looking weather station design with a 0.96″ display and turned into an attractive desk piece with a much larger display and an artistic–and functional–enclosure.
The acrylic cloud lights up thanks to an RGB LED Neopixel strip and can indicate weather trends at a glance: red for warmer, blue for colder, flashing for inclement weather. The project was truly multidisciplinary, using a laser cutter to produce the body and the stand, a 3D-printed display bezel, and a PCB to make it easy to build.
Continue reading “Beautiful Weather Station Uses Acrylic, RGB LED, And And ESP8266”
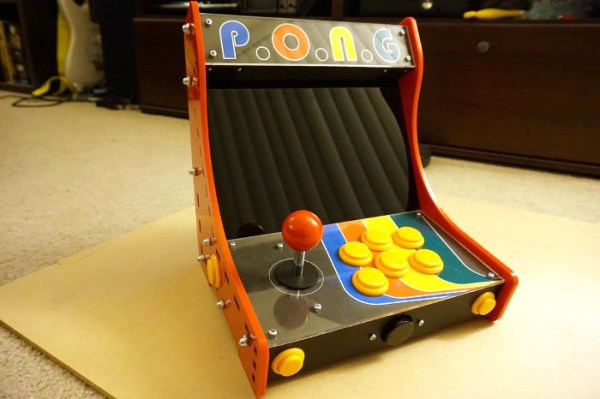
Bartop Arcade RetroPie Powered Laser Cut
[hhtat] wanted to build an arcade cabinet since his days in high-school. Only recently have the tech planets aligned. Looking into the night sky he saw a laser cutter, the Raspberry Pi, and lowering prices on key components and thought, “this is the year.”
Much like an arcade cabinet we posted earlier, this one sits on a counter top. With full controls and a nice screen, it provides a lot of the experience without the additional explaining to the SO why the living space should house a giant decaled MDF box.
The frame was designed in SketchUp and vectors were made in Inkscape. The frame was lasercut out of MDF and Acrylic. Decals were printed and applied. The resulting case, build from tab and slot construction, is attractive.
The internals are simple. A Raspberry Pi with a fast SD card acts as the brain. Rather than make it difficult on himself, [hhat] bought a pre-made controls kit from eBay. Apparently there is a small market for this stuff. He also purchased an IPS screen with built in controller. The IPS panel gives the arcade cabinet a desireable wide viewing angle.
The final product looks like a lot of fun and we can see it turning at least one person into an unintentional loner at any house party.
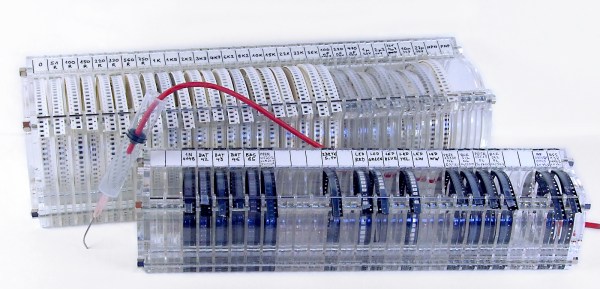
Clearly The Best Way To Organize SMD Parts
Have some plexiglas (acrylic) leftovers lying around? Well, they could be put to good use in making this SMD organizer. It comes in handy if you deal with a lot of SMD components in your work. No longer will you waste your time trying to find a 15K 1206 resistor, or that BAS85 diode… or any other component you can think of soldering on the PCB. The basic idea is fairly straightforword, which helped keep this short.
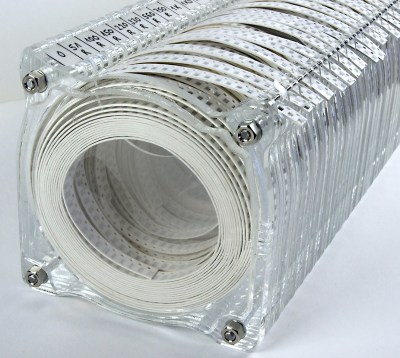 SMD resistors are packed in thick paper tapes that don’t bend easily, and thus need larger containers than other components, which are packed mainly in flexible PE tapes. The first version of this organizer was built with a 96mm diameter space for resistors and 63mm diameter for other components, but it seems that there is no need for such large compartments. If I were to make it again, I would probably scale everything down to about 80% of it’s current size.
The best way to join all plexiglass parts is to use four M4 threaded rods. There is also a 1.5mm steel rod which holds SMD tape ends in place and helps to un-stick the transparent tape which covers the components. At the top of the organizer there is a notch for paper, used for components labels. Most SMD components are packed in 8mm wide tapes, making the optimal compartment width 10mm. It is not easy to cut the 10mm thick acrylic and get a neat edge – instead, you could use more layers of thin sheets to make the spacers. Using 5mm acrylic you can combine more layers for any width of tape, which contains wider components, like SMD integrated circuits. The only thing that you have to be careful about, is to keep the distance between the thin steel rod and acrylic, which is marked as “2-4mm” on the drawing. It is good if this space is just a few tenths of a millimeter wider than the thickness of SMD tapes.
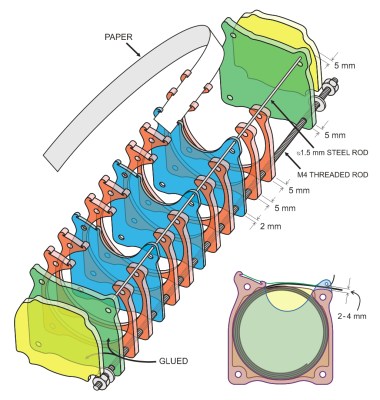 The CorelDraw file that can be used for laser cutting the acrylic parts, is available for download. If you scale the profiles, don’t forget to readjust the hole diameters and some other dimensions which have to remain intact. If you have 5mm acrylic pieces, you should probably use two layers of acrylic for every tape (red parts on the drawing). The barrier layers would be made of thin acrylic — for instance 2mm (the blue parts). Edge layers (green) are once again 5mm thick, and there are also the end pieces (yellow), glued to the previous borders and used to “round up” the whole construction and to protect your hands from the threaded rods and nuts.
While you’re building this for your bench, make a vacuum picking tool for SMDs out of a dispensing syringe with a thick needle. It’s a common trick for hackers to use an aquarium air pump, just turn the compressor unit by 180°, so that it creates vacuum instead of blowing the air outside. This process is described by R&TPreppers in the video below.
Continue reading “Clearly The Best Way To Organize SMD Parts”

