Faux Vintage Radio Gets AirPlay Upgrade

There’s plenty of vintage-styled hardware out these days, with quality and functionality being mixed at best. [Huan] found such a device in the form of an attractively-styled Bluetooth speaker. Deciding he could improve on the capabilities while retaining a stock look, he got down to hacking.

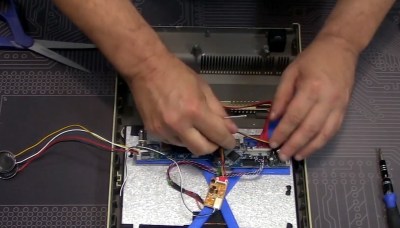
The aim of the project was to keep the original volume knob, buttons and screen, while replacing the internals with something a bit more capable. A Raspberry Pi Zero was sourced as the brains of the operation, with the Google Voice AIY hardware used as the sound output after early attempts with a discrete amplifier faced hum issues. An Arduino Pro Micro was pressed into service to read the volume encoder along with the buttons and drive the charlieplexed LED screen. Shairport Sync was then installed on the Pi Zero to enable Airplay functionality.

It’s a basic hack that nonetheless gives [Huan] an attractive AirPlay speaker, along with plenty of useful experience working with Arduinos and Raspberry Pis. We’ve seen similar hacks before, too. If you’re working on your own stereo resurrection at home, be sure to drop us a line!

iPhone pictured with a lock

Is Anything Really Private Anymore?

In the connected age, every day it appears privacy is becoming more and more of an idealistic fantasy as opposed to a basic human right. In our latest privacy debate per [TechCrunch], apparently the FBI is taking some shots at Apple.

You may recall the unfortunate events, leading the FBI to ask Apple to unlock an iPhone belonging to a person of interest. Apple did not capitulate to the FBI’s request on the basis of their fundamental commitment to privacy. The FBI wasn’t really thrilled with Apple’s stance given the circumstances leading to the request. Nevertheless, eventually, the FBI was able to unlock the phone without Apple’s help.

You may find it somewhat interesting that the author of the news piece appears to be more upset with the FBI for cracking the phone than at Apple (and by extension other tech companies) for making phones that are crackable to begin with.

Maybe we should take solace in knowing that Apple stood their ground for the sake of honoring their privacy commitment. But as we saw, it didn’t really matter in the end as the FBI was able to hire a third party to help them unlock the phones and were later able to repeat the process in-house. The article also noted that there are other private companies capable of doing exactly what the FBI did. We understand that no encryption is 100% safe. So it begs the question, “Is anything really private anymore?” Share your thoughts in the comments below.

Ditching X86, Apple Starts An ARM Race

At its annual World Wide Developer Conference, Apple dropped many jaws when announcing that their Mac line will be switching away from Intel processors before the year is out. Intel’s x86 architecture is the third to grace Apple’s desktop computer products, succeeding PowerPC and the Motorola 68000 family before it.

In its place will be Apple’s own custom silicon, based on 64-bit ARM architecture. Apple are by no means the first to try and bring ARM chips to bear for general purpose computing, but can they succeed where others have failed?

Continue reading “Ditching X86, Apple Starts An ARM Race”

IMac G4 Reborn With Intel NUC Transplant

Released in 2002, Apple’s iMac G4 was certainly a unique machine. Even today, its hemispherical case and integrated “gooseneck” display is unlike anything else on the market. Whether or not that’s a good thing is rather subjective of course, but there’s no denying it’s still an attention grabber nearly 20 years after its release. Unfortunately, it’s got less processing power than a modern burner phone.

Which is why [Tom Hightower] figured it was the perfect candidate for a retrofit. Rather than being little more than a display piece, this Intel NUC powered iMac is now able to run the latest version of Mac OS. He even went as far as replacing the display with a higher resolution panel, though it sounds like it was dead to begin with so he didn’t have much choice in the matter.

Somewhere, an early 2000s Apple engineer is screaming.

The retrofit starts off with a brief teardown, which is quite interesting in itself. [Tom] notes a number of unique design elements, chief among them the circular motherboard. The two banks of memory also use different form factors, and only one of them is easily accessible to the end user. Something to think about the next time somebody tells you that Apple’s “brave” hardware choices are only a modern phenomena.

There was plenty of room inside the iMac’s dome to fit the NUC motherboard, and some extension cables and hot glue got the computer’s rear panel suitably updated with the latest-and-greatest ports and connectors. But the conversion wasn’t a total cakewalk. That iconic “gooseneck” put up quite a fight when it was time to run the new wires up to the display. Between the proprietary screws that had to be coerced out with a Dremel to the massive spring that was determined to escape captivity, [Tom] recommends anyone else looking to perform a similar modification just leave the wires on the outside of the thing. That’s what he ended up doing with the power wires for the display inverter.

If you like the idea of reviving old Apple hardware but don’t want to anger the goose, you could start on something a little easier. Like putting an iPad inside of a Macintosh Classic shell.

DIY Magsafe Charger Feeds Off 12 V Solar Battery

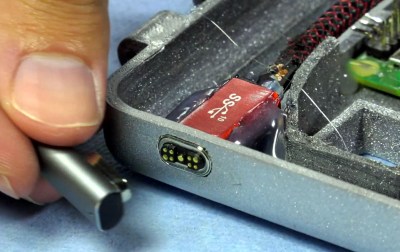
[Steve Chamberlin] has a spiffy solar-charged 12 V battery that he was eager to use to power his laptop, but ran into a glitch. His MacBook Pro uses Apple’s MagSafe 2 connector for power, but plugging the AC adapter into the battery via a 110 VAC inverter seemed awfully inefficient. It would be much better to plug it into the battery directly, but that also was a problem. While Apple has a number of DC power adapters intended for automotive use, none exist for the MagSafe 2 connector [Steve]’s mid-2014 MacBook Pro uses. His solution was to roll his own MagSafe charger with 12 VDC input.

Since MagSafe connectors are proprietary, his first duty was to salvage one from a broken wall charger. After cleaning up the wires and repairing any frayed bits, it was time to choose a DC-DC converter to go between the MagSafe connector and the battery. The battery is nominally 12 volts, so the input of the DC-DC converter was easy to choose, but the output was a bit uncertain. Figuring out what the MagSafe connector expects took a little educated guesswork.

The original AC adapter attached to the charger claimed an output of 20 volts, another Apple adapter claimed a 14.85 V output, and a third-party adapter said 16.5 volts. [Steve] figured that the MagSafe connectors seemed fine with anything in the 15 to 20 V range, so it would be acceptable to use a 12 V to 19 V DC-DC boost converter which he had available. The result worked just fine, and [Steve] took measurements to verify that it is in fact much more efficient than had he took the easy way out with the inverter.

MagSafe has been displaced by USB-C nowadays, but there are plenty of MagSafe devices still kicking around. In a pinch, keep in mind that a little bit of filing or grinding is all that’s needed to turn MagSafe 1 into MagSafe 2.

New Depths For IMac Repair

There’s not much economic sense in fixing a decade-old desktop computer, especially when it’s the fancy type with the screen integrated into the body of the computer, and the screen is the thing that’s broken. Luckily for [JnsBn] aka [BEAN] the computer in question was still functional with a second monitor, so he decided to implement a cheap repair to get the screen working again by making it see-through.

The only part of the screen that was broken was the backlight, which is separate from the display unit itself. In order to view at least something on the screen without an expensive replacement part, he decided to remove the backlight altogether but leave the display unit installed. With a strip of LEDs around the edge, the screen was visible again in addition to the inner depths of the computer. After a coat of white Plasti Dip on the inside of the computer, it made for an interesting effect and made the computer’s display useful again.

While none of us, including the creator, recommend coating the inside of an iMac with Plasti Dip due to the risk of fire and/or other catastrophic failure, there’s not much to lose otherwise. Just don’t shove this one into the wall. Continue reading “New Depths For IMac Repair”

Retro PowerBook Gets A Mac Mini Transplant

Around these parts, seeing a classic laptop or desktop computer get revived with the Raspberry Pi is fairly common. While we’re not ones to turn down a well-executed Pi infusion, we know they can be controversial at times. There’s an impression that such projects are low-effort, and that the combination of old and new tech gains little in the way of usability due to the usability quirks of the Pi itself.

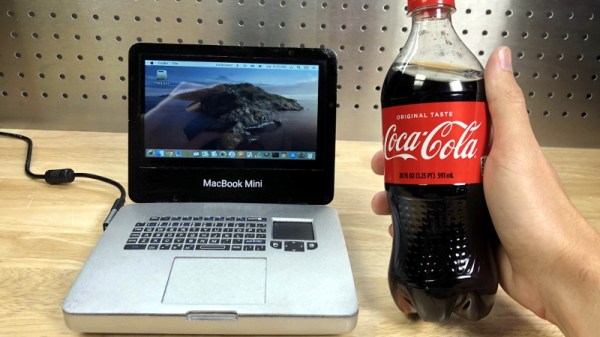
But we think even the most critical in the audience will agree that this build by [Tylinol], which sees the internals of a circa 1993 PowerBook 165c get replaced with that of a 2014 Mac Mini, is something else entirely. For one thing, there’s no question that packing a modern (relatively) desktop computer motherboard into a laptop’s body takes a lot more planning and effort than hot gluing the comparatively tiny Pi into the same space. Plus as an added bonus, anyone who counts themselves among the Cult of Mac will be happy to see the vintage machine retain its Cupertino pedigree.

So how do you get a Mac Mini inside of a PowerBook? Very carefully. As explained by [Tylinol], the inside of the PowerBook’s case was coated in graphite and conductive enough to be a problem. So after the original hardware was removed, a layer of tape was added to insulate it; though we imagine a suitably thick spray-on coating could be used as well if you don’t have that kind of patience.

Once the case was gutted and insulated, [Tylinol] added new stand-offs to mount the Mac Mini motherboard and hard drive. For anyone wondering, the 2014 model was used because the shape of the board almost perfectly fits around the trackball PCB. A board from a newer Mac could be used, but it would likely mean using an external mouse.

Which would have been a problem for [Tylinol], because one of the main goals of this build was to get the original input working. That meant adapting the Apple Desktop Bus (ADB) devices to USB, which turns out to be something of a Dark Art. But with the help of some contemporary information about the long-forgotten protocol and a Teensy 3.5, both devices are now picked up as standard USB HID.

But of course, that’s just scratching the surface. [Tylinol] also had to figure out how to swap the original display out for a modern panel, and then get the whole thing running on internal battery power. Even if you’re not particularly interested in retro Apple hardware, this is really a phenomenal build that deserves a thorough read-through.

For those of you who don’t mind getting a Pi in a PowerBook, we recently saw a recreation of Lord Nikon’s laptop from Hackers that went that route.