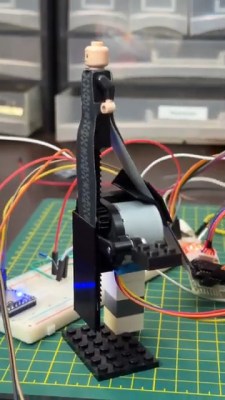
Screech Owl Is A Tribute To The Eowave Persephone

The Eowave Persephone was a beautiful thing—a monophonic ribbon synth capable of producing clean, smoothly varying tones. [Ben Glover] used to own a nice example that formerly belonged to Peter Christopherson, but lost it in the shifting sands of time. His solution was to build one of his own from scratch.

It’s a simple build, but the final result puts out a nice pleasant sound.

Known as the Screech Owl, the build is based around a custom shield designed to suit the Arduino Leonardo. The primary control interface is a Softpot 500 mm membrane potentiometer, layered up with a further thin film pressure sensor which provides aftertouch control. The Leonardo reads these sensors and synthesizes the appropriate frequencies in turn.

All the electronics is wrapped up inside a tidy laser-cut enclosure that roughly approximates the design of the original Eowave device. [Ben] noted the value of services like Fiverr and ChatGPT for helping him with the design, while he also enjoyed getting his first shield design professionally manufactured via JLCPCB.

It’s a tidy build, and in [Ben’s] capable hands, it sounds pretty good, too. We’ve seen some other great ribbon controlled synths before, too. Video after the break.

Continue reading “Screech Owl Is A Tribute To The Eowave Persephone”

A Buzzing, Flashing Phone Ringer For The Elderly

For a lonely person, elderly or otherwise, the sound of a ringing phone can be music to the ears, unless of course it’s another spam call. But what good is a phone when you can’t hear it well enough to answer?

[Giovanni Aggiustatutto] was tasked with building an additional ringer for a set of cordless landline phones belonging to an elderly friend. Rather than try to intercept the signal, [Giovanni] chose to simply mic up the phone base that’s connected to the phone port on the router and send a signal over Wi-Fi to a second box which has a loud piezo buzzer and a handful of LEDs.

At the heart of this build is a pair of ESP8266 Wemos D1 minis and an Arduino sound sensor module inside a pair of really nice-looking 3D printed boxen that may or may not have been inspired by an IKEA air quality sensor. On the receiving side, a green LED indicates the system is working, and the red LEDs flash as soon as a call comes in.

All the code, schematics, and STL files are available for this build, and between the Instructable and the build video after the break, you should have no trouble replicating it for the hard-of-hearing in your life.

Continue reading “A Buzzing, Flashing Phone Ringer For The Elderly”

Smart Coffee Replaces Espresso Machine Controller With Arduino, Sensors

A common hacker upgrade to an espresso machine is to improve stability and performance with a better temperature controller, but [Schematix]’s Smart Coffee project doesn’t stop there. It entirely replaces the machine’s controller and provides an optional array of improvements for a variety of single-boiler machines (which is most of them).

Smart Coffee isn’t free, it costs 16 NZD (about 10 USD) but there is a free demo version. There is no official support, but there are wiring guides and sources aplenty from which to purchase the various optional parts. It runs on an Arduino MEGA 2560 PRO (or similar microcontroller) and supports a wide array of additional hardware including pressure transducer, water level sensor, flow meter, OLED display, and more.

Modification of one’s espresso machine is a rewarding endeavor, but the Smart Coffee project provides a way for one to get straight to the hacking and function modifying, instead of figuring out the wiring hardware interfacing from scratch.

We’ve seen [Schematix]’s work before with a DIY induction heater which showed off thoughtful design, and it’s clear he takes his coffee at least as seriously. Check out the highly comprehensive overview and installation video for Smart Coffee, embedded just below the page break.

Continue reading “Smart Coffee Replaces Espresso Machine Controller With Arduino, Sensors”

2023 Halloween Hackfest: Treat Trough Of Terror Is Actually Pretty Cute

Even though it seems the worst of COVID has passed, October generally kicks off cold and flu season, so why not continue to pass out Halloween treats in a socially-distanced fashion?

That is, of course the idea behind [Gord Payne]’s Halloween Treat Trough of Terror. Lay a treat at the top of the trough and it will activate the LED strips that follow the treat down to the end, as well as some spooky sounds. The treat in question is detected by an SR-04 ultrasonic distance sensor connected to an Arduino Nano.

All in all this was a highly successful build as far as neighborhood entertainment value goes. Toddlers stared in awe at the blinkenlights, teenagers proclaimed it ‘sick’, and we can only assume that the adults were likely happy to see something aimed at kids that’s not scary.

[Gord] has a nice how-to if you want to build your own, and of course, the Arduino sketch is available. Be sure to check it out in action after the break.

Don’t have room to build a treat slide? Here’s a socially-distanced dispenser that lets them stomp a giant button.

Continue reading “2023 Halloween Hackfest: Treat Trough Of Terror Is Actually Pretty Cute”

Investigating The Fourth Passive Component

When first learning about and building electronic circuits, the first things all of us come across are passive components such as resistors, capacitors, and inductors. These have easily-understandable properties and are used in nearly all circuits in some way or another. Eventually we’ll move on to learning about active components like transistors, but there’s a fourth passive circuit component that’s almost never encountered. Known as the memristor, this mysterious device is not quite as intuitive as the other three, so [Andrew] created an Arduino shield to investigate their properties.

Memristors relate electric charge and magnetic flux linkage, which means that their resistance changes based on the current that passes through them. As their name implies, this means they have memory, and retain their properties even after power is removed. [Andrew] is testing three different memristors, composed of tungsten, carbon, and chromium, using this specialized test set. The rig is based on an Arduino Uno and has a few circuit components that can be used as references and generates data on the behavior of the memristors under various situations.

The memristors used here do exhibit expected behavior when driven with positive voltage signals, but did exhibit a large amount of variability when voltage was applied in a negative direction. [Andrew] speculates that using these devices for storage would be difficult and would likely require fairly bespoke applications for each type. But as the applications for these seemingly bizarre circuit components increase, we expect them to improve much like any other passive component.

Continue reading “Investigating The Fourth Passive Component”

Feed Your Fasteners In Line, With A Bowl Feeder

If you spend much time around industrial processes, you may have seen a vibrating bowl feeder at work. It’s a clever but simple machine that takes an unruly pile of screws or nuts and bolts, and delivers them in a line the correct way up. They do this by shaking the pile of fasteners in a specific way — a spiral motion which encourages them to work to the edge of the pile and align themselves on a spiral track which leads to a dispenser. It’s a machine [Fraens] has made from 3D printed parts, and as he explains in the video below the break, there’s more to this than meets the eye.

The basic form of the machine has a weighted base and an upper bowl on three angled springs. Between the two is an electromagnet, which provides the force for the vibration. The electromagnet needed to be driven with a sine wave which he makes with an Arduino and delivers as PWM via an H-bridge, but the meat of this project comes in balancing the force and frequency with the stiffness of the springs. He shows us the enormous pile of test prints made before the final result was achieved, and it’s a testament to the amount of work put into this project. The final sequence of a variety of objects making the march round the spiral is pure theatre, but we can see his evident satisfaction in a job well done.

Oddly this isn’t the first bowl feeder we’ve seen, though it may be one of the most accomplished. We particularly like this tiny example for SMD parts.

Continue reading “Feed Your Fasteners In Line, With A Bowl Feeder”

Latency Meter For Accurate Gaming

The gaming world experienced a bit of a resurgence in 2020 that is still seen in the present day. Even putting aside the effects from the pandemic, the affordability and accessibility has arguably never been better. Building a gaming PC can have its downsides, though, and a challenging issue to troubleshoot is input lag or input latency. This is something that’s best measured with standalone hardware, and if this is an issue on your setup you may want to take a look at this latency meter.

Unlike other measurement devices that use the time between a mouse button input and the monitor’s display of a bullet or shooting event, this one looks at mouse movement and the change in the scene instead. This makes it much more versatile than other methods since it’s independent of specific actions, and can be used in any game without any specific events needed to perform the measurement. A camera phototransistor is placed on the monitor’s top edge and the Arduino-based device sends mouse commands to the computer while measuring the time between those commands and the shift in the image on the monitor.

The project is open source, so with the right hardware it’s possible to build one to troubleshoot latency issues or just to learn more about a particular hardware configuration’s behavior. Arduinos and other microcontrollers have been doing all kinds of things by pretending to be human interface devices like this for a while now. One of our favorites of late was this effects pedal that replicates musical effects on mice and keyboards.