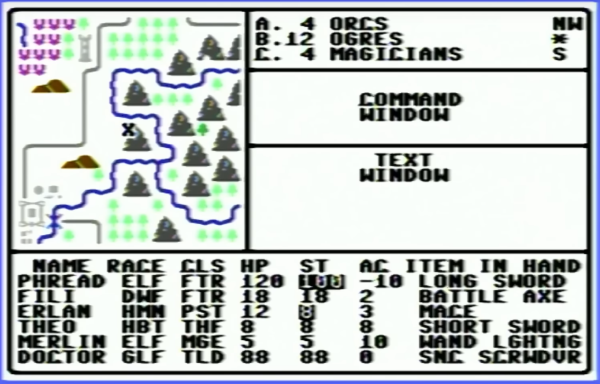
To say that Tandy’s TRS-80 Model 100 was an influential piece of computer hardware would be something of an understatement. While there’s some debate over which computer can historically be called the “first laptop”, the Model 100 was early enough that it helped influence our modern idea of portable computing. It was also one of the most successful of these early portables, due in part to how easy it was to write your own software for it using the built-in BASIC interpreter.
But as handy and capable as that integrated development environment might have been, it never produced anything as impressive as this Baldur’s Gate III “demake” created by [Alex Bowen]. Written in assembly, the game’s engine implements a subset of the Dungeons & Dragons Systems Reference Document (SRD), and is flexible enough that you could use it to produce your own ASCII art role-playing game that can run on either a Model 100 emulator like Virtual-T or on the real hardware.
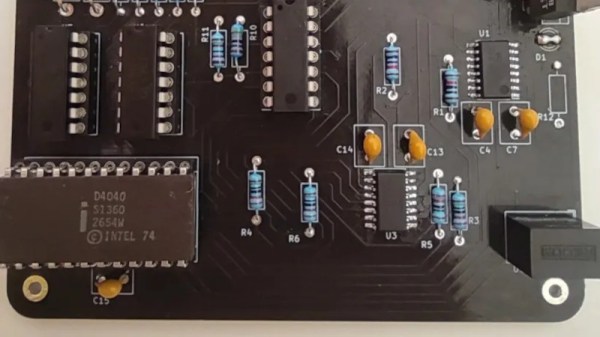
At first glance, getting a computer program to run faster than the first electronic computers might seem trivial. After all, most of us carry enormously powerful processors in our pockets every day as if that’s normal. But [Mark] isn’t trying to beat computers like the ENIAC with a mobile ARM processor or other modern device. He’s now programming with the successor to the original Intel integrated circuit processor, the 4040, but beating the ENIAC is still little more complicated than you might think with a processor from 1974.
For this project, the goal was to best the 70-hour time set by ENIAC for computing the first 2035 digits of pi. There are a number of algorithms for performing this calculation, but using a 4-bit processor and an extremely limited memory of only 1280 bytes makes a number of these methods impossible, especially with the self-imposed time limit. The limited instruction set is a potential bottleneck as well with these early processors. [Mark] decided to use [Fabrice Bellard]’s algorithm given these limitations. He goes into great detail about the mathematics behind this method before coding it in JavaScript. Generating assembly language from a working JavaScript was found to be fairly straightforward.
[Mark] is also doing a lot of work on the 4040 to get this program running as well, including upgrades to the 40xx tool stack, the compiler and linker, and an emulator he’s using to test his program before sending it to physical hardware. The project is remarkably well-documented, including all of the optimizations needed to get these antique processors running fast enough to beat the ENIAC. We won’t spoil the results for you, but as a hint to how it worked out, he started this project using the 4040 since his original attempt using a 4004 wasn’t quite fast enough.
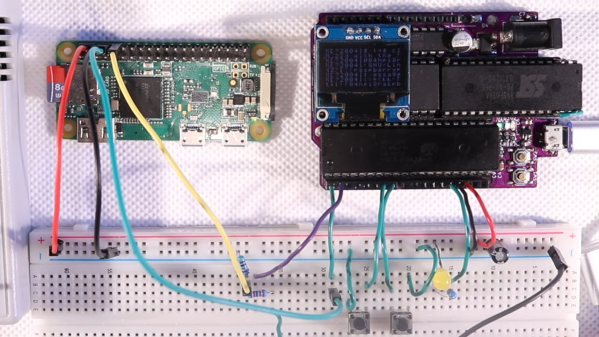
Twenty years ago, if you wanted an LCD for a project, you’d probably end up with something salvaged from a mobile phone or an HD44780 character display. These days, little OLEDs can be had for a few bucks and they’ve taken the maker world by storm. [Anders Nielsen] has recently been experimenting with driving these displays from the vintage 6502 CPU, and he’s even got scrolling operation down pat.
The best part is that [Nielsen] is doing all this on a single-board computer running his own assembly code. That’s right – there’s no compilers here. It’s bare metal coding at it’s best. The build uses a 6507 chip running at 1 MHz, paired with a 6532 RIOT and just 128 bytes of RAM—a similar setup to the Atari 2600.
The video explains how the code stacks up and drives the display, achieving the scrolling effect. It makes a huge difference to usability, especially compared to chunking pages at a time to the postage stamp-sized screen. He demonstrates a legitimate usage case too, using the setup as a serial terminal for a Raspberry Pi.
The 6502 architecture still looms large in the collective consciousness; we’ve been talking about programming it in assembly for years. Video after the break.
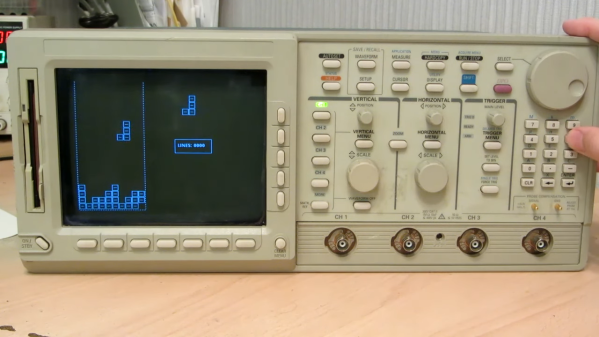
When we talk about video games on an oscilloscope, you’d be pardoned for assuming the project involved an analog CRT scope in X-Y mode, with vector graphics for something like Asteroids or BattleZone. Alas, this oscilloscope Tetris (Russian language, English translation) isn’t that at all — but that doesn’t make it any less cool.
If you’re interested in recreating [iliasam]’s build, it’ll probably help to be a retro-oscilloscope collector. The target instrument here is a Tektronix TDS5400, a scope from that awkward time when everything was going digital, but CRTs were still cheaper and better than LCDs. It’s based on a Motorola 68EC040 processor, sports a boatload of discrete ICs on its main PCB, and runs VxWorks for its OS. Tek also provided a 3.5″ floppy drive on this model, to save traces and the like, as well as a debug port, which required [iliasam] to build a custom UART adapter.
All these tools ended up being the keys to the kingdom, but getting the scope to run arbitrary code was still a long and arduous process, with a lot of trial and error. It’s a good story, but the gist is that after dumping the firmware onto the floppy and disassembling it in Ghidra, [iliasam] was able to identify the functions used to draw graphics primitives on the CRT, as well as the functions to read inputs from the control panel. The result is the simple version of Tetris seen in the video below. If you’ve got a similar oscilloscope, the code is up on GitHub.
The Pixel Pump is an open source manual pick & place assist tool by [Robin Reiter], and after a long road to completion, it’s ready to ship. We first saw the Pixel Pump project as an entry to the 2021 Hackaday Prize and liked the clean design and the concept of a completely open architecture for a tool that is so valuable to desktop assembly. It’s not easy getting hardware off the ground, but it’s now over the finish line and nearly everything — from assembly to packaging — has been done in-house.
Because having parts organized and available is every bit as important as the tool itself, a useful-looking companion item for the Pixel Pump is the SMD-Magazine. This is a container for parts that come on SMD tape rolls. These hold components at an optimal angle for use with the pickup tool, and can be fixed together on a rail to create project-specific part groups.
A tool being open source means giving folks a way to modify or add features for better workflows, and an example of this is [Robin]’s suggestion of using a foot pedal for hands-free control of the interactive BoM plugin. With it, one can simply use a foot pedal to step through a highlighted list of every part for a design, an invaluable visual aid when doing hand assembly.
Some professional coders are absolutely adamant that learning to program in assembly language in these modern times is simply a waste of time, and this post is not for them. This is for the rest of us, who still think there is value in knowing at a low level what is going on, a deeper appreciation can be developed. [Philippe Gaultier] was certainly in this latter camp and figured the best way to learn was to work on a substantial project.
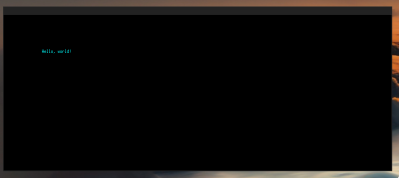
Now, there are some valid reasons to write directly in assembler; for example hand-crafting unusual code sequences for creating software exploits would be hindered by an optimising compiler. Creating code optimised for speed and size is unlikely to be among those reasons, as doing a better job than a modern compiler would be a considerable challenge. Some folks would follow the tried and trusted route and work towards getting a “hello world!” output to the console or a serial port, but not [Philippe]. This project aimed to get a full-custom GUI application running as a client to the X11 server running atop Linux, but the theory should be good for any *nix OS.
Hello World! In X11!
The first part of the process was to create a valid ELF executable that Linux would work with. Using nasm to assemble and the standard linker, only a few X86_64 instructions are needed to create a tiny executable that just exits cleanly. Next, we learn how to manipulate the stack in order to set up a non-trivial system call that sends some text to the system STDOUT.
To perform any GUI actions, we must remember that X11 is a network-orientated system, where our executable will be a client connected via a socket. In the simple case, we just connect the locally created socket to the server path for the local X server, which is just a matter of populating the sockaddr_un data structure on the stack and calling the connect() system call.
Now the connection is made, we can follow the usual X11 route of creating client ids, then allocating resources using them. Next, fonts are opened, and a graphical context is created to use it to create a window. Finally, after mapping the window, something will be visible to draw into with subsequent commands. X11 is a low-level GUI system, so there are quite a few steps to create even the most simple drawable object, but this also makes it quite simple to understand and thus quite suited to such a project.
We applaud [Phillip] for the fabulous documentation of this learning hack and can’t wait to see what’s next in store!
In the 1980s, [Mike] was working on his own RPG for the Commodore 64, inspired by dungeon crawlers of the era like Ultima IV and Telengard, both some of his favorites. The mechanics and gameplay were fairly revolutionary for the time, and [Mike] wanted to develop some of these ideas, especially the idea of line-of-sight, even further with his own game. But an illness, a stint in the military, and the rest of life since the 80s got in the way of finishing this project. This always nagged at him, so he finally dug out his decades-old project, dusted out his old Commodore and other antique equipment, and is hoping to finish it by 2024.
Luckily [Mike’s] younger self went to some extremes documenting the project, starting with a map he created which was inspired by Dungeons and Dragons. There are printed notes from a Commodore 64 printer, including all of the assembly instructions, augmented with his handwritten notes to explain how everything worked. He also has handwritten notes, including character set plans, disk sector use plans, menus, player commands, character stats, and equipment, all saved on paper. The early code was written using a machine language monitor since [Mike] didn’t know about the existence of assemblers at the time. Eventually, he discovered them and attempted to rebuild the code on a Commodore 128 and then an Amiga, but never got everything working together. There is some working code still on a floppy disk, but a lot of it doesn’t work together either.
While not quite finished yet, [Mike] has a well-thought-out plan for completing the build, involving aggregating all of the commented source code and doing quarterly sprints from here on out to attempt to get the project finished. We’re all excited to see how this project fares in the future. Beyond the huge scope of this pet project, we’d also suggest that this is an excellent example of thoroughly commenting one’s code to avoid having to solve mysteries or reinvent wheels when revisiting projects months (or decades) later. After all, self-documenting code doesn’t exist.