2024 Business Card Challenge: BAUDI/O For The Audio Hacker

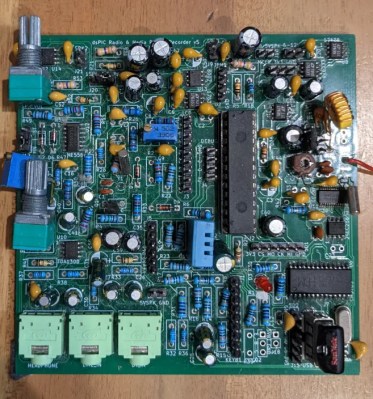
[Simon B] enters our 2024 Business Card Challenge with BAUDI/O, a genuinely useful audio output device. The device is based around the PCM2706 DAC, which handles all the USB interfacing and audio stack for you, needing only a reference crystal and the usual sprinkling of passives. This isn’t just a DAC board, though; it’s more of an audio experimentation tool with two microcontrollers to play with.

The first ATTiny AT1614 is hooked up to a simple LED vu-meter, and the second is connected to the onboard AD5252 digipot, which together allows one to custom program the response to the digital inputs to suit the user. The power supply is taken from the USB connection. A pair of ganged LM2663 charge-pump inverters allow inversion of the 5V rail to provide the necessary -5 V for the output amplifiers.  This is then fed to the LM4562-based CMoy-type headphone amplifier.  This design has a few extra stages, so with a bit of soldering, you can adjust the output filtering to suit. An LM1117 derives 3.3 V from the USB input to provide another power rail,  mostly for the DAC.

There’s not much more to say other than this is a nice, clean audio design, with everything broken out so you can tinker with it and get exactly the audio experience you want.

Weird Old Stereo Accessories

Some people trick out their cars. Some, their computers. There are even people who max out their audio systems, although back in 1979, there was more of that going on, probably, than today where you discresionary income is split so many ways. Case in point: [Alan Cross] remembers how excited he was to get the Radio Shack catalog that year. He was working at a grocery store, saved his money, and — over time — picked up a haul ranging from an equalizer to a strobe light.

Who didn’t need a power meter or a “light organ?” These gadgets seem cheap until you realize it was 1979 and [Alan] was a student working at a grocery store. He points out that the $20 power meter is about the same as $80 today.

Continue reading “Weird Old Stereo Accessories”

Simplest Speaker Oscillator, Now Even Simpler

It never fails. Lay down some kind of superlative — fastest, cheapest, smallest — around this place and someone out there says, “Hold my beer” and gets to work. In this case, it’s another, even simpler audio oscillator, this time with just a loudspeaker and a battery.

Attentive readers will recall the previous title holder was indeed pretty simple, consisting only of the mic and speaker from an old landline telephone handset wired in series with a battery. Seeing this reminded [Hydrogen Time] of a lucky childhood accident while experimenting with a loudspeaker, which he recreates in the video below. The BOM for this one is even smaller than the previous one — just a small speaker and a battery, plus a small scrap of solid hookup wire. The wire is the key; rather than connecting directly to the speaker terminal, it connects to the speaker frame on one end while the other is carefully adjusted to just barely touch the flexible wire penetrating the speaker cone on its way to the voice coil.

When power is applied with the correct polarity, current flows through the wire into the voice coil, which moves the cone and breaks the circuit. The speaker’s diaphragm resets the cone, completing the circuit and repeating the whole process. The loudspeaker makes a little click with each cycle, leading to a very rough-sounding oscillator. [Hydrogen Time] doesn’t put a scope on it, but we suspect the waveform would be a ragged square wave whose frequency depends on the voltage, the spring constant of the diaphragm, and the spacing between the fixed wire and the voice coil lead.

Yes, we realize this is stretching the definition of an audio oscillator somewhat, but you’ve got to admit it’s simple. Can you get it even simpler?

Continue reading “Simplest Speaker Oscillator, Now Even Simpler”

Sound And Water Make Weird Vibes In Microgravity

NASA astronaut [Don Pettit] shared a short video from an experiment he performed on the ISS back in 2012, demonstrating the effects of sound waves on water in space. Specifically, seeing what happens when a sphere of water surrounding an air bubble perched on a speaker cone is subjected to a variety of acoustic waves.

The result is visually striking patterns across different parts of the globe depending on what kind of sound waves were created. It’s a neat visual effect, and there’s more where that came from.

[Don] experimented with music as well as plain tones, and found that cello music had a particularly interesting effect on the setup. Little drops of water would break off from inside the sphere and start moving around the inside of the air bubble when cello music was played. You can see this in action as part of episode 160 from SmarterEveryDay (cued up to 7:51) which itself is about exploring the phenomenon of how water droplets can appear to act in an almost hydrophobic way.

This isn’t the first time water and sound collide in visually surprising ways. For example, check out the borderline optical illusion that comes from pouring water past a subwoofer emitting 24 Hz while the camera captures video at 24 frames per second.

Build Yourself A Vacuum Tube VU Meter

Volume unit (VU) meters are cool — it’s an undeniable fact. For some reason, humans just dig lights that flash along with sounds. You can build a VU meter using LEDs, or bulbs if you’re trapped in 1972. Or, you could use special vacuum tubes. [mircemk] did just that in their latest VU meter project.

The 6E2 vacuum tube is the part for the job in this case. You might think a specialist tube like this is expensive, but they can be had for just a few dollars from online retailers. They were often used as tuning indicators, but here, they’re used as a responsive VU meter instead. However, instead of a single bar going up and down, you get a pair of bars that raise to meet in the middle.

[mircemk] explains all the circuitry required to drive the tubes, and how to hook them up to create a two-channel stereo VU meter. The final circuit largely relies on a transistor, a diode, some passive components, and a DC-DC boost supply to generate 250 V for the tubes.

The final result looks pretty neat, particularly as it’s built into an old-school blue project box. We’ve seen similar projects from [mircemk] before, too. Continue reading “Build Yourself A Vacuum Tube VU Meter”

Creating A Numbers Station Of Your Very Own

Numbers stations are a weird phenomenon where odd voices read out long strings of numbers or random codewords to the confusion of the vast majority of the listening audience. If you’ve ever wanted to build one of your own, you could follow the example of [AudioWanderer].

NumberMumble, as it’s called, is a numbers station emulator. It doesn’t signal spy networks or reveal national secrets. Instead, it randomly plays audio samples using an Arduino, including characteristic bursts of white noise that make it sound more authentic. It relies on the Mozzi library to help with audio tasks, including generating white noise and playing back samples. It’s also kitted out with a filter knob for varying the tone. Audio output is via PWM.

If you want to confuse your neighbours with oddball audio, put this thing on a radio transmitter and get broadcasting. But don’t, because that’s illegal without the proper licenses or — you know — if you happen to be a real spy. Video after the break.

Continue reading “Creating A Numbers Station Of Your Very Own”

Playing Audio On The Pi Pico With No DAC To Speak Of

Normally, if you want to play music or other audio on a microcontroller, you need to get yourself a DAC. Or at least, that’s the easiest way to go about it and the one most likely to get you good, intelligible audio. You don’t have to go that way, though, as [antirez] demonstrates.

[antirez] decided to do this with a Pi Pico, but it’s applicable to other microcontrollers too. It’s all done with a single pin and a PWM output. The PWM output is set to a very high frequency beyond human hearing. In this case, it was 100 KHz. Then, the duty cycle of the PWM is changed to essentially output various average voltage levels at the pin. Vary the output voltage as per your desired sound file by using each sample to vary the duty cycle of the PWM. Voila! You can output whatever sound you want on that pin! [antirez] steps through the basics of doing this, including processing simple WAV files into a raw format that can be dumped into MicroPython code.

There’s no sound sample on the project page, and we’d have to assume it sounds pretty crunchy when hooked up to a speaker. And yet, it could prove a useful technique if you’re designing your own audio greeting cards or something, so keep that in mind!