Program This Badge In Lisp

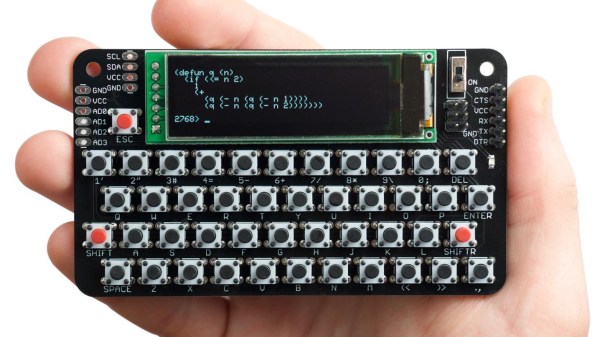
This hardware badge is a computer programmed with Lisp. You can write your own programs right on the badge using the built-in keyboard, as long as you know Lisp.

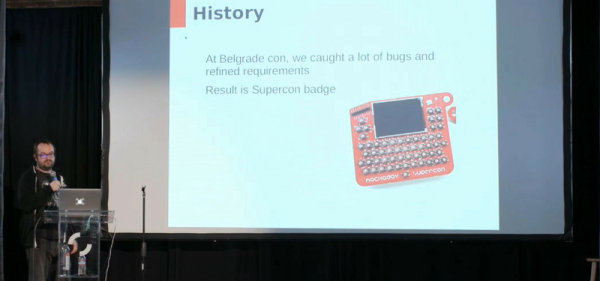
If there’s one thing we really like to see, it’s people advancing their own projects based on inspiration from others. The Lisp Badge by [David Johnson-Davies] is a perfect example. With an interface inspired by [Voja Antonic’s] hardware design for the 2018 Hackaday Belgrade Conference Badge, this version is an upgrade of an earlier single-board Lisp machine, now sporting an integrated keyboard.

Unlike the Belgrade badge, which is programmed in BASIC, this new badge is programmed in uLisp, a subset of common lisp designed for microcontrollers. Let’s face it, BASIC is retro, but Lisp is even more so, only pre-dated by FORTRAN as the oldest high-level language. So, if you’re into retro-style programming on small devices (physically small, that is), you should consider building one of these.

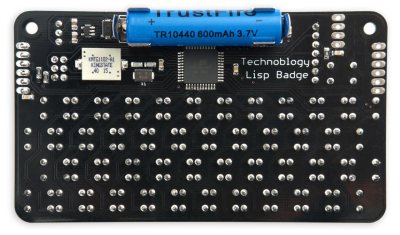
A 16 MHz ATmega 1284P serves as the badge’s brain, allowing storage for 2,816 Lisp cells, while the 256×64 pixel OLED display shows 8 lines of 42 characters in 16 gray levels. A full complement of I/O connections includes four analog inputs, two analog outputs, I2C, SPI, serial, and a handful of GPIOs for interfacing with just about anything. Power comes from a LiPO battery, which at a nominal voltage of 3.7 V doesn’t quite meet the datasheet requirements for running the processor at 16 MHz, although it seems to work fine in practice. Really cautious builders could opt for a 12 MHz crystal transplant to avoid any possibility of problems.

The keyboard layout is optimized for uLisp programming: unnecessary keys have been removed and the all-important parenthesis are afforded their own dedicated keys on the bottom row. This is presumably for convenience of use, but we suspect this will also make it easier to replace the parenthesis key switches when they inevitably wear out from overuse [obligatory Lisp/parenthesis joke].

As far as entering uLisp programs, you can simply use the keyboard. The built-in editor buffers a full screen of text, and includes parenthesis matching that highlights each pair as you type. We’re guessing that we won’t see Emacs implemented in the near future, so this bracket management is a great feature for a badge-based editor. If you find the keyboard difficult to type on, you can also enter programs over the serial port.

The other thing we really like to see is open-source projects. [David] doesn’t let us down on this point, either. The Eagle design files for the PCB as well as the source code for the badge are available on GitHub. The PCB is also shared on OSH Park, and there are detailed instructions for installing the bootloader and uploading the code.

If programmable badges is your thing, also check out the 2018 Hackaday Supercon Badge, the successor the Belgrade design.

Thanks to [Sven] for the tip!

Apple 1 Emulator Is A Perfect Fit For Supercon Badge

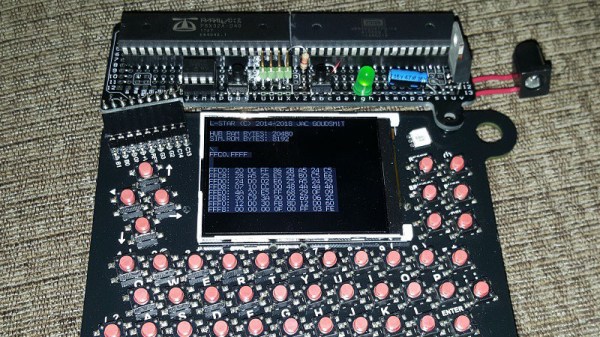
Supercon badge hackers had to be ready to present their show-and-tell by 6 pm Sunday evening. This ruthless unmoving deadline meant every badge hack on stage represents an accomplishment in time management, and some luck, in addition to their own technical merits. But that deadline also meant a few fantastic projects lost their race against the clock. We were rooting for [Jac Goudsmit] to build an Apple I emulator as his badge expansion, but he wasn’t quite done when our badge hack ceremony began. After Supercon he went home, finished the project, and documented everything in a detailed writeup.

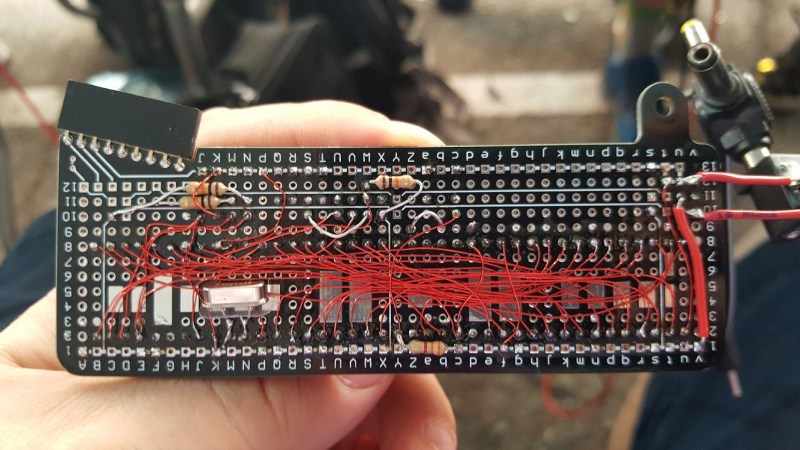
Our 2018 Supercon badge is built on a retro-computing theme, and the default firmware came with a BASIC interpreter as well as a Z80 emulator running CP/M. So an Apple 1 emulator should feel right home with its contemporaries. Mechanically speaking, all the parts were a tight fit on the badge expansion board given out to every attendee at Supercon. So tightly that [Jac] had to file down the two main chips in order to fit them side by side. The breadboard-like pattern of connected holes on the expansion board, intended to help ease in beginners for their badge hack soldering, proved to be an inconvenience in tightly packed arrangements such as this.

With all the work [Jac] had invested, it was heartbreaking to know he was only five minutes of soldering and 30 minutes of coding away when time ran out. Time pressure was part of the challenge faced by every Supercon badge hacker, and while we’re sad [Jac] missed the deadline for stage time we’re happy to see him finish and write it all up. We hope every badge hacker would write up their stories of frantic weekend projects. Those who do so on hackaday.io are encouraged to tag their project with “Supercon” and get them added to our list of badge hacks for everyone to admire.

Supercon Badge Hardware Hacking: Here’s What To Bring

Hackaday Superconference is just a week away (precious few tickets remain), a celebration of all things Hackaday, which naturally includes creative projects making the most of their hardware. Every attendee gets a platform for hacking in the form of the conference badge.

To make the most of your badge hacking fun, plan ahead so you will have the extra components and the tools you need. At the most basic, bring along a serial to USB cable and a PIC programmer. These are common and if you don’t own them, ask around and you will likely be able to borrow them. Now is also the time to put in a parts order for any components you want to use but don’t have on hand!

The badge is hackable without any extras, but it’s designed for adding hardware and hacking the firmware. We’re excited to see what you can do with it. We gave an overview of this retro themed pocket computer a few days ago, today we’re inviting you to exploit its potential for your hardware hacks.

Continue reading “Supercon Badge Hardware Hacking: Here’s What To Bring”

The Supercon Badge Is A Freakin’ Computer

It hangs around your neck, comes with the cost of admission, and would blow away a desktop computer from the 1980’s. This is the Hackaday Superconference badge and you can get your hands on one for the price of admission to the ultimate hardware conference.

Everyone through the door gets one of these badges featuring a 320 x 240 color display, a full qwerty keyboard, and limitless hacking potential! The stock firmware runs a BASIC interpreter, the CP/M operating system, and includes games and Easter Eggs. It’s a giant playground, and we want to see what you can do with this custom hardware during the three days of Supercon. Get your ticket now, then join me after the break for a demo video and plenty more info.

Continue reading “The Supercon Badge Is A Freakin’ Computer”

Fallout Watch Build Triumphs In Adverse Conditions

Is it a badge? Is it a watch? Well, it’s [Sarif’s] take on a wrist-mounted computer from the Fallout series, so you’re free to choose your own designation! We think the Brotherhood of Steel would be proud to have this piece of kit.

[Sarif] commenced the build after first getting their feet wet with the pipman, a watch inspired by Metro 2033 and Steins;;gate as much as Bethesda’s popular post-apocalyptic RPG. It features all the fruit – GPS, compass, a TV-B-Gone – and perhaps the coolest feature, long-since-deprecated bubble LED displays and flippy switches for that Altair-esque charm.

The build log is full of details, from the components used and the debugging battles involved in the journey. [Sarif] learned about using transistors, burning up a few along the way – some say setting the lab on fire is the quickest way to learn important lessons, anyway. On top of that, there were some software niggles but in the end, the watchputer made it to DEFCON 26 anyway!

Builds like this that start from limited experience and go deep into the trials and tribulations involved are an excellent way to learn about what goes into the average DIY electronics project, particularly when talking about embedded systems. And if you’re keen to check out the work of [Sarif’s] contemporaries, we’ve got a collection of all the awesome badges from DEFCON 26. Enjoy!

2018 Electromagnetic Field Badge: It’s An Entire Phone!

As is always the case with a significant hacker camp, we’ve been awaiting the official badge announcement for the upcoming Electromagnetic Field 2018 hacker camp with huge interest. These badges, for readers who may have been on Mars for the past few years, are part of a lively scene of wearable electronics at hacker conferences and camps, and can usually be expected to sport a fully-fledged computer in their own right along with other special functionality.

The announcement of the 2018 badge, dubbed the TiLDA Mk4, does not disappoint. We’d been told that there would be an on-site GSM network for which the welcome packs would contain a SIM, and the well-prepared among us had accordingly dusted off our old Nokia handsets alongside our DECT phones. What we hadn’t expected was that the SIM would be for the badge, because the Mk4 is a fully-fledged hackable mobile phone in its own right. The network will be fully functional for  calls and texts within the camp, though since it does not explicitly say so we expect that external calls may be an impossibility. Afterwards though it will remain a usable device on any GSM network, giving it a lease of post-camp life that may see more of them staying in use rather than joining the hacker’s dusty collection in a drawer.

Beyond the party-piece phone it appears to follow the lead of its 2016 predecessor, with the same Python environment atop a TI chipset including an MSP432E4 ARM Cortex M4F microcontroller running at 120MHz with 256kB of internal and 8MB of external RAM, a CC3210 WiFi processor, and the usual battery of sensors, LEDs and GPIOs. Importantly, it also has a Shitty Add-on connector. The 2016 badge was remarkably easy to develop for, and we expect that there will soon be an impressive array of apps for this badge too. If any reader would like to put together a Hackaday feed reader app, we can’t offer you fortune but fame such as we can bestow awaits.

We’ll bring you more information as we have it about the TiLDA Mk4, as well as a hands-on report when one lands in front of us. Meanwhile you’d like to see a retrospective of past EMF badges as a demonstration of where this one has come from, have a read of our coverage of the 2016 and 2014 badges.