Today’s hacker finds themself in a very interesting moment in time. The availability of powerful microcontrollers and standardized sensor modules is such that assembling the hardware for something like an Internet-connected environmental monitor is about as complex as building with LEGO. Hardware has become elementary in many cases, leaving software as the weak link. It’s easy to build the sensor node to collect the data, but how do you display it in a useful and appealing way?
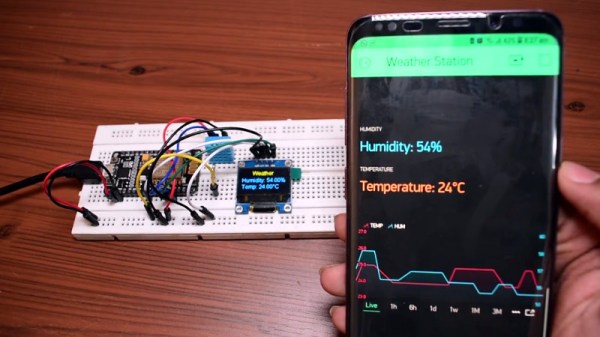
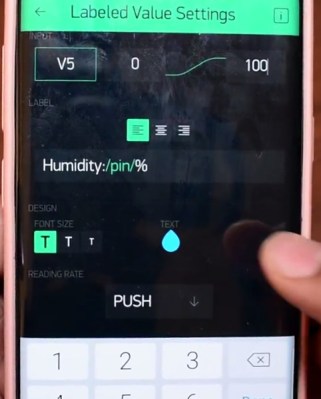 This simple indoor temperature and humidity sensor put together by [Shyam Ravi] shows one possible solution to the problem using Blynk. In the video after the break, he first walks you through wiring the demonstration hardware, and then moves on to creating the Blynk interface. While it might not be the ideal solution for all applications, it does show you how quickly you can go from a handful of components on the bench to displaying useful data.
In addition to the NodeMCU board, [Shyam] adds a DHT11 sensor and SSD1306 OLED display. He’s provided a wiring diagram in the repository along with the Arduino code for the ESP8266, but the hardware side of this demonstration really isn’t that important. You could omit the OLED or switch over to something like a BME280 sensor if you wanted to. The real trick is in the software.
For readers who haven’t played with it before, Blynk is a service that allows you to create GUIs to interact with microcontrollers from anywhere in the world. The code provided by [Shyam] reads the humidity and temperature data from the DHT11 sensor, and “writes” it to the Blynk service. From within the application, you can then visualize that data in a number of ways using the simple drag-and-drop interface.
We’ve seen Blynk and ESP8266 used to control everything from mood lighting to clearance-rack robotic toys. It’s a powerful combination, and something to keep in mind next time you need to knock something together in short order.
Continue reading “Simple ESP8266 Weather Station Using Blynk”

