Tricked-out Arduino-controlled Time-Lapse Is More Than Just A Timer

arduinoPhotoRig

[Hlesliebole] wanted a finer degree of remote control over his time-lapse shots, so he decided to build an Arduino-driven infrared shutter. He ended up creating this killer Arduino-controlled photography rig that does a whole lot more.

This hack was built for [Hlesliebole]’s Nikon D3100, but he says it should work with any DSLR and remote shutter. This initial build uses an LED as a stand-in for the remote shutter that he ordered.  He intends to update the post once it arrives and he integrates it.

[Hlesliebole] wired a 7-segment display to show the current time delay between photos. This can be set on the fly with a potentiometer, so there’s no need to stop and reprogram the Arduino. And while you’re grabbing a beer and watching the sun slowly sink, the rig can better capture that sunset because of a photoresistor. It detects the ambient light level and minimizes the number of throwaway dark shots.

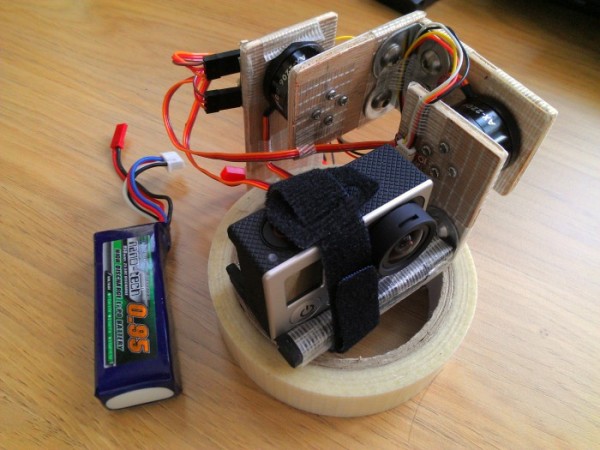
If that weren’t enough, he’s built servo functionality into the code to support remote control over the camera’s physical position, allowing for panning or rotation over a scene. [Hlesliebole] doesn’t go into detail, but he assures us that there are many tutorials out there.  If you think you’re man enough, you could always work in this outstanding versatile motion dolly hack.

Continue reading “Tricked-out Arduino-controlled Time-Lapse Is More Than Just A Timer”

Oculus Rift Goes From Virtual To Augmented Reality

[William Steptoe] is a post-doctoral research associate at University College London. This means he gets to play with some really cool hardware. His most recent project is an augmented reality update to the Oculus Rift. This is much more than hacking a pair of cameras on the Rift though. [William] has created an entire AR/VR user interface, complete with dockable web browser screens. He started with a stock Rift, and a room decked out with a professional motion capture system. The Rift was made wireless with the addition of an ASUS Wavi and a laptop battery system. [William] found that the wireless link added no appreciable latency to the Rift. To move into the realm of augmented reality, [William] added a pair of Logitech C310 cameras. The C310 lens’ field of view was a bit narrow for what he needed, so lenses from a Genius WideCam F100 were swapped in. The Logitech cameras were stripped down to the board level, and mounted on 3D printed brackets that clip onto the Rift’s display. Shapelock was added to the mounts to allow the convergence of the cameras to be easily set.

Stereo camera calibration is a difficult and processor intensive process. Add to that multiple tracking systems (both the 6DOF head tracking on the Rift, and the video tracker built-in to the room) and you’ve got quite a difficult computational process. [William] found that he needed to use a Unity shader running on his PC’s graphics card to get the system to operate in real-time.  The results are quite stunning. We didn’t have a Rift handy to view the 3D portions of [William’s] video. However,  the sense of presence in the room still showed through. Videos like this make us excited for the future of augmented reality applications, with the Rift, the upcoming castAR, and with other systems.

Continue reading “Oculus Rift Goes From Virtual To Augmented Reality”

OpenMV: The Camera For Your Next Project

Last month we saw [Ibrahim] tackle the lack of cheap, high speed, high resolution serial cameras with full force. He designed a serial camera based on the STM32F4 microcontroller that’s the perfect solution to anyone wanting to add visual processing or machine vision to a project. It’s cheap, too: instead of the $100 or so you’d spend on a high-end serial camera, [Ibrahim]’s version only has about $15 in parts.

Now he’s back at it again, with 25 FPS face detection, 30 FPS color detection, a new board with a micro SD socket, and support for USB OTG full speed. [Ibrahim] has been hard at work deep in the bowels of the STM32F4 micro, playing around with the core coupled memory. This allows for some very fast image processing, combined with the micro running at 168 MHz makes for very fast face and color detection.

As for a few benchmarks for this camera, the maximum resolution is 1280×1024, and at 88×72 resolution this little board can output at 60 FPS. Of course everything is limited by the speed of the serial connection, but there’s a lot of potential in this small serial camera.

No word on how much this board will cost, but [Ibrahim] may be putting a few boards up on Tindie shortly. Here’s to hoping he’ll send us an email telling us when his store is open.

If You Own A Camera You Need To Try Light Graffiti

Do you have a camera that’s capable of controlling how long of an exposure it takes?  With this and any small light source, you can make a really awesome illuminated image like the one featured above.  Combine this with the hacking skills that you’ve hopefully learned from reading Hackaday, and the visual possibilities are endless.

Let’s look at the background of this entertaining light hacking technique, and how you can make images like this yourself!

Continue reading “If You Own A Camera You Need To Try Light Graffiti”

A Jeep-Mounted FLIR Camera

jeep

[Eddie Zarick] is at it again, modding his Jeep Wrangler into something that makes us all properly jealous. This time, he managed to acquire and mount the FLIR camera from an old Cadillac. It truly is an FLIR thermal imaging camera, and not just a near-infrared hack. Cadillac used this technology with a HUD, but [Eddie] decided to connect it to his in-dash screen. He also didn’t settle for simply facing it forward, but mounted it to a Golight searchlight base. He mounted the joysticks under the screen, giving him directional control.

[Eddie] spent about $500 on the project, which seems like a lot, but not when you consider the cost of a new FLIR camera. We would love to know where he found such a great deal! Maybe he hit up a local salvage yard? If you know of a good source for parts like this, let us know in the comments!

Previously we covered [Eddie’s] pressurized water tap, weatherproof keypad entry, and other assorted hacks. We look forward to seeing what he adds to his Jeep next.

Continue reading “A Jeep-Mounted FLIR Camera”

Arduino-Controlled Single-Leaf Shutter

Single-Leaf Shutter

[Kevin] has made an interesting camera shutter mechanism using an Arduino and a solenoid. To keep it extremely simple, he is only controlling a single leaf. In the linked video, you can see him take it through its paces from 1/125 seconds up to infinite. This is, of course, a proof of concept, and [Kevin] mentions using smaller components to make everything fit easily inside a Holga-like body. As he points out in the video’s comments, digitally controlling the flash would be a simple matter as well.

A basic camera is incredibly simple to make, and [Kevin’s] design certainly isn’t complicated. That said, if you look at the big picture, [Kevin] is demonstrating how feasible it could be to build an entirely custom camera with a standard microcontroller as the brain. We can’t help but think of all of the possibilities when you are able to control the entire photo taking process.

Interestingly, [Kevin] is also behind this twin lens reflex Kickstarter project from earlier in the year. It will be interesting to see what other camera-related hacks we will see from him.

Game Controller Repurposed For Flea Market Find

powerPannerControlReplacement

A jarring pan with your tripod can ruin a shot in your film, and tilting up or down usually requires some loosening and tightening kung fu to keep gravity from taking over. The “Power Panner” is a remote-controlled device that fits between the tripod and the camera, handling pans and tilts with ease. When [NeXT] found one at the Capitol Flea Market for $5, he didn’t care about the missing remote. He bought the Panner, dragged it home, and hacked together his own remote with a Sega Master Pad.

After researching similar devices online, [NeXT] had determined the original remote’s pinout: essentially a D-pad with adjustable speed control. He decided to ignore the speed pins and to instead search for a suitable replacement controller. A Sega Master Pad offered the most straightforward solution, so [NeXT] went to work separating out the wires and soldering them to a DIN connector. He couldn’t find the right plug to fit the Panner’s DIN-7 jack, so he substituted a DIN-8 with the extra pin snapped off.

Rather than use the remaining two buttons for speed control, [NeXT] chose to feed them directly into his camera to drive the focus and shutter, but the Master Pad’s wiring posed a problem: the camera would have to share the Power Panner’s ground, and the Panner plugs into the wall via a 6V adapter. Fingers crossed, he decided to push ahead and was relieved that everything worked. We suspect the shared ground won’t be a problem as long as one device uses a floating power supply, which the Panner can provide either through the proper wall wart or by using its 4 AA battery option.

If you’re in the mood for more camera hacks, check out the sound-dampening and waterproofing build from last week.