Transmitting HD Video From A Raspberry Pi

It’s been a few years since the RTL-SDR TV Tuner dongle blew up the world of amateur radio; it’s a simple device that listens in on digital television frequencies, but it’s one of those tools that’s just capable enough to have a lot of fun. Now, we have a transmitting dongle. It’s only being used to transmit live HDTV from a Pi, but that in itself is very interesting and opens up a lot of possible builds.

The key piece of hardware for this build is a UT-100C DVB-T modulator. It’s a $169 USB dongle capable of transmitting between 1200-1350 MHz, and with a special edition of OpenCaster it’s possible to transmit over-the-air TV. There’s no amplifier, so you won’t be sending TV very far, but it does work.

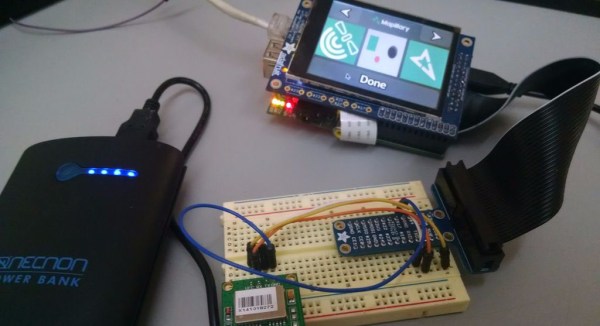
On the Raspberry Pi side of the build, the standard camera captures H.264 video with raspivid, which is converted to a DVB compliant stream using ffmpeg. These are well-worn bits of software in the Raspberry Pi world, and OpenCaster takes care of the rest.

While this seems like the perfect solution to completely overbuilt quadcopters, keep in mind transmitting on the 23cm band does require a license. Transmitting in the UHF TV bands is a bad idea.

RasPi Doorbell

Raspberry Pi Doorbell Is Fully Featured

When you think of a doorbell, you typically don’t think of anything very complicated. It’s a button that rings a bell inside your home. That’s about it. [Ahmad] decided he wanted to turn his doorbell up to eleven (Google Doc) with this build. Using a Raspberry Pi, he was able to cram in loads of features.

When the doorbell button is pressed, many different events can be triggered. In the demo video, [Ahmad] shows how his phone receives a text message, and email, and a tweet. The system can even be configured to place a voice call via Google Hangouts using a USB microphone. [Ahmad] demonstrates this and shows how the voice call is placed almost instantly when the button is pressed. This may be a bit overkill, but it does demonstrate many different options depending on your own needs.

For the hardware side of things, [Ahmad] purchased a wireless doorbell. He opened up the ringer unit and hooked up the speaker wires to a couple of pins on the Raspberry Pi through a resistor. The doorbell unit itself is powered off of the 3.3V supply from the Pi. The Pi also has a small LCD screen which shows helpful information such as if the Internet connection is working. The screen will also display the last time and date the doorbell was pressed, in case you weren’t home to answer the door.

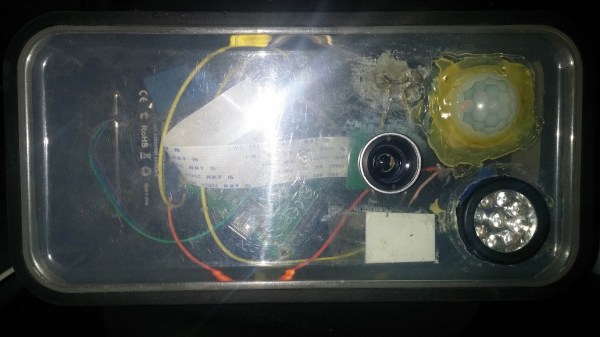
On top of all of that, the system also includes a Raspberry Pi camera module. This allows [Ahmad] to take a photo of the person ringing the doorbell as a security measure. He can even view a live video feed from the front door by streaming directly to YouTube live. [Ahmad] has provided a link to his Pi image in the Google Doc so others can use it and modify it as they see fit. Continue reading “Raspberry Pi Doorbell Is Fully Featured”

Hack Your Phone: Turn Your Volume Buttons Into GPIO Ports

Internet connected cameras are mighty useful, specially in situations requiring some form of remote monitoring. An always-on camera that is available over an internet connection, is cheap, and uses re-purposed  hardware – that’s what the Gonzo project hopes to achieve. To accommodate these requirements, the Exploratory Engineering program team in Telenor Digital are using off-the-shelf phone hardware running on top of a fork of Firefox OS. You hang the Gonzo where you want to monitor a situation, after which it will function for up to one month before needing a recharge, sending data to a designated public URL over the 2G network.

A big downside with using such hardware is that it is not designed for the task at hand, and offers no expansion ports that may be needed for certain functions. In this particular case, the designers needed a couple of output ports to drive some LED’s. The hardware guys got a bit creative,  and re-mapped the volume buttons of the phone into generic GPIO ports. On the software side, they looked at where the button GPIO’s were referenced, and located how they are mapped to a keymap. They then added a device driver that maps the GPIO ports to be generic ports instead. Modding the hardware needed a little bit more hard work, figuring out which traces connected to the two volume buttons, adding series resistors, and then wiring the LED’s in place. The project itself is still a work in progress, and you can read more about it at the Gonzo website.

If you’re like one of us and have a box full of old phones lying around, take a look at some creative suggestions here for some Arduino controlled robots.

Thanks for the tip [pb] !

DIY Camera Light Ring

Inexpensive Ring Light Makes Macro Photos Easy

[edyb] uses his relatively inexpensive Cannon camera quite a bit. However, in dark areas or extreme closeups, the camera’s image quality leaves something to be desired. [edyb] hopped on the ‘net and found out that a ring light may cure his photo faux pas. Ring lights are nothing new but nothing existed for his lower-end point and shoot camera. With a USB-powered lamp and a spare AA battery pack kicking around, [edyb] decided to make his own.

First, the USB lamp was disassembled, luckily the LEDs were already laid out in a ring shape. The clear protective housing and gooseneck were discarded and the remaining PCB ring was glued directly to the camera. A female USB jack was then glued to the top of the camera and soldered to the two leads connected to the lamp’s PCB. The AA battery holder received a small switch and a male USB plug, also courtesy of a few dabs of glue. The now-assembled battery pack plugs directly into the camera via the USB connector and is its only method of attachment.

DIY Camera Light RingThe utilitarian modification may look crude but the results are anything but. Check out this close-up macro shot of a Canadian penny. Not too bad.

[edyb] has done some similar mods to other cameras, attaching components with magnets and even using an old Blackberry battery to power the LEDs showing that there is no one way to solve a problem. Check out the video after the break…

Continue reading “Inexpensive Ring Light Makes Macro Photos Easy”

How Fast Is Your Flash?

What’s cooler than learning about timers and interrupts on AVRs? Well, if you’re like [Matt], you can use that learning experience to build something useful – in this case, a timer for various camera flashes.

There are two ways to measure the speed of a flash. The first is the lag between when a button is pressed and when the flash goes off. As long as this is consistent, everything’s okay. The second type of speed is the pulse width. When looking at a xenon flash as time vs. brightness, they have a large spike at the beginning followed by a significant amount of decay. LED flashes are pretty much one cycle of a square wave.

To measure both types of flash speed, [Matt] used a $0.50 photodiode an a 3.5mm jack that ties into the flash remote. These bits are wired up to an Arduino, a little bit of fun work with timers and interrupts happens, and [Matt] learns how fast his flash is.

ArduinoCamera

A Single Pixel Digital Camera With Arduino

[Jordan] managed to cobble together his own version of a low resolution digital camera using just a few components. The image generated is pretty low resolution and is only in grey scale, but it’s pretty impressive what can be done with some basic hardware.

The heart of the camera is the image sensor. Most consumer digital cameras have tons of tiny receptors all jammed into the sensor. This allows for a larger resolution image, capturing more detail in a smaller space. Unfortunately this also usually means a higher price tag. [Jordan’s] sensor includes just a single pixel. The sensor is really just an infrared photodiode inside of a tube. The diode is connected to an analog input pin on an Arduino. The sensor can be pointed at an object, and the Arduino can sense the brightness of that one point.

In order to compile an actual image, [Jordan] needs to obtain readings of multiple points. Most cameras do this using the large array of pixels. Since [Jordan’s] camera only has a single pixel, he has to move it around and take each reading one at a time. To accomplish this, the Arduino is hooked up to two servo motors. This allows the sensor to be aimed horizontally and vertically. The Arduino slowly scans the sensor in a grid, taking readings along the way. A Processing application then takes each reading and compiles the final image.

Since this camera compiles an image so slowly, it sometimes has a problem with varying brightness. [Jordan] noticed this issue when clouds would pass over while he was taking an image. To fix this problem, he added an ambient light sensor. The Arduino can detect the amount of overall ambient light and then adjust each reading to compensate. He says it’s not perfect but the results are still an improvement. Maybe next time he can try it in color.