A Customizable Open Source Mechanical Numpad

Mechanical keyboards with reduced key counts are all the rage these days, but while those streamlined input devices might look cool on your desk, there are times when the traditional number pad or navigation keys are quite handy. Rather than just going without, [Mattia Dal Ben] decided to put together his own mechanical auxiliary input device for when the main board just isn’t cutting it.
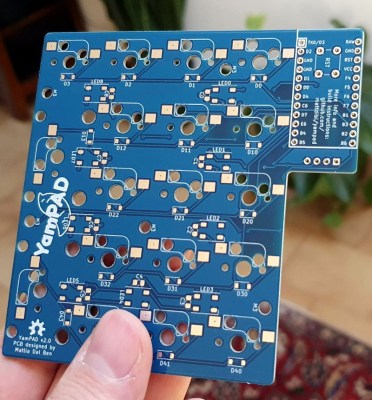
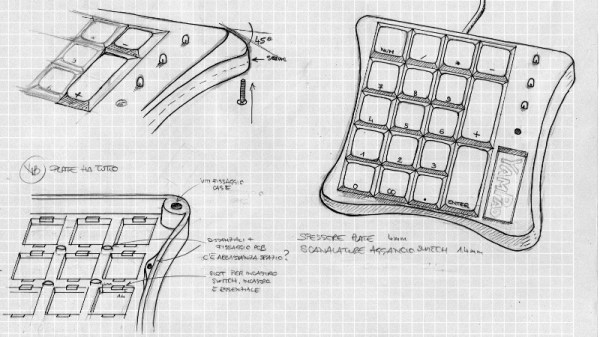
[Mattia] is calling his creation the YamPAD, which stands for Yet Another Mechanical numPAD. One of the major goals for the project is to produce a design that’s easy for others to replicate and customize. His PCB has a socket designed to fit an Arduino Pro Micro, which combined with the QMK firmware, offers a wide array of configuration options. All that’s left is to add in the Cherry MX switches and some 1N4148 diodes.

But if you want to take things a little further, [Mattia] has that covered as well. The PCB design has provisions for RGB LED back-lighting should you find yourself in need of crunching some numbers in the dark. There’s even a spot for a 0.91″ OLED display if you really want to take things to the next level.

As of right now, the YamPAD is just a bare PCB, but [Mattia] is planning to design a 3D printed enclosure for it soon. The sketches he’s done so far depict a printed case which we think bears more than a passing resemblance to a Wii Fit Balance Board, but of course being a fully open source project, you’ll be free to design your own case based on the PCB’s dimensions. It would be interesting to see what other kind of customization the community might come up with once the design is finalized.

If you like the idea of the YamPAD, you might also want to check out the kbord we covered back in 2017. If you want to see the full keyboard done in this DIY open hardware style, there are already some choice entries into the field.

Custom Calculator Rolls D20 So You Don’t Have To

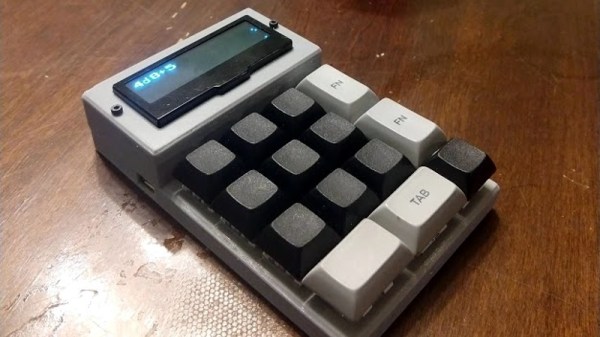
There are a number of sticking points that can keep new players away from complex tabletop games such as Dungeons & Dragons. Some people are intimidated by the math involved, and of course others just can’t find enough friends who are willing to sit down and play D&D with them in 2019. While this gadget created by [Caleb Everett] won’t help you get more open minded friends, it will take some of the mental gymnastics out of adding up dice rolls.

In its current form the device saves you from the hassle of not only having to roll various combinations of physical dice, but adding up all the faces after the fact as well. In the future [Caleb] plans on adding more advanced software features which will allow for tricks not possible with real dice, such as increasing the likelihood of rolling numbers which haven’t been seen in awhile. Now that the hardware is put together, he’s free to dig into the software side of things and really get creative.

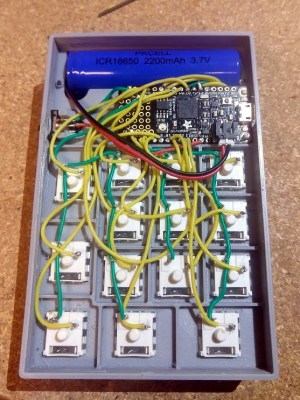
Inside the 3D printed case of his calculator there’s a Adafruit Feather M0 Express, a 128 x 32 OLED display, and a 2200 mAh lithium ion battery that lets him go mobile. The keys, which are Cherry MX clones, are wired directly to the digital pins of the Feather board as [Caleb] found that easier to wrap his head around than doing a matrix. This ended up working out as he had enough pins, but does stifle future expansion a bit.

Even if you aren’t into the sort of tabletop gaming which would benefit from an automatic dice roller and tabulator, we think [Caleb] has come up with a very neat form factor for similar pocket sized gadgets. It reminds us of the Handlink from Quantum Leap; before the prop department swapped it out for a jumble of gummy bears later on in the series, anyway. Since he’s shared the link to the OnShape project, you can even tweak the design a bit without having to suffer through modifying the STLs.

Many of the electronic dice we’ve seen in the past have tried to emulate the size and appearance of traditional dice, so it’s interesting to see this approach which goes in the opposite direction entirely. Critics might say that at some point you’d be better off just using a software application for your smartphone, but we’re not in the business of complaining when people produce interesting pieces of hardware.

C64 Keyboard Helps Keep The Memory Alive

To say that the Commodore 64 was an important milestone in the history of personal computing is probably a bit of an understatement. For a decent chunk of the 1980s, it was the home computer, with some estimates putting the total number of them sold as high as 17 million. For hackers of a certain age, there’s a fairly good chance that the C64 holds a special spot in their childhood; perhaps even setting them on a trajectory they followed for the rest of their lives.

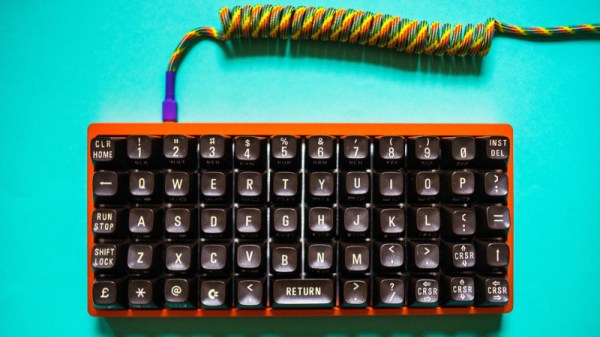
At the risk of showing his age, [Clicky Steve] writes in to tell us about the important role the C64 played in his childhood. He received it as a gift on his fifth birthday from his parents, and fondly remembers the hours he and his grandfather spent with a mail order book learning how to program it. He credits these memories with getting him interested in technology and electronic music. In an effort to keep himself connected to those early memories, he decided to build a modern keyboard with C64 keycaps.

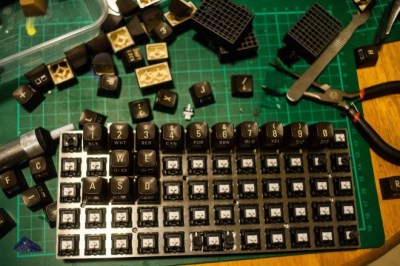
As you might expect, the process started with [Steve] harvesting the caps from a real Commodore, in fact, the very same computer he received as a child. While the purists might shed a tear that the original machine was sacrificed to build this new keyboard, he does note that his C64 had seen better days.

Of course, you can’t just pull the caps off of C64 and stick them on a modern keyboard. [Steve] found the STLs for a 3D printable C64 to Cherry MX adapter on GitHub, and had 80 of them professionally printed as he doesn’t have access to an SLS printer. He reports the design works well, but that non-destructively removing the adapters from the caps once they are pressed into place probably isn’t going to happen; something to keep in mind for others who might be considering sacrificing their personal C64 for the project.

[Steve] installed the caps on a Preonic mechanical keyboard, which worked out fairly well, though he had to get creative with the layout as the C64 caps didn’t really lend themselves to the keyboard’s ortholinear layout. He does mention that switches a bit heavier than the Cherry MX Whites he selected would probably be ideal, but overall he’s extremely happy with his functional tribute to his grandfather.

If you’re more of a purist, you can always adapt the C64 keyboard directly to USB. Or go in the complete opposite direction and put a Raspberry Pi into a C64 carcass.

Trackball Gets Bolt-On Button Upgrade

The question of whether to use a mouse versus a trackball is something of a Holy War on the level of Vi versus Emacs. We at Hackaday want no part of such things, use whatever you want, and leave us out of it. But we will go as far as to say that Team Trackball seems to take things mighty seriously. We’ve never met a casual trackball user: if they’ve got a trackball on their desk then get ready to hear all about it.

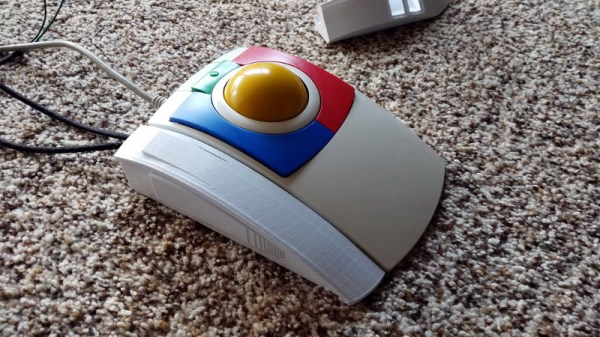
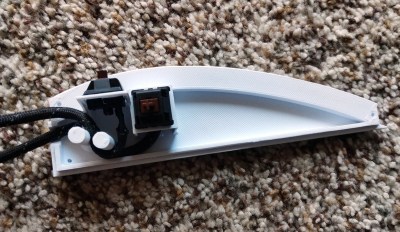
With that in mind, the lengths [LayeredDesigns] went to just to add a couple extra buttons to his CST trackball make a bit more sense. Obviously enamored with this particular piece of pointing technology, he designed a 3D printed “sidecar” that you can mount to the left side of the stock trackball. Matching the shape of the original case pretty closely, this add-on module currently hosts a pair of MX mechanical keys, but the plans don’t stop there.

[LayeredDesigns] mentions that all the free room inside the shell for this two-button modification has got him thinking of what else he could fit in there. The logical choice is a Teensy emulating a USB HID device, which could allow for all sorts of cool programmable input possibilities. One potential feature he mentioned was adding a scroll wheel, which the Teensy could easily interface with and present to the operating system.

We’ve seen our fair share of 3D printed keyboards and keyboard modifications, but we can’t say the same about the legendary trackball. Ones made of cardboard, sure. Pulled out of a military installation and hacked to add USB? You bet. This project is just more evidence of what’s possible with a 3D printer, a caliper, and some patience.

[via /r/functionalprint]

A Custom Keypad With Vision

A combination of cheap USB HID capable microcontrollers, the ability to buy individual mechanical keys online, and 3D printing has opened up a whole new world of purpose-built input devices. Occasionally these take the form of full keyboards, but more often than not they are small boards with six or so keys that are dedicated to specific tasks or occasionally a particular game or program. An easy and cheap project with tangible benefits to anyone who spends a decent amount of time sitting in front of the computer certainly sounds like a win to us.

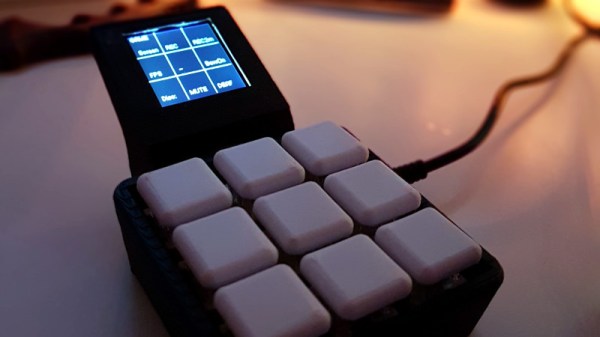
But this build by [r0ckR2] takes the concept one step farther. Rather than just being a simple 3×3 keypad, his includes a small screen that shows the current assignments for each key. Not only does this look really cool on the desk (always important), but it also allows assigning multiple functions to each key. The screen enables the user to switch between different pages of key assignments, potentially allowing a different set of hot keys or macros for every piece of software they use.

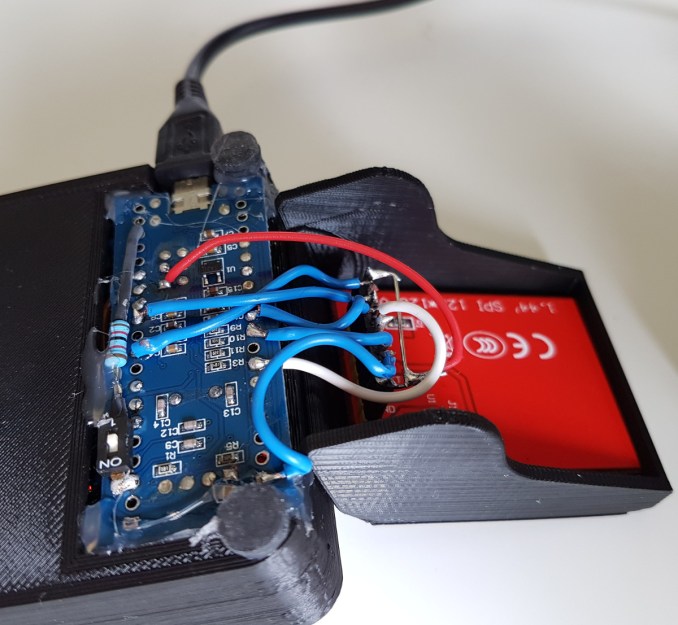
The case is entirely 3D printed, as are the key caps. To keep things simple, [r0ckR2] didn’t bother to design a full enclosure, leaving all the electronics exposed on the back. Some might think it’s a little messy, but we appreciate the fact that it gives you easy access to the internals if you need to fix anything. Rubber feet were added to the bottom so it doesn’t slide around while in use, but otherwise the case is a pretty straightforward affair.

As for the electronics, [r0ckR2] went with an STM32 “Blue Pill” board, simply because it’s what he had on hand. The screen is a ST7735 1.44 inch SPI TFT, and the keys themselves are Cherry MX Red clones he got off of eBay. All in all, most of the gear came from his parts bins or else was only a couple bucks online.

If you’re looking for something a bit bigger, check out this gorgeous Arduino-powered version, or this far more utilitarian version. Both are almost entirely 3D printed, proving the technology is capable of more than making little boats.

[via /r/functionalprint]

One-key Keyboard Is Exercise In Sub-millimeter Design

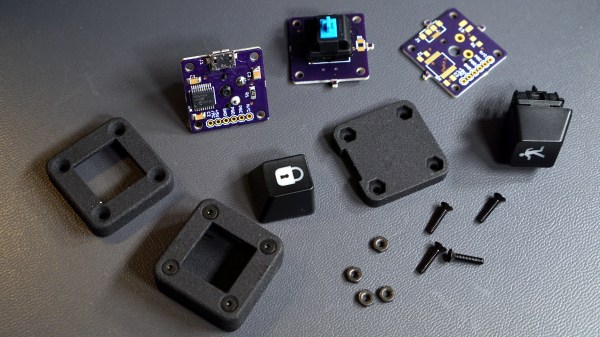
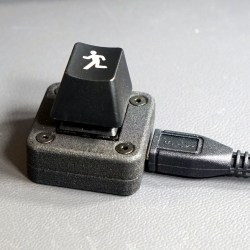
As [Glen] describes it, the only real goal in his decision to design his single-key USB keyboard was to see how small he could build a functional keyboard using a Cherry MX key switch, and every fraction of a millimeter counted. Making a one-key USB keyboard is one thing, but making it from scratch complete with form-fitting enclosure that’s easy to assemble required careful design, and luckily for all of us, [Glen] has documented it wonderfully. (Incidentally, Cherry MX switches come in a variety of qualities and features, the different models being identified by their color. [Glen] is using a Cherry MX Blue, common in keyboards due to its tactile bump and audible click.)

[Glen] steps though the design challenges of making a device where seemingly every detail counts, and explains problems and solutions from beginning to end. A PIC16F1459, a USB micro-B connector, and three capacitors are all that’s needed to implement USB 2.0, but a few other components including LED were added to help things along. The enclosure took some extra care, because not only is it necessary to fit the board and the mounted components, but other design considerations needed to be addressed such as the depth and angle of the countersink for the screws, seating depth and clearance around the USB connector, and taking into account the height of the overmold on the USB cable itself so that the small device actually rests on the enclosure, and not on any part of the cable’s molding. To top it off, it was also necessary to adhere to the some design rules for minimum feature size and wall thicknesses for the enclosure itself, which was SLS 3D printed in nylon.

PCB, enclosure, software, and bill of materials (for single and triple-key versions of the keyboard) are all documented and available in the project’s GitHub repository. [Glen] also highlights the possibility of using a light pipe to redirect the embedded LED to somewhere else on the enclosure; which recalls his earlier work in using 3D printing to make custom LED bar graphs.

Ergonomic Keyboard Designed From The Ground Up

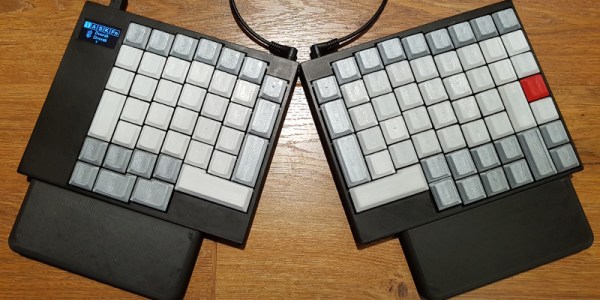
In 2011, [Fabio] had been working behind a keyboard for about a decade when he started noticing wrist pain. This is a common long-term injury for people at desk jobs, but rather than buy an ergonomic keyboard he decided that none of the commercial offerings had all of the features he needed. Instead, he set out on a five-year journey to build the perfect ergonomic keyboard.

Part of the problem with other solutions was that no keyboards could be left in Dvorak (a keyboard layout [Fabio] finds improves his typing speed) after rebooting the computer, and Arduino-based solutions would not make themselves available to the computer’s BIOS. Luckily he found the LUFA keyboard library, and then was able to salvage a PCB from another keyboard. From there, he programmed everything on a Teensy microcontroller, added an OLED screen, and soldered it all together (including a set of Cherry MX switches).

Of course, the build wasn’t truly complete until recently, when a custom two-part case was 3D printed. The build quality and attention to detail in this project is impressive, and if you want to roll out your own [Fabio] has made all of the CAD files and software available. Should you wish to incorporate some of his designs into other types of specialized keyboards, there are some ideas floating around that will surely improve your typing or workflow.