Hackaday Prize Entry: A Clock For Alternate Timebases

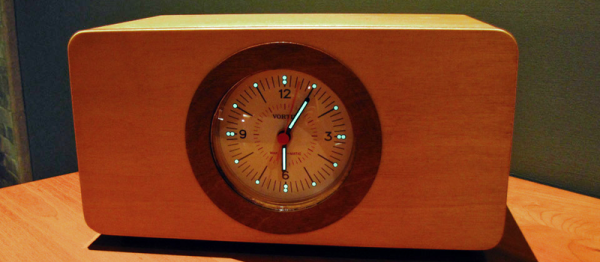
There is a strange clock in the waiting room of Lord Vetinari, Patrician of Ankh-Morpork. While this clock keeps accurate time overall, the ticks and tocks are out of sync, occasionally missing a tick altogether. The net effect is one of turning one’s brain into a sort of porridge.

Yes, a Vetinari Clock has made its way into The Hackaday Prize. This isn’t a clock that’s random yet accurate over long time spans; this is a complete replacement for run-of-the-mill clock movements you can find at any craft store.

In addition to the Vetinari Clock, [Nick Sayer]’s Crazy Clock can be programmed as a sidereal clock (3m 56s fast per day), a Martian clock (39m 36s slow per day), and a tidal clock (50m 28s slow per day), as well as some ‘novelty’ modes that still have 86400 ticks per day ranging from subtle to ‘clown car’ levels of craziness.

[Nick] is gunning for the ‘best product’ category for the Hackaday Prize, and for that he’s designing a board to be a direct replacement for the board in a Quartex Q80 clock movement. With this new board, [Nick] can replace the electronics in this movement in just a few minutes. Being built around an ATtiny45 means it’s infinitely hackable. A clock with this movement would be a great product, although judging from the video below, not one we would want to be around all day.

The 2015 Hackaday Prize is sponsored by:

Continue reading “Hackaday Prize Entry: A Clock For Alternate Timebases”

Instrument Cluster Clock Gets The Show On The Road

While driving around one day, [Esko] noticed that the numbers and dials on a speedometer would be a pretty great medium for a clock build. This was his first project using a microcontroller, and with no time to lose he got his hands on the instrument cluster from a Fiat and used it to make a very unique timepiece.

The instrument cluster he chose was from a diesel Fiat Stilo, which [Esko] chose because the tachometer on the diesel version suited his timekeeping needs almost exactly. The speedometer measures almost all the way to 240 kph which works well for a 24-hour clock too. With the major part sourced, he found an Arduino clone and hit the road (figuratively speaking). A major focus of this project was getting the CAN bus signals sorted out. It helped that the Arduino clone he found had this functionality built-in (and ended up being cheaper than a real Arduino and shield) but he still had quite a bit of difficulty figuring out all of the signals.

In the end he got everything working, using a built-in servo motor in the cluster to make a “ticking” sound for seconds, and using the fuel gauge to keep track of the minutes. [Esko] also donated it to a local car museum when he finished so that others can enjoy this unique timepiece. Be sure to check out the video below to see this clock in action, and if you’re looking for other uses for instrument clusters that you might have lying around, be sure to check out this cluster used for video games.

The mechanics in dashboards are awesome, and produced at scale. That’s why our own [Adam Fabio] is able to get a hold of that type of hardware for his Analog Gauge Stepper kit. He simply adds a 3D printed needle, and a PCB to make interfacing easy.

Continue reading “Instrument Cluster Clock Gets The Show On The Road”

Swollen Clock Build Demostrates All Engineering Shoulds

[Steve Gardner] wants an accurate clock for his bench. Of course the only option most engineers will accept for something like this a clock they’ve built themselves. In fact, this is his second time around as his first was an OLED based system using one of those sweet Maxim TCXO’s that keep time for years with negligible drift.

This build is going to be dead accurate as well since he plans to roll in a GPS source. But for now he’s covering the display build itself and will use another clock source IC at first. The display is a set of six 2.3″ 7-segment displays on protoboard. Bonus points for all the tidiness in his point to point soldering!

You may think this is a super simple project, and in a way it is. But [Steve] does an amazing job of dotting all the i’s and crossing all the t’s in a way that is beneficial to learn for all of your prototyping. For instance, he’s combining some 7-segment displays with 5mm LEDs as the colons. He mentions checking the peak wavelength of the displays to match the LEDs when choosing components. The design is also well-planned on graph paper. This may be just for use in illustrating the video but is a great practice in your own prototyping.

We’re not sure if there’s some movie magic involved here as his first burning of code to the PIC microcontroller results in a fully working device — impressive. Looking at his entire presentation, if you follow the workflow that [Steve] uses in his engineering, you’re doing it right!

Continue reading “Swollen Clock Build Demostrates All Engineering Shoulds”

PiClock

PiClock – Time And Weather Information Overload

[Kevin] wanted a display where he could take a quick glance and get all the current environmental information he uses throughout the day. That information includes, of course, the time and date as well as weather information. We’re not just talking the current weather information but the forecast for the upcoming week as well as a map showing current weather patterns. To do this, [Kevin] came up with a unique system he’s calling the PiClock.

[Kevin] did some serious programming to get this clock project off of the ground. The weather data comes via the Weather Underground API and the map data from the Google Maps API. The main program is written in Python and will run on any OS running Python 2.7+ and PyQt4. If you’re interested in doing something similar, check out the source at github.

From the project’s name, it is no surprise that a Raspberry Pi is the brains here. A USB WiFi adapter allows access to the internet but an Ethernet connection would do just fine. Having the RaspPi hanging out with wires everywhere would be a little lazy, so [Kevin] opened up his 19″ LCD monitor and mounted the RaspPi inside the case. He tapped 5vdc off of the monitors power supply and used that to power the RaspPi, no external wall wart necessary! And if the PiClock’s background isn’t cool enough, some RGB LED strips were mounted to the back of the monitor to give an Ambilight effect.

Nixie Clock Uses Ingenious Software RTC

There’s something about Nixie Tube Clocks that keeps drawing hackers to build their own iterations, even if its been done a gazillion times before. Their depleting supply, and the high voltage drivers to control them, makes it all the more interesting. [Pete Mills], a veteran of several interesting projects, many of which we have featured here, is no exception and decided to build his own version of a Nixie Tube Clock, but with several nifty features.

To put it in a nut shell, his Clock uses Nixie tubes for display, has USB serial communication, temperature measurement, AC frequency measurement, time and date keeping with a software based RTC, software driven boost converter for the 175V DC nixie tube supply and a windows app for clock configuration.

The software based time keeping is pretty interesting. It is essentially a method to calibrate the crystal to more closely match real time, and some code to keep track of the time and date.  This obviously leads to a reduction in components and the spin-offs that comes with that; increased reliability, cost reduction, real estate savings. The RTC code can easily be ported to other clock projects irrespective of the display used. Besides keeping track of time and date, it can also account for leap years, and report the day of the week. A zero-crossing detector connected to the low-voltage transformer supply that powers the clock can also be used as an alternative way of keeping time.

When connected to a serial console over UART, the clock can report back many variables depending on the queries it receives. The high voltage DC needed to drive the Nixie tubes is generated using a simple boost converter controlled by the micro controller. An important “gotcha” that [Pete] deduced after blowing off several fuses, was to disconnect the micro controller port connected to the PWM timer and explicitly set it to output low via software. There’s a couple of other issues that he ran into – such as board layout, power supply, incorrect pullups – that make for interesting reading. The clock enclosure is still work in progress, but [Pete] hopes to get it done sometime soon.

He also wrote a Windows application – Nixie Clock Communicator – to help with time setting and calibration. Finally, he describes in detail the process of calibrating the clock’s software based RTC. Based on his calculations, the clock will drift by about 48 seconds over an 8 month period. Since he will be adjusting for DST much sooner than that, his clock ought to be off from correct time by not more than a minute at any given time. Not bad for a clock that does not use a dedicated RTC chip. [Pete] still has some of the prototype boards to give away if someone is interested. If you’d rather build it yourself from scratch, [Pete] has posted the software code, schematics and PCB, and a BoM.

Transparent Alarm Clock Runs Linux

[Benoit] was using an extremely old alarm clock which normally ran on mains power, and he plugged it in to his computer’s UPS to keep it operational during power outages. He noticed that when the UPS switched on that the clock would run fast, though, and apparently it was keeping time by watching the power system frequency. To solve this problem he created his own feature-dense clock which runs Linux.

This alarm clock has everything: seven-segment displays housed in clear epoxy, a touch interface, battery backup, the ability to retrieve the time from an NTP server, and a web interface to change the clock’s settings over the network. That was a large part of [Benoit]’s decision to have the clock run Linux; the network capabilities add a lot of functionality to the clock like the ability to send commands to other devices at particular times. The clock runs on an Aria G25 SOM and has a custom case that looks very professional.

We’re suckers for a high-quality clock builds here, and [Benoit]’s most recent project hits all of our buttons. Even though it doesn’t currently drive people insane or tell confusing time, the Linux and networking capabilities could certainly open up options!

hand in hand clock

Odd Clock Moves Minute Hand To Hour Hand

We see a lot of clocks here on Hackaday. Some make it easy to tell the time, others are more cryptic. [dragonator] has done something that is so simple, we are surprised it isn’t more common. In a typical mechanical hand clock the minute and hour hands rotate around the same axis. [dragonator] decided to take the minute hand and move it out to the tip of the hour hand.

It works because of a gear system hidden behind the thick hour hand. As the hour hand turns, the gear system rotates, the last gear of which is connected to the minute hand. Since the minute hand rotates 12 times for every one revolution of the hour hand, the gear ratio can easily be calculated.

hand in hand clockThe 3D printed parts were designed by [dragonator] himself. All of the design files are available here for anyone who wants to build one of these neat clocks.

The clock uses a Trinket microcontroller board to keep track of the time and to send step signals to a StepStick that drives a NEMA 17 stepper motor. There is no on-board battery power for this clock, 9-12vdc comes in via a wall wart and is stepped down to 5v by the micro controller’s regulator. Even still, this is a great project that makes it fun to watch time pass, check the video out after the break.

Continue reading “Odd Clock Moves Minute Hand To Hour Hand”