In the first part of our series on in-band signaling, we discussed one of the most common and easily recognizable forms of audio control, familiar to anyone who has dialed a phone in the last fifty years – dual-tone multifrequency (DTMF) dialing. Our second installment will look at an in-band signaling method that far fewer people have heard, precisely because it was designed to be sub-audible — coded squelch systems for public service and other radio services. Continue reading “In-Band Signaling: Coded Squelch Systems”
decoder13 Articles
In-Band Signaling: Dual-Tone Multifrequency Dialing
One late night many decades ago, I chanced upon a technical description of the Touch-Tone system. The book I was reading had an explanation of how each key on a telephone sends a combination of two tones down the wire, and what’s more, it listed the seven audio frequencies needed for the standard 12-key dial pad. I gazed over at my Commodore 64, and inspiration hit — if I can use two of the C64’s three audio channels to generate the dual tones, I bet I can dial the phone! I sprang out of bed and started pecking out a Basic program, and in the wee hours I finally had it generating the recognizable Touch-Tones of my girlfriend’s phone number. I held the mouthpiece of my phone handset up to the speaker of my monitor, started the program, and put the receiver to my ear to hear her phone ringing! Her parents were none too impressed with my accomplishment since it came at 4:00 AM, but I was pretty jazzed about it.
Since that fateful night I’ve always wondered about how the Touch-Tone system worked, and in delving into the topic I discovered that it’s part of a much broader field of control technology called in-band signaling, or the use of audible or sub-audible signals to control an audio or video transmission. It’s pretty interesting stuff, even when it’s not used to inadvertently prank call someone in the middle of the night. Continue reading “In-Band Signaling: Dual-Tone Multifrequency Dialing”
Arduino Tetris On A Multiplexed LED Matrix
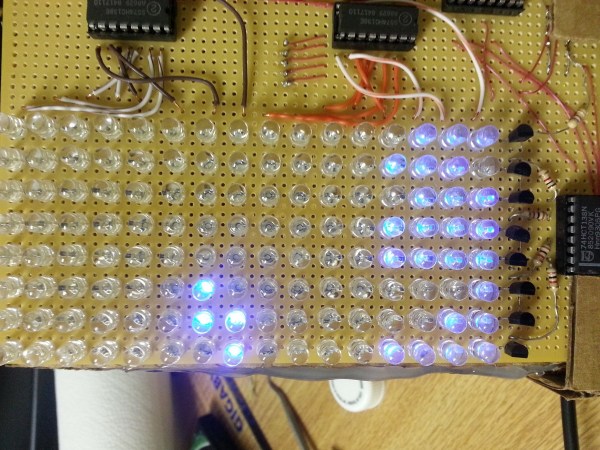
[Alex] needed a project for his microcomputer circuits class. He wanted something that would challenge him on both the electronics side of things, as well as the programming side. He ended up designing an 8 by 16 grid of LED’s that was turned into a game of Tetris.
He arranged all 128 LED’s into the grid on a piece of perfboard. All of the anodes were bent over and connected together into rows of 8 LED’s. The cathodes were bent perpendicularly and forms columns of 16 LED’s. This way, if power is applied to one row and a single column is grounded, one LED will light up at the intersection. This method only works reliably to light up a single LED at a time. With that in mind, [Alex] needed to have a very high “refresh rate” for his display. He only ever lights up one LED at a time, but he scans through the 128 LED’s so fast that persistence of vision prevents you from noticing. To the human eye, it looks like multiple LED’s are lit up simultaneously.
[Alex] planned to use an Arduino to control this display, but it doesn’t have enough outputs on its own to control all of those lights. He ended up using multiple 74138 decoder/multiplexer IC’s to control the LED’s. Since the columns have inverted outputs, he couldn’t just hook them straight up to the LED’s. Instead he had to run the signals through a set of PNP transistors to flip the logic. This setup allowed [Alex] to control all 128 LED’s with just seven bits, but it was too slow for him.
His solution was to control the multiplexers with counter IC’s. The Arduino can just increment the counter up to the appropriate LED. The Arduino then controls the state of the LED using the active high enable line from the column multiplexer chip.
[Alex] wanted more than just a static image to show off on his new display, so he programmed in a version of Tetris. The controller is just a piece of perfboard with four push buttons. He had to work out all of the programming to ensure the game ran smoothly while properly updating the screen and simultaneously reading the controller for new input. All of this ran on the Arduino.
Pager Message Sniffing With RPi And SDR

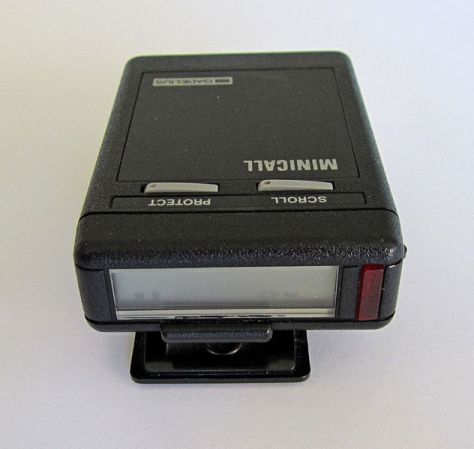
The 1990’s called, they want you to use modern technology to listen in on your friends’ pager messages. Seriously, how many people are still using pagers these days? We guess you can find out by building your own Software-Define Radio pager message decoder.
[Sonny_Jim] bought an RTL2832 based USB dongle to listen in on ADS-B airplane communications only to find out the hardware wasn’t capable of communicating in that bandwidth range. So he set out to find a project the hardware was suited for and ended up exploring the POCSAG protocol used by paging devices. It turns out it’s not just used for person-to-person communications. There are still many automated systems that use the technology.
Setting things up is not all that hard. Reading the comments on the project log show some folks are having dependency issues, but these sound rather banal and will be a good chance for you to brush up on your Linux-fu. Once all the packages are installed you’re simply working with text which can be displayed in a myriad of ways. [Sonny] set up a text files on the Pi’s webserver so that he can check out the latest captures from a smartphone.
24 Cellphone Buttons Controlled With 6 Microcontroller Pins

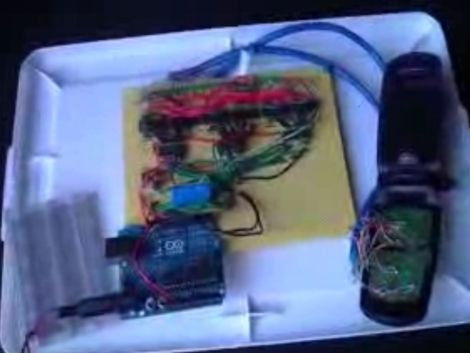
[J8g8j] has been playing around with an old cellphone. He wanted to control it using a microcontroller but since there’s 24 buttons he wasn’t thrilled about hooking up a couple dozen relays to do the switching. Instead, he managed to control all 24-buttons using just 6-pins of a microcontroller.
The proof-of-concept video that he posted on his site shows the phone responding to an arbitrary string of button presses. [J8g8j] spent the majority of his time reverse engineering how the phone’s keypad is wired. Once he figured out the rows and columns of the key matrix he soldered wires to access each of them. This turns out to be 14 connections. To these, he wired up a set of opto-isolators to handle the switching. These are in turn controlled by a set of three 74HC138A 3-8 bit decoders. what’s left are six input pins that leave plenty of room for him to hook up other items to the Arduino serving as the microcontroller.
Decoding MP3 In Python

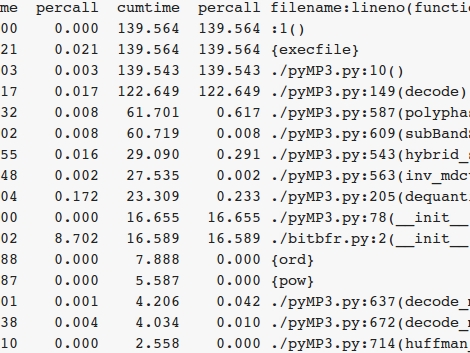
We all listen to them, but do you know how the compression for an MP3 file actually works? [Portalfire] wanted to find out, while honing his Python skills at the same time. He’s been working on an MP3 decoder in the Python language. So far he’s had some success, with the first working decoder clocking in at just 34 times slower than real-time. But since then a bit of optimization improved that to 10 times slower.
Sure, it’s not a usable module yet but his goal of learning the algorithms has been reached. A combination of reading about the standard and looking at code from other projects made that possible. In the future he plans to try the same thing with the H.264 codec.


