Mechanical Seven-Segment Display, Smaller And Better Than The Original

One thing we love here at Hackaday is when we get to track the evolution of a project over time. Seeing a project grow over time is pretty typical — scope creep is real, after all. But watching a project shrink can be a real treat too, as early versions get refined into sleeker and more elegant solutions.

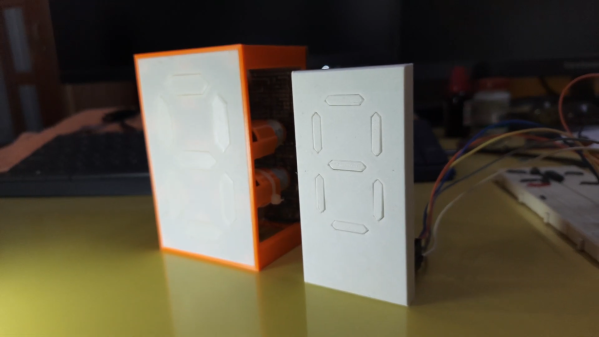
This slimmed-down mechanical seven-segment display is a perfect example of that downsizing trend. When we saw [IndoorGeek]’s first vision of an electromechanical display, it was pretty chunky. Then as now, each segment is a 3D-printed piece with a magnet attached to the rear. The segments hover over solenoid coils, which when energized repel the magnet and protrude the segment, forming the desired digit. The old version used large, hand-wound coils, though, making the display pretty bulky front to back.

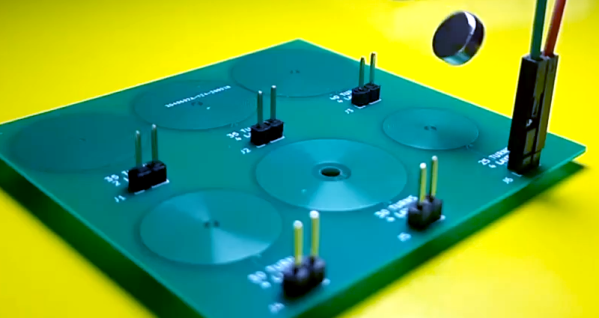
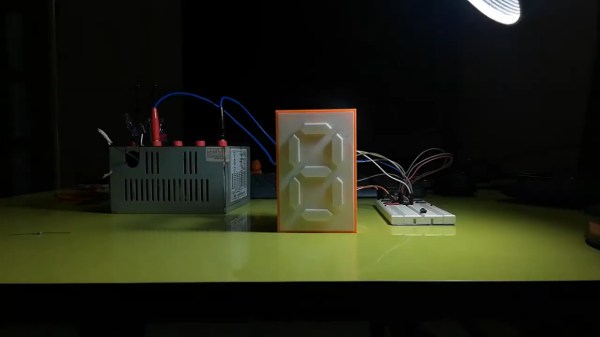
Version 2 of the display takes a page from [Carl Bugeja]’s playbook and replaces the wound coils with PCB coils. We’ve seen [Carl]’s coils on both rigid substrates and flex PCBs; [IndoorGeek] used plain old FR4 here. The coils occupy four layers so they have enough oomph to extend and retract each segment, and the PCB includes space for H-bridge drivers for each segment. The PCB forms the rear cover for the display, which is also considerably slimmed down for this version. What’s the same, though, is how good this display looks, especially with strong side-lighting — the shadows cast by the extended segments are striking against the plain white face of the display.

Congratulations to [IndoorGeek] on a great-looking build and a useful improvement over the original.

Continue reading “Mechanical Seven-Segment Display, Smaller And Better Than The Original”

Let KiCad And Python Make Your Coils

We like to pretend that our circuits are as perfect as our schematics. But in truth, PCB traces have unwanted resistance, capacitance, and inductance. On the other hand, that means you can use those traces to build components. For example, it isn’t uncommon to see a very small value current sense resistor be nothing more than a long PC board trace. Using PC layers for decoupling capacitance and creating precise transmission lines are other examples. [IndoorGeek] takes us through his process of creating coils on the PCB using KiCad. To help, he used a Python script that works out the circles, something KiCAD has trouble with.

The idea is simple. A coil of wire has inductance even if it is a flat copper trace on a PCB. In this case, the coils are more for the electromagnetic properties, but the same idea applies if you wanted to build tuned circuits. The project took inspiration from FlexAR, an open-source flexible PCB magnet.

Continue reading “Let KiCad And Python Make Your Coils”

Mechanical Seven-Segment Display Really Sticks Out From The Pack

We’ve been displaying numbers using segmented displays for almost 120 years now, an invention that predates the LEDs that usually power the ubiquitous devices by a half-dozen decades or so. But LEDs are far from the only way to run a seven-segment display — check out this mechanical seven-segment display for proof of that.

We’ve been seeing a lot of mechanical seven-segment displays lately, and when we first spotted [indoorgeek]’s build, we thought it would be a variation on the common “flip-dot” mechanism. But this one is different; to form each numeral, the necessary segments protrude from the face of the display slightly. Everything is 3D-printed from white filament, yielding a clean look when the retracted but casting a sharp shadow when extended. Each segment carries a small magnet on the back which snuggles up against the steel core of a custom-wound electromagnet, which repels the magnet when energized and extends the segment. We thought for sure it would be loud, but the video below shows that it’s really quiet.

While we like the subtle contrast of the display, it might not be enough for some users, especially where side-lighting is impractical. In that case, they might want to look at this earlier similar display and try contrasting colors on the sides of each segment.

Continue reading “Mechanical Seven-Segment Display Really Sticks Out From The Pack”

Salvaged Drill Gets A Magnetic Upgrade

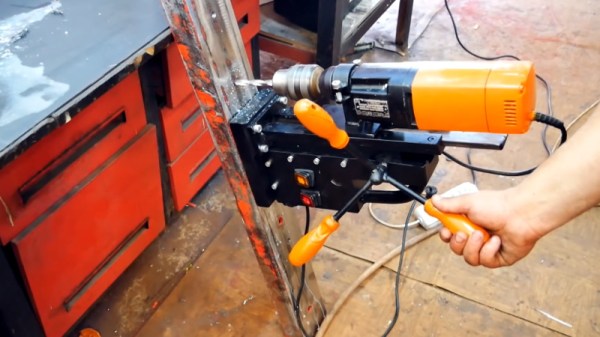
For most people, a broken tool is at the end of its useful life. But rather than toss a heavy-duty drill that had its handle broken off, [Workshop From Scratch] thought it was a perfect opportunity to create something new. In his latest video, he shows how he converted this old hand tool into a magnetic drill press with predictably impressive results.

Despite being assembled largely from pieces of scrap metal cut into shape with an angle grinder, we wouldn’t blame you for believing the end result was a commercial product. From the handles salvaged from chewed up old screwdrivers to the scratch-built rack and pinion assembly, the attention to detail here is really fantastic.

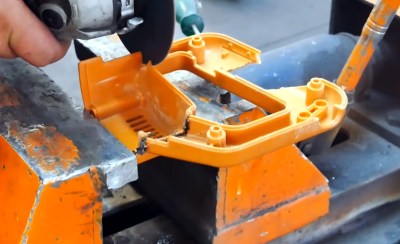
Removing what was left of the broken handle.

It’s difficult to pick a favorite detail, but the reinvented enclosure for the drill certainly ranks up there. [Workshop From Scratch] could have simply bolted on the tool as-is, but instead he surgically removed the vestigial handle to make it look as though the drill was always meant for this application. After cutting, it was finished off with some body filler, a bit of sanding, and a coat of his signature orange spray paint.

When he built his magnetic vise, [Workshop From Scratch] used magnets pulled from automotive air conditioning systems. They got the job done, but were somewhat annoying to work with given their round shape. This time around, he’s used off-the-shelf magnetic locks intended for steel doors. When energized with a 19 V laptop power supply, he says the three rectangular electromagnets have a combined pull of 540 kilograms.

If you don’t have a broken drill to use as a donor for this type of project, don’t worry. You could always use a salvaged hoverboard motor instead.

Continue reading “Salvaged Drill Gets A Magnetic Upgrade”

Chat Cat Waves On Slack @

Isolated as we are by national lockdowns and statewide stay-at-home orders, many coworkers are more connected than ever before through oddly-named productivity/chat programs such as Slack. But those notifications flying in from the sidebar all the time are are oh-so-annoying and anti-productive. Ignoring requests for your attention will only make them multiply. So how do you make the notifications bearable?

[Mr. Tom] wrote in to tell us about his solution, which involves a maneki-neko — one of those good luck cats that wave slowly and constantly thanks to a solar-powered electromagnetic pendulum. Now whenever [Mr. Tom] has an incoming message, the cat starts waving gently over on the corner of his desk. It’s enough movement to be noticeable, but not annoying.

An ESP32 inside the kitty looks at incoming messages and watches for [Mr. Tom]’s user ID, prioritizing messages where he has been mentioned directly. This kitty is smart, too. As soon as the message is dealt with, the data pin goes low again, and the cat can take a nap for a while.

The natural state of the maneki-neko is pretty interesting, as we saw in this teardown a few years back.

Scratch Built Magnetic Vise Stays Where You Need It

For those who might not have run into one before, a magnetic vise is used when you want to quickly anchor something to a metal surface at an arbitrary position. They’re often used to hold the workpiece down when machining, and can be a real time saver if a lot of repositioning is involved.

[Workshop From Scratch] recently wanted to put together one of these handy pieces of gear, and as we’ve come to expect from his channel, the finished product is an absolute beast. Starting with little more than scraps of metal, the video after the break takes the viewer on a fascinating journey that ends with some demonstrations of the vise in action.

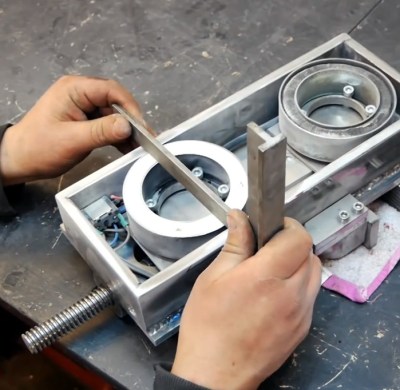
Conceptually, this build is relatively simple. Start with a vise, put a hollow base on it, and fit it with powerful electromagnets that will anchor it down once you flip the switch. Technically you could just build a magnetic base and bolt a commercially available vise onto it, but that’s not how [Workshop From Scratch] does things.

Every element of the build is done by hand, from the pattern cut into the jaws to the t-handle nut driver that gets adapted into a very slick crank. Of particular interest is how much effort is put into grinding down the surface of the electromagnets so they are perfectly flush with the base of the vise. Incidentally, these beefy electromagnets were salvaged from automotive air conditioning compressors, so you might want to add that to your junkyard shopping list.

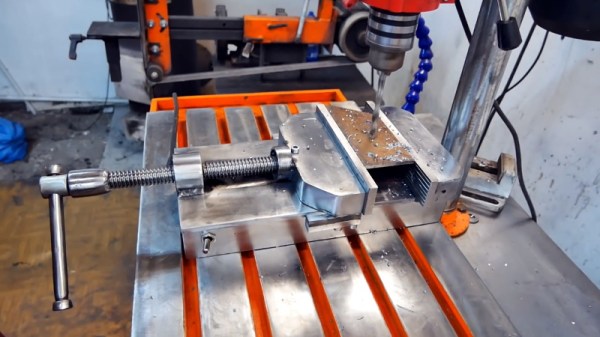
Eagle-eyed readers might recognize the surface [Workshop From Scratch] uses the vise on as the custom drill press table he built a few months ago. These videos are not only reminders of what you can accomplish when you’ve mastered the use of a few common tools, but just how much design and thought goes into the hardware many of us take for granted.

Continue reading “Scratch Built Magnetic Vise Stays Where You Need It”

Magnets Turn Flexible PCB Into Electric Grasshopper

Just because something doesn’t seem to have an apparent purpose, that doesn’t mean we shouldn’t try making it anyway. As flexible PCBs become cheaper and easier to order from low-scale fab houses, we’re seeing hobbyists experiment with new uses for them such as [Carl Bugeja]’s jumping circuit.

The circuit is based a coil printed on the flexible PCB itself acting as an electromagnet, but unlike other designs which use the same trick, in this one the coil is made to be the static side of an actuator. Attached to the circuit with folding arms is a stack of two permanent magnets, which work as the moving part. Since the magnets make up most of the mass of the circuit, as they’re pushed down and sprung back up, it causes the whole thing to leap around just under one centimeter off the table like a little electric grasshopper.

This is far from [Carl]’s first appearance here on Hackaday, and he’s been clearly busy exploring new uses for flexible PCBs with their properties as electromagnets, from making POV displays with them to small robots that move around through vibration. We’re excited to see what else he can come up with, and you can see this one in action after the break.

Continue reading “Magnets Turn Flexible PCB Into Electric Grasshopper”