24 Hours Of Temperature Data At A Glance

In an era where we can see the current temperature with just a glance at our smartphones, the classic “Time and Temp” gadget sitting on the desk doesn’t have quite the same appeal. The modern weather fanatic demands more data, which is where this gorgeous full-day temperature display from [Richard] comes in.

The display, built inside of a picture frame, shows the temperature recorded for every hour of the day. If the LED next to the corresponding hour is lit that means the value displayed is from the current day, otherwise it’s a holdover from the previous day’s recordings. This not only makes sure all 24 LED displays have something to show, but gives you an idea of where the temperature might be trending for the rest of the day. Naturally there’s also a display of the instantaneous temperature (indoor and outdoor), plus [Richard] even threw in the current wind speed for good measure.
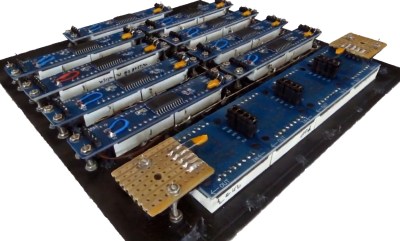
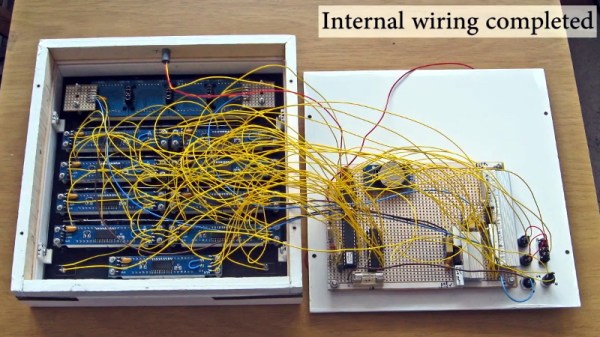
In the video after the break, [Richard] briefly walks us through the construction of his “Thermo Logger”, which reveals among other things that the beautiful panel art is nothing more exotic than a printed piece of A4 paper. The video also features a 3D model of the inside of the device which appears to have been created through photogrammetry; perhaps one of the coolest pieces of project documentation we’ve ever seen. We’ll just throw this out there: if you want to ensure that your latest build makes the front page of Hackaday, pop off that back panel and make some decent quality 3D scans.

Given the final result, it should come as no surprise to find that this isn’t the first incredible weather display that [Richard] has built. We previously covered another weather monitoring creation of his that needed two seperate display devices to adequately display all the data it was collecting.

Continue reading “24 Hours Of Temperature Data At A Glance”

The Final Days Of The Fire Lookouts

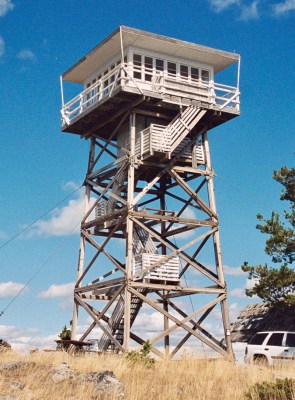
For more than a century, the United States Forest Service has employed men and women to monitor vast swaths of wilderness from isolated lookout towers. Armed with little more than a pair of binoculars and a map, these lookouts served as an early warning system for combating wildfires. Eventually the towers would be equipped with radios, and later still a cellular or satellite connection to the Internet, but beyond that the job of fire lookout has changed little since the 1900s.

Like the lighthouse keepers of old, there’s a certain romance surrounding the fire lookouts. Sitting alone in their tower, the majority of their time is spent looking at a horizon they’ve memorized over years or even decades, carefully watching for the slightest whiff of smoke. The isolation has been a prison for some, and a paradise for others. Author Jack Kerouac spent the summer of 1956 in a lookout tower on Desolation Peak in Washington state, an experience which he wrote about in several works including Desolation Angels.

But slowly, in a change completely imperceptible to the public, the era of the fire lookouts has been drawing to a close. As technology improves, the idea of perching a human on top of a tall tower for months on end seems increasingly archaic. Many are staunchly opposed to the idea of automation replacing human workers, but in the case of the fire lookouts, it’s difficult to argue against it. Computer vision offers an unwavering eye that can detect even the smallest column of smoke amongst acres of woodland, while drones equipped with GPS can pinpoint its location and make on-site assessments without risk to human life.

At one point, the United States Forest Service operated more than 5,000 permanent fire lookout towers, but today that number has dwindled into the hundreds. As this niche job fades even farther into obscurity, let’s take a look at the fire lookout’s most famous tool, and the modern technology poised to replace it.

Continue reading “The Final Days Of The Fire Lookouts”

Particle Mesh Powers The Internet Of Fans

With the winter months not far off, [Ben Brooks] was looking for a way to help circulate the heat from his wood-burning fireplace throughout his home. Rather than go with a commercial solution, he decided to come up with his own automated air circulation system powered by the mesh networking capabilities of one of his favorite pieces of tech, the Particle Photon.

Particle Xeon remote sensor

The idea here is pretty simple: use a remote temperature sensor to tell a fan located behind the fireplace when it’s time to kick on and start sharing some of that warmth with the rest of the house. But as usual, it ended up being a bit trickier than anticipated. For one, when [Ben] took a close look at the Vornado 660 fan he planned on using, he realized that its speed controller was “smart” enough that simply putting a relay on the AC line wouldn’t allow him to turn it on and off.

So he had to do some reverse engineering to figure out how the Sonix SN8P2501B microcontroller on the board was controlling the fan, and then wire the Photon directly to the pins on the chip that corresponded with the various physical controls. This allows the Photon to not only “push” the buttons to trigger the different speeds, but also read the controls to see if a human is trying to override the current setting.

For the remote side [Ben] is using a Particle Xenon, which is specifically designed for Internet of Things endpoints and sensor applications. Combined with a TMP36 temperature sensor and 3.7 V 500 mAh battery, this allowed him to easily put together a wireless remote thermometer that will publish the current temperature to the Photon’s mesh network at regular intervals.

This isn’t the first time we’ve seen the Particle Photon used to augment an unassuming piece of hardware. We’ve previously seen one get grafted into a coffee maker, and if you can believe it, somebody even stuck one inside an umbrella to create a mobile weather station.

Building A Full-Fat Air Quality Monitor

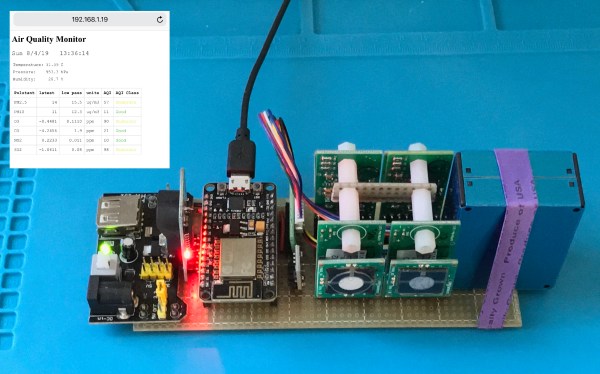
Over the years many people have made an air quality monitor station, usually of some configuration which measures particulates (PM2.5 & PM10). Some will also measure ozone (O3), but very few will meet the requirements that will allow one to calculate the Air Quality Index (AQI) as used by the EPA and other organizations. [Ryan Kinnett]’s project is one of those AQI-capable stations.

The AQI requires the measurement of the aforementioned PM2.5 (µg/m3), PM10 (µg/m3) and O3 (ppb), but also CO (ppm), SO2 (ppb) and NO2 (ppb), all of which has to be done with specific sensitivities and tolerances. This means getting sensitive enough sensors that are also calibrated. [Ryan] found a company called Spec Sensors who sell sensors which are pretty much perfect for this goal.

Using Spec Sensor’s Ultra-Low Power Sensor Modules (ULPSM) for ozone, nitrogen-dioxide, carbon monoxide and sulfur dioxide, a BME280 for air temperature, pressure and relative humidity, as well as a Plantower PMS5003 laser particle counter and an ADS1115 ADC, a package was created that fit nicely alongside an ESP8266-based NodeMCU board, making for a convenient way to read out these sensors. The total one-off BOM cost is about $250.

The resulting data can be read out and the AQI calculated from them, giving the desired results. Originally [Ryan] had planned to take this sensor package along for a ride around Los Angeles, to get more AQI data than the EPA currently provides, but with the time it takes for the sensors to stabilize and average readings (1 hour) it would take a very long time to get the readings across a large area.

Ideally many of such nodes should be installed in the area, but this would be fairly costly, which raises for [Ryan] the question of how one could take this to the level of the Air Quality Citizen Science project in the LA area. Please leave your thoughts and any tips in the comments.

Stack Of Plant Saucers, Transformed Into Low Cost Solar Shield

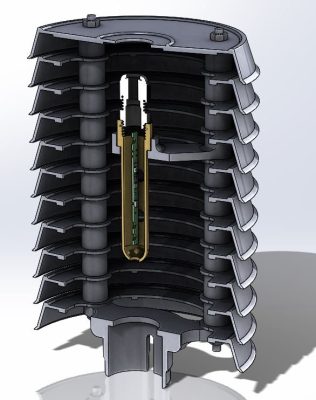
For serious data collection with weather sensors, a solar shield is crucial. The shield protects temperature and humidity sensors from direct sunlight, as well as rain and other inclement weather, without interfering with their operation. [Mare] managed to create an economical and effective shield for under three euros in materials.

It began with a stack of plastic saucers intended for the bottom of plant pots. Each of these is a lot like a small plate, but with high sides that made them perfect for this application. [Mare] cut the bottom of each saucer out with a small CNC machine, but the cut isn’t critical and a hand tool could also be used.

Three threaded rods, nuts, and some plastic spacers between each saucer yields the assembly you see here. When mounted correctly, the sensors on the inside are protected from direct exposure to the elements while still allowing airflow. As a result, the readings are more accurate and stable, and the sensors last longer.

The top of the shield is the perfect place to mount a UV and ambient light sensor board, and [Mare] has a low-cost DIY solution for that too. The sensor board is covered by a clear glass dish on top that protects the board without interfering with readings, and an o-ring seals the gap.

3D printing is fantastic for creating useful components, and has been instrumental in past weather station builds, but projects like these show not everything needs to be (nor should be) 3D printed.

Global Radiation Montoring And Tracking Nuclear Disasters At Home

Many of us don’t think too much about radiation levels in our area, until a nuclear disaster hits and questions are raised. Radiation monitoring is an important undertaking, both from a public health perspective and as a way to monitor things like weapon development. So why is it done, how is it done, and what role can concerned citizens play in keeping an eye on things?

Continue reading “Global Radiation Montoring And Tracking Nuclear Disasters At Home”

A Solar-Powered Box Of Sensors To Last 100 Years

It’s a simple goal: build a waterproof box full of environmental sensors that can run continuously for the next century. OK, so maybe it’s not exactly “simple”. But whatever you want to call this epic quest to study and record the planet we call home, [sciencedude1990] has decided to make his mission part of the 2019 Hackaday Prize.

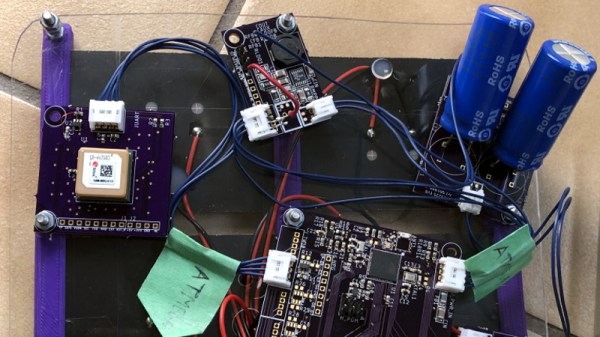
The end goal might be pretty lofty, but we think you’ll agree that the implementation keeps the complexity down to a minimum. Which is important if these solar-powered sensor nodes are to have any chance of going the distance. A number of design decisions have been made with longevity in mind, such as replacing lithium ion batteries that are only good for a few hundred recharge cycles with supercapacitors which should add a handful of zeros to that number.

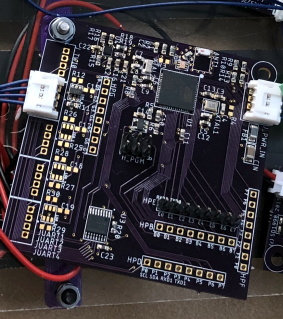
At the most basic level, each node in the system consists of photovoltaic panels, the supercapacitors, and a “motherboard” based on the ATmega256RFR2. This single-chip solution provides not only an AVR microcontroller with ample processing power for the task at hand, but an integrated 2.4 GHz radio for uploading data to a local base station. [sciencedude1990] has added a LSM303 accelerometer and magnetometer to the board, but the real functionality comes from external “accessory” boards.

Along the side of the main board there’s a row of ports for external sensors, each connected to the ATmega through a UART multiplexer. To help control energy consumption, each external sensor has its own dedicated load switch; the firmware doesn’t power up the external sensors until they’re needed, and even then, only if there’s enough power in the supercapacitors to do so safely. Right now [sciencedude1990] only has a GPS module designed to plug into the main board, but we’re very interested in seeing what else he (and perhaps even the community) comes up with.