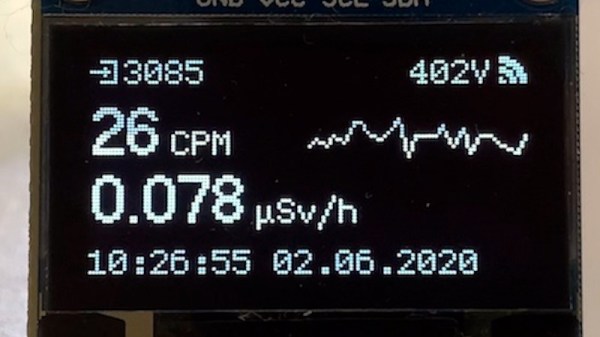
On a typical microcontroller project we may only have access to a relatively tiny screen. Information display can be a challenge, but it’s one that may be made easier by [0xPIT]’s ESParklines library for Espressif processors using the Arduino framework.
A sparkline is a simple line graph without annotations (like axes or units) intended to fit within the flow of text. They’re largely associated today with the statistician Edward Tufte, and if you’ve not encountered them or Tufte before then we suggest you’ll enjoy educating yourself.
It’s a simple enough library and it comes with example code. Usefully it maintains a data buffer all of its own allowing simple updating, and as well as the examples there is a YouTube video we’ve put below the fold showing graphs evolving as more information is added to them. We’re curious about one thing though, it’s billed as an ESP library, for either the ESP8266 or the ESP32, but we can’t find any ESP-specific code in there and neither could our friendly ESP-guru. Have we missed something? The comments are below if you can shed any light.
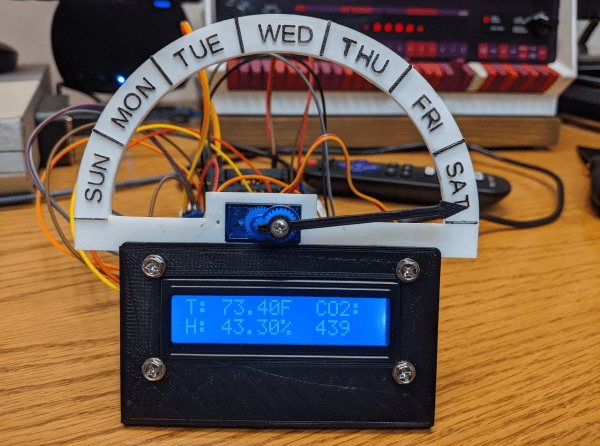
As the world settles into this pandemic, some things are still difficult to mentally reckon, such as the day of the week. We featured a printed day clock a few months ago that used a large pointer to provide this basic psyche-grounding information. In the years since then, [Jeff Thieleke] whipped up a feature-rich remix that adds indoor air quality readings and a lot more.
Like [phreakmonkey]’s original day tripper, an ESP32 takes care of figuring out what day it is and moves a 9 g servo accordingly. [Jeff] wanted a little more visual action, so the pointer moves a tad bit every hour. A temperature/humidity sensor and a separate CO₂ sensor output their readings to an LCD screen mounted under the pointer. Since [Jeff] is keeping this across the basement workshop from the bench, the data is also available from a web server running on the ESP32 via XML and JSON, and the day clock can get OTA updates.
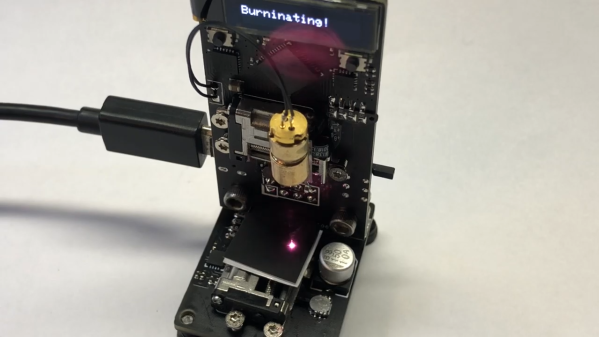
The influx of cheap laser cutters from China has been a boon to the maker movement, if at the cost of a lot of tinkering to just get the thing to work. So some people just prefer to roll their own, figuring that starting from scratch means you get exactly what you want. And apparently what [Mike Rankin] wanted was a really, really small laser cutter.
The ESP32 Burninator, as [Mike] lovingly calls his creation, is small enough to be in danger of being misplaced accidentally. The stage relies on tiny stepper-actuated linear drives, available on the cheap from AliExpress. The entire mechanical structure is two PCBs — a vertical piece that holds the ESP32, an OLED display, the X-axis motor, and the driver for the laser, which comes from an old DVD burner; a smaller bottom board holds the Y-axis and the stage. “Stage” is actually a rather grand term for the postage-stamp-sized working area of this cutter, but the video below shows that it does indeed cut black paper.
The cuts are a bit wonky, but this is surely to be expected given the running gear, and we like it regardless. It sort of reminds us of that resin 3D-printer small enough to fit in a Christmas ornament that [Sean Hodgins] did a while back. We’d suggest not trying to hang this on a tree, though.
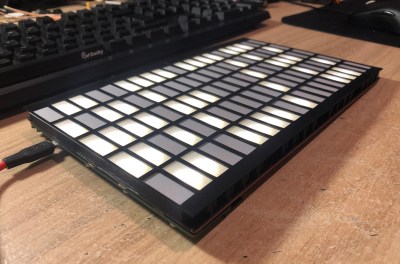
It all started when [Damien Walsh] got his hands on some surplus LED boards. Each panel contained 100 mini-PCBs hosting a single bright LED that were meant to be to be snapped apart as needed. [Damien] had a much better idea: leave them in their 20×5 array and design a driver allowing each LED to be controlled over WiFi. He was successful (a brief demo video is embedded down below after the break) and had a few interesting tips to share about the process of making it from scratch.
The first hurdle he ran into was something most of us can relate to; it’s difficult to research something when one doesn’t know the correct terms. In [Damien]’s case, his searches led him to a cornucopia of LED drivers intended to be used for room lighting or backlights. These devices make a large array of smaller LEDs act like a single larger light source, but he wanted to be able to individually address each LED.
Eventually he came across the IS32FL3738 6×8 Dot Matrix LED Driver IC from ISSI which hit all the right bases. Three of these would be enough to control the 100-LED panel; it offered I2C control and even had the ability to synchronize the PWM of the LEDs across multiple chips, so there would be no mismatched flicker between LEDs on different drivers. As for micontroller and WiFi connectivity, we all have our favorites and [Damien] is a big fan of Espressif’s ESP32 series, and used the ESP32-WROOM to head it all up.
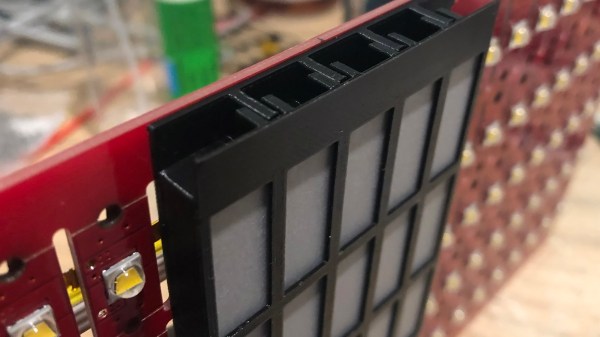
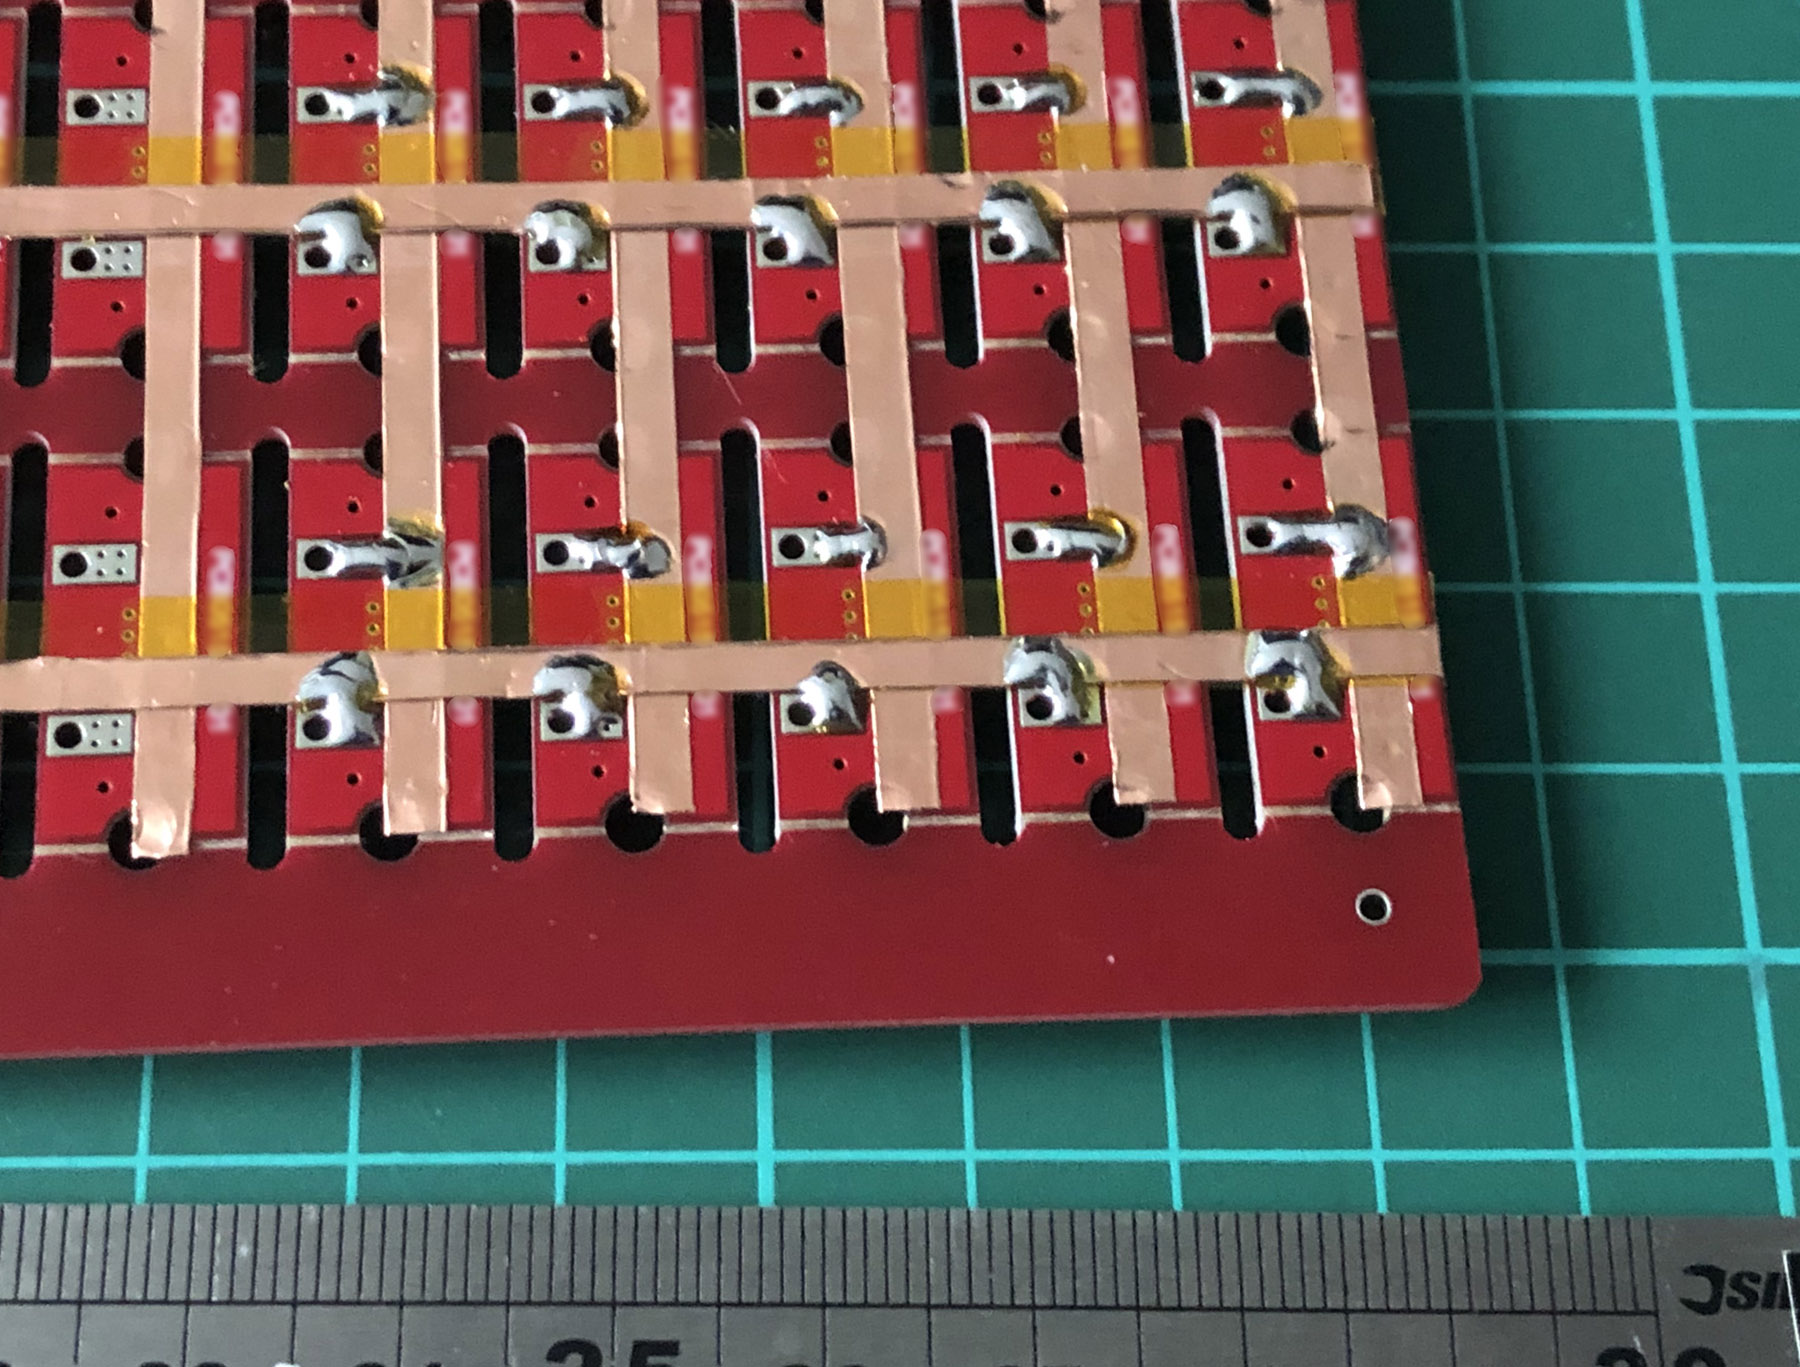
LED pads bridged to copper tape, with Kapton (polyimide) tape insulating any crossovers.
The other issue that needed attention was wiring. Each of the LEDs is on its own little PCB with handy exposed soldering pads, but soldering up 100 LEDs is the kind of job where a little planning goes a long way. [Damien] settled on a clever system of using strips of copper tape, insulated by Kapton (a super handy material with a sadly tragic history.) One tip [Damien] has for soldering to copper tape: make sure to have a fume extractor fan running because it’s a much smokier process than soldering to wires.
A 3D-printed baffle using tracing paper to diffuse the light rounds out the device, yielding a 20 x 5 matrix of individually-controlled rectangles that light up smoothly and evenly. The end result looks fantastic, and you can see it in action in the short video embedded below.
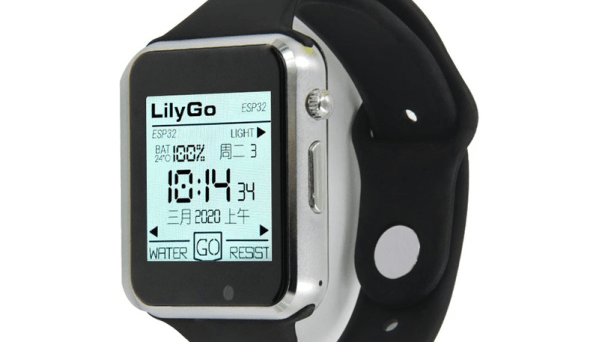
What could you do with a dual-core 240 MHz ESP32 that supports Arduino-style programming, with 16 MB of flash, 8 MB of PSRAM, and 520 k of RAM? Oh, let’s throw in a touchscreen, an accelerometer, Wifi, and Bluetooth. Besides that, it fits on your wrist and can show the time? That’s the proposition behind Lilygo T Watch 2020. If it sounds like a smartwatch, it is. At around $25 –and you can snag the hardware from a few different places — it is not only cheaper than the latest flagship smartwatch, but it is also infinitely more hackable.
OK, so the screen is only 1.54″, but then again, it is a watch. If Arduino isn’t your thing, you can use anything else that supports the ESP32 like Micropython or even Scratch. There are variants that have LoRA and GPS, at slightly higher prices. You can also find ones with heart rate monitors and other features.
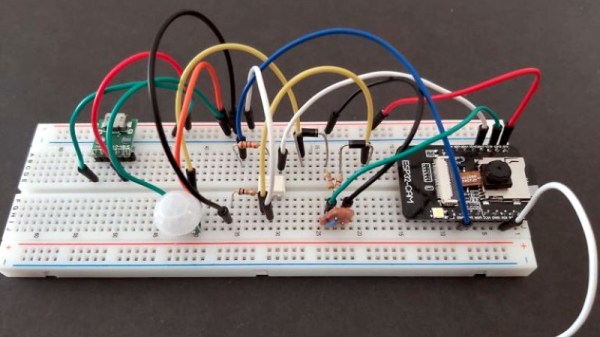
There’s no shortage of things to like about the ESP8266 and ESP32, but if we had to make a list of the best features these WiFi-enabled microcontrollers have to offer, their power management capabilities would certainly be near the top. Which is how we assumed [Mark] was able to take a whopping 23,475 pictures on his ESP32 camera while powered by nothing more exotic than four AA batteries from the grocery store.
But as it turns out, the full story is quite a bit more interesting. As far as we can tell, [Mark] isn’t bothering with the ESP32’s sleep modes all. In fact, it looks like you could pull this trick off with whatever chip you wanted, which certainly makes it worth mentally filing away for the future; even if it depends on a fairly specific use case.
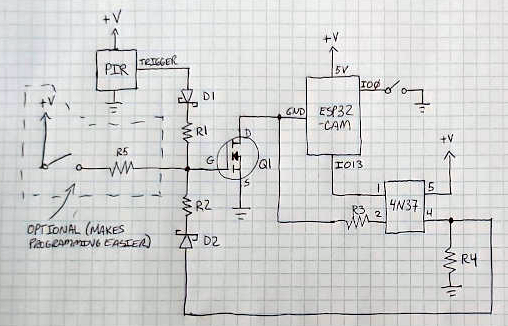
In the most simplistic of terms, [Mark] is cutting power to the ESP32 completely when it’s not actively taking pictures. The clever circuit he’s come up with only turns on the microcontroller when a PIR sensor detects something moving around in front of the camera. Once the chip is powered up and running code, it brings one of its GPIO pins high which in turn triggers a 4N37 optoisolator connected to the gate on the circuit’s MOSFET. As long as the pin remains high, the circuit won’t cut power to the ESP32. This gives the chip time to take the requested number of pictures and get everything in order before bringing the pin low and allowing the circuit to pull the plug.
Laundry. It’s one of life’s inescapable cycles, but at least we have machines now. The downside of this innovation is that since we no longer monitor every step — the rock-beating, the river-rinsing, the line-hanging and -retrieving — the pain of laundry has evolved into the monotony of monitoring the robots’ work.
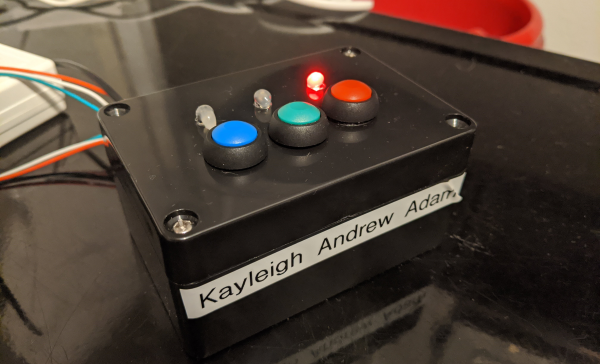
Each machine has a little Hall effect-sensing module that’s carefully zip-tied around its power cable. The signal from these three-wire boards goes high when the machine is running and low when it’s not. At the beginning of the load, the launderer simply presses their assigned button on the control box, and the ESP32 inside takes care of the rest.
Getting a text when your drawers are clean is about as private as it gets. Clean underwear, don’t care? Put it on a scrolling marquee.