LED Clock Strips Time Down To Pulses Of Light

Nietzsche said (essentially) that time is a flat circle — we are doomed to repeat history whether we remember it or not. This is a stark and sobering thought for sure, but it’s bound to dissipate the longer you look at [andrei.erdei]’s literal realization of time as a flat circle.

A clock that uses nothing but RGB LEDs to give the time sounds confusing and potentially cluttered, but the result here is quite pleasing and serene. We figure it must be the combination of brighter LEDs to represent 12, 3, 6, and 9, and dimmer LEDs for the rest of the numbers, plus the diffusion scheme. The front plate is smoky acrylic topped with two layers of frosted black window foil.

Inside the printed plastic ring are two adhesive RGB LED strips running on an ESP8266 that ultimately connects to an NTP time server. The strips are two halves of an adhesive 60 LED/meter run that have been stuck together back to back so that the lights are staggered for seamless coverage. This sets up the coolest thing about this clock — the second hand, which is represented by a single pink LED zig-zagging back and forth around the ring. Confused? Watch the short demo after the break and you’ll figure it out in no time.

Now that times are strange, you might be more interested in a straightforward approach to finding out what day it is. The wait is over.

Continue reading “LED Clock Strips Time Down To Pulses Of Light”

Edge-Lit 7-Segments Clock The New Normal

People keep saying that time has lost all meaning now, but we’re still over here divvying up the days with hacks. Most of the hacks you see here are open source. But if you want something even more transparent to meter out the meaninglessness, we invite you to make one of these clearly awesome see-through clocks, which happens to be both.

A word of warning though — according to [GeekMomProjects], this is an incredibly fiddly build with tight tolerances everywhere that acrylic meets acrylic or an LED strip. We can see how it might be like forcing fragile puzzle pieces together. Since the whole thing is crystal clear acrylic, light is going to go everywhere.

[GeekMomProjects] cleverly blocked the escaping light by painstakingly applying non-conductive adhesive foil to the edges of all the smaller pieces. In spite of all that work, we think it would be worth it to have such a fantastic timepiece glowing away the hours somewhere in the house.

Electronically speaking, this beauty is pretty simple. The lights run off of an ItsyBitsy M4 Express, and the time is separately fetched with an ESP8266. [GeekMomProjects] had so much fun that she made one with seconds and one without. Check out their RGB dance routine after the break.

If you prefer your blinky 7-segment clocks a bit more utilitarian, here’s a clock made of shelves.

Continue reading “Edge-Lit 7-Segments Clock The New Normal”

Table Tennis Ball Lamp Serves Up Style

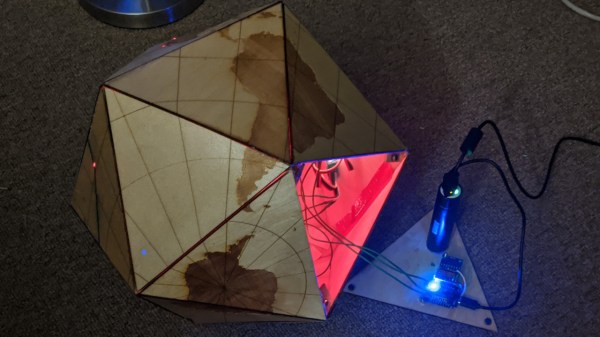
Although RGB LEDs diffused by ping pong balls will probably never stop being cool, [thomasj152] feels that flat panels of balls have become a bit of a tired concept. After a lot of effort and two complete builds, he has spun up an 80-ball spherical lamp. The results are positively glowing!

All the balls are connected together with some clever 3D printed pieces that were inspired by the classic soccer ball layout of hexagons and pentagons. [thomasj152] chose this shape because it’s fairly easy to code animation sequences for it.

The design also breaks down nicely into two halves, which makes it easier to wire. All 80 of the balls are controlled with a single NodeMCU ESP8266 development board.

This stranded version is the second lamp [thomasj152] built. The first one used the same soccer ball style, but had RGB LED strips instead, and the balls were wrangled with laser-cut support pieces. Strips lay much flatter than strands do, leaving the inside tidy and spacious. Unfortunately, the LED strips got fried accidentally, which is extra sad because the strips version looks like way more work.

The bright spot here is that [thomasj152] can now provide instructions for both versions. He even has code that cycles through each pentagon and hexagon section, lighting them up one at a time for testing and sanity checks. Roll past the break for a walk-through video that shows both versions and explains the differences.

Got a bunch of wall space begging for blinkenlights? Apparently it’s possible to throw together a working 300-ball video wall in less than 24 hours. Who knew?

Continue reading “Table Tennis Ball Lamp Serves Up Style”

What Day Is It?

With much of the world staying at home at the moment, keeping track of our sanity and the day of the week is a bit of a challenge, especially without the normal daily routine to hold onto. To help with one of these problems, [phreakmonkey] has built a Day Clock. As the name suggests, it’s only purpose is to show what day of the week it is.

Avery simple device, the two main components are a servo and a Wemos D1 Mini, the popular ESP8266-based dev board. Using the NTPtimeESP library, it gets day of the week from the internet, and moves the servo to indicate the current day on a 3D printed face. Most readers should be able to whip one up in an hour or two, which can help keep sane in these interesting times.

For another Corona clock, check out [Elliot Williams]’ version that helps with keeping domestic peace. If you want to do something to combat the spread of the current epidemic, you can build a few face shields, make your idle computer available for Folding@Home or sew a few masks. Every bit helps.

ESP8266 And Sensors Make For A Brainy NERF Ball

For his final project in UCLA’s Physics 4AL program, [Timothy Kanarsky] used a NodeMCU to smarten up a carefully dissected NERF football. With the addition to dual MPU6050 digital accelerometers and some math, the ball can calculate things like the distance traveled and angular velocity. With a 9 V alkaline battery and a voltage regulator board along for the ride it seems like a lot of weight to toss around; but of course nobody on the Hackaday payroll has thrown a ball in quite some time, so we’re probably not the best judge of such things.

Even if you’re not particularly interested in refining your throw, there’s a lot of fascinating science going on in this project; complete with fancy-looking equations to make you remember just how poorly you did back in math class.

As [Timothy] explains in the write-up, the math used to find velocity and distance traveled with just two accelerometers is not unlike the sort of dead-reckoning used in intercontinental ballistic missiles (ICBMs). Since we’ve already seen model rockets with their own silos, seems all the pieces are falling into place.

The NodeMCU polls the accelerometers every 5 milliseconds, and displays the data on web page complete with scrolling graphs of acceleration and angular velocity. When the button on the rear of the ball is pressed, the data is instead saved to basic Comma Separated Values (CSV) file that’s served up to clients with a minimal FTP server. We might not know much about sportsball, but we definitely like the idea of a file server we can throw at people.

Interestingly, this isn’t the first time we’ve seen an instrumented football. Back in 2011 it took some pretty elaborate hardware to pull this sort of thing off, and it’s fascinating to see how far the state-of-the-art has progressed.

Motorized LEGO Train Gets Qi Charging In The Track

This project started, as many do, with a simple idea. [Ben Hoad] just wanted to take a static LEGO Hogwarts Express train kit and make it motorized. It was compatible with standard LEGO track pieces, so all he should have to do was figure out how to shoehorn a motor in there and be done with it. Right?

Well, you already know how things like this go. It started with adding the motor, which ended up being relatively straightforward once [Ben] used some community LEGO CAD tools to figure out which kits had the specific parts he needed to redesign the train in such a way that he’d have enough space inside for the motor without ruining the way it looked. But then the feature creep kicked in, and he found himself falling down that familiar rabbit hole.

A 3D representation of the train’s internal components.

The first problem was how to reliably power the train. It turns out the rear car was more or less empty already, so that became home for two 18650 batteries (the project details say “16850” but we believe that is merely a typo). [Ben] didn’t want to have to take the thing apart every time it ran down, so he wondered if it would be possible to add wireless charging.

A Qi coil in the bottom of the train car and one in a specially designed section of track got the power flowing, but getting them lined up proved a bit finicky. So he added a Hall effect sensor to the car and a strong magnet to the track, so the train would know when the coils were lined up and automatically pump the brakes.

So now he had a motorized train that could recharge itself, but how should he turn it on and off? Well, with an ESP8266 along for the ride, he figured it would be easy to add WiFi control. With a bit of code and the Homebridge project, he was able to get the train to appear as a smart switch to Apple’s HomeKit. That allows him to start and stop the train from his smartphone, complete with a routine that returns the train to the charging station once it’s finished making the rounds. [Ben] says the next steps are to put some sanity checks in, such as shutting the motors down if the train hasn’t passed the charging station in a few minutes; a sure sign that it’s not actually moving.

All [Ben] needs to do now is implement automatic LEGO train decoupling before the plastic Hogwarts students come back from spring break.

Keep The Family At Bay While Working From Home With This WiFi Do Not Disturb Dongle

Those who have been suddenly introduced to the wonderful world of working from home over the last couple of weeks may have experienced a bit of culture shock. Even with today’s open floorplan workspaces and less-formal expectations, work isn’t home. That’s especially true with young children in the house, who’ll probably respond to seeing mommy or daddy working from home much differently than [Bob] from accounting would at the office.

To smooth out the rough spots of transitioning to a full-time work-from-home setup, [Brian Lough] threw together this web-enabled “do not disturb” beacon for his office door. The original idea was to simply provide a red light and a green light to let the rest of the family know when [Brian] would be in a meeting, but in an example of scope creep that turned out to be useful, [Mrs. Lough] rewrote the spec to include a button on the family-facing side so that she could alert him that his presence is requested.

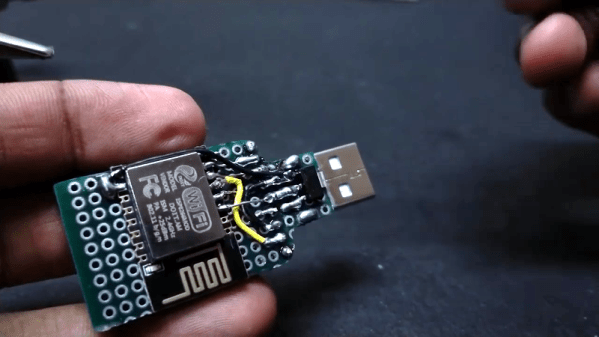
[Brian] went through a couple of prototype using both an ESP32 and an ESP8266. We were rooting for the ESP32, which [Brian] was leveraging for its built-in capacitive touch input. That would have eliminated a physical button, but alas, the ESP8266 made it into the final build, along with lots and lots of Blu-Tack. The video below details the build and the code, and features an adorable Irish lesson as a bonus.

Yes, a simple text message would probably have satisfied the specs, but where’s the sport in that? Then again, as [Brian] points out, this build seemed oddly familiar for a good reason.

Continue reading “Keep The Family At Bay While Working From Home With This WiFi Do Not Disturb Dongle”