Really Big Digital Clock Finds Use For Really Big 3D Printer

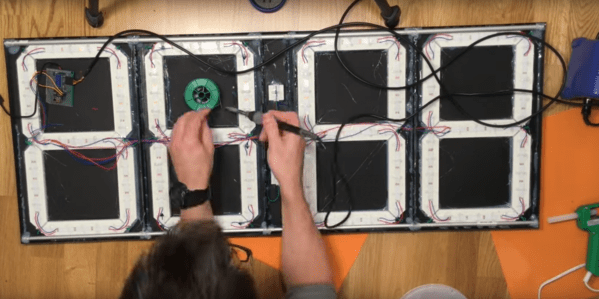
What does it take to make a really big digital clock? If [Ivan Miranda]’s creation is any gauge, it takes a really big 3D printer, an armful of Neopixel strips, and a ton of hot melt glue.

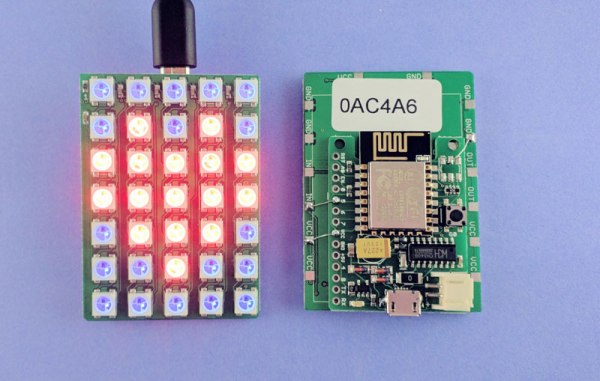
It looks like [Ivan]’s plus-size clock is mainly an exercise for his recently completed large-bed custom 3D printer, in itself a project worth checking out. But it’s a pretty ambitious project, and one that has some possibilities for enhancements. Each of the four seven-segment displays was printed separately, with a black background, translucent white for the segments, and recesses for five RGB LEDs each. The four digits and colon spacer are mated together into one display, and an ESP8266 fetches the time from a NIST server and drives the segments. What’s really interesting about [Ivan]’s projects is that he constrains himself to finishing them each in a week. That explains the copious amount of hot glue he uses, and leaves room for improvements. We’d love to see this display built into a nice walnut case with a giant red diffusing lens. Even as it stands it certainly makes a statement.

We’ve featured other outsized seven-segment displays before, but few as big as this one.

Continue reading “Really Big Digital Clock Finds Use For Really Big 3D Printer”

Web Matrix Control Proves Power Of ESP8266

LED matrix projects are all over the place, but this one is interesting for its simplicity: it’s an LED matrix that is driven straight from an ESP8266 board. [Ray] put it together as a quick project for his students to teach the basics of LED programming.

It’s built using a WS2812 LED matrix board he designed himself and his own ESPToy ESP8266 dev board. But the gist of the hardware is simply an ESP8266 and some WS2812’s. Where this gets interesting is with the user interaction side of things. The ESP makes WiFi and web serving easy, and [Ray] has build a simple HTTP GET API into the firmware. This is a great combination for the web dashboard and JavaScript-based animation programs [Ray] is demonstrating in the video below.

Just get on the same network and load up the module’s WiFi address for a graphical representation of the 5×7 LED matrix. Pick a color, turn pixels on or off, or choose a predefined pattern and send it to the hardware. This is a powerful way to get use input and with this as a guide it’s fast to set up for pretty much an application you can think of. Just work your way through the documents he put together for the workshop (Zip file link), including all of the code and the slides he used to run the workshop.

Continue reading “Web Matrix Control Proves Power Of ESP8266”

WarWalking With The ESP8266

[Steve] needed a tool to diagnose and fix his friend’s and family’s WiFi. A laptop would do, but WiFi modules and tiny OLED displays are cheap now. His solution was to build a War Walker, a tiny handheld device that would listen in WiFi access points, return the signal strength, and monitor the 2.4GHz environment around him.

The War Walker didn’t appear out of a vacuum. It’s based on the WarCollar Dope Scope, a tiny, portable device consisting of an off-the-shelf Chinese OLED display, an ESP8266 module, and a PCB that can charge batteries, provide a serial port, and ties the whole thing together with jellybean glue. The Dope Scope is a capable device, but it’s marketed towards the 1337 utilikilt-wearing, The Prodigy-blasting pentesters of the world. It is, therefore, a ripoff. [Steve] can build his version for $6 in materials.

The core of the build is an ESP-based carrier board built for NodeMCU. This board is available for $3.77 in quantity one, with free shipping. A $2 SPI OLED display is the user interface, and the rest of the circuit is just some perfboard and a few wires.

The software is based on platformio, and dumps all the WiFi info you could want over the serial port or displays it right on the OLED. It’s a brilliantly simple device for War Walking, and the addition of a small LiPo makes this a much better value than the same circuit with a larger pricetag.

Running LISP On An ESP8266

LISP is a polarizing language. Either you love it or you hate it. But we’ll put aside our personal preferences to bring you a good hack. In this case a LISP environment running on an ESP8266. [Dmitry] is on the “love it” side of the fence — he’s been waiting for an excuse to code up a LISP interpreter for a while, and he found one in the ESP8266.

there-is-always-a-way-2Actually, [Dmitry] is running LISP inside JavaScript, which is itself presumably coded up in C, before it’s assembled to run on an ESP8266. (It’s turtles all the way down!) This means that he can piggy-back on JavaScript’s garbage collection and console handling and so on. After picking a suitably small LISP implementation (actually a Scheme dialect for those of you who know the difference), he went to work.

One weekend bled into the next, but he got the system running, connected to the network, and had LEDs blinking! In the end, he even managed to squeeze in some optimization for memory’s sake. Pretty cool, and because it takes advantage of an already complete system, it can even be made pretty useful. Not bad for a few weekends’ work!

And finally, if Lots of Irritating Silly Parentheses is your idea of a good time, but the wealth of computing resources available on an ESP8266 seem overkill, have a look at Microlisp, running on an AVR. Or go to the opposite extreme, and run a LISP OS on a Raspberry Pi. Whatever you do, don’t forget to close your parentheses! (We’re told that’s a traditional LISPer farewell.)

64×16 LED MQTT Laundry Display

When you have an MQTT broker receiving messages, you want to be able to see them. [Xose Pérez] already had a system set up that sent him notifications, but he had a pair of 32×16 LED matrices, so he decided to make a big, bright sign to let him know when he got an important message sent to the broker.

[Xose Pérez] had already built a laundry monitor which was sending messages to an MQTT broker so he wouldn’t forget his laundry sitting in the washing machine. To communicate with the broker, he used an ESP-12. He had already ported an Arduino library for the Holtek HT1362C display drivers used by the matrices to work with his driver board.

mqtt-led-matrix-driver-board
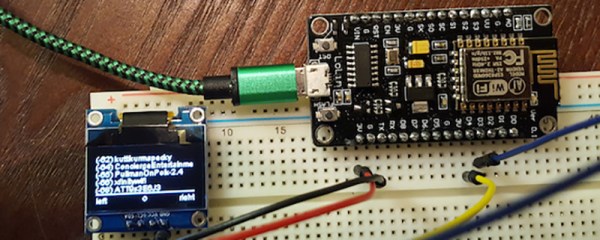
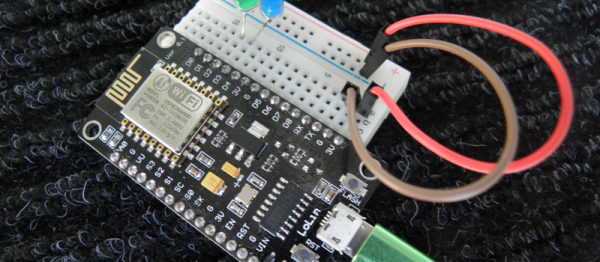
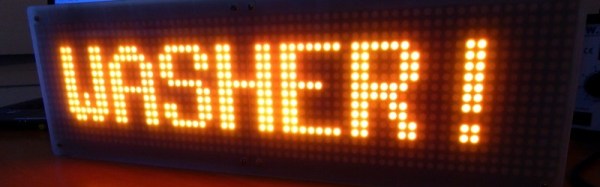
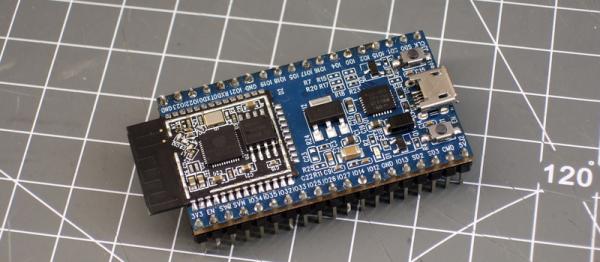
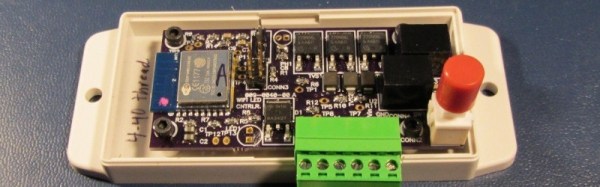
He wanted to try out SMD soldering so he built a custom PCB to hold the ESP-12, power supply, passive components, and a connector and he describes his methods and results. Instead of hardcoded messages, he wanted the system to be configurable and display messages coming in, not only from his laundry system, but also from other sensors. A web interface, built with jQuery and WebSockets, running on the ESP-12 allows the user to subscribe to a topic on the broker and show a customized name and value on the display when a payload is available.

All-in-all, [Xose Pérez] has posted a great tutorial in which he goes over the hardware he built, the libraries he used, SMD soldering, how he made the enclosure, and even his choice in IDE (PlatformIO). He also posted the software, board designs and enclosure models software and hardware on bitbucket. The end result is a great looking LED matrix that displays not only his laundry’s status, but also anything else he wants to from his MQTT broker.

If you want to try your hand with MQTT, the ESP8266 is a wonderful device for sensor nodes, and any Linux box (like the Raspberry Pi) makes an easy broker. Check out [Elliot Williams’] Minimal MQTT series and you will be up and running in no time.

How To Get Started With The ESP32

ESP32 is the hottest new wireless chip out there, offering both WiFi and Bluetooth Low Energy radios rolled up with a dual-core 32-bit processor and packed with peripherals of every kind. We got some review sample dev boards, Adafruit and Seeed Studio had them in stock for a while, and AI-Thinker — the company that makes the most popular ESP8266 modules — is starting up full-scale production on October 1st. This means that some of you have the new hotness in your hands right now, and the rest of you aren’t going to have to wait more than a few more weeks.

As we said in our first-look review of the new chip, many things are in a state of flux on the software side, but the basic process of writing, compiling, and flashing code to the chip is going to remain stable. It’s time to start up some tutorials!

Continue reading “How To Get Started With The ESP32”

Hackaday Prize Entry: Under Cabinet LED Lighting Controller

[Matt Meerian]’s workbench seems to be in perpetual shadow, so he has become adept at mounting LED strips under all his shelves and cabinets. These solve any problems involving finding things in the gloom, but present a new problem in that he risks a lot of LED strips being left on, and going round turning them all off is tedious.

His solution is to make a wireless controller for all his home LED strips, under the command of a web app from his Android tablet. An ESP8266 and a set of MOSFETs provide the inner workings, and the whole is presented on a very compact and well-designed purple OSH Park PCB reflow soldered on a $20 Wal-Mart hotplate and set in a plastic enclosure. The web interface is still in development, but has a fairly simple CSS front end for the ESP8266 code. All software, the schematic, and BoM can be downloaded from the Hackaday.io page linked above.

This project isn’t going to end world hunger or stop wars, but it’s beautifully done and well documented, and it makes [Matt]’s life a lot easier. And that makes it a good entry for the Hackaday Prize.