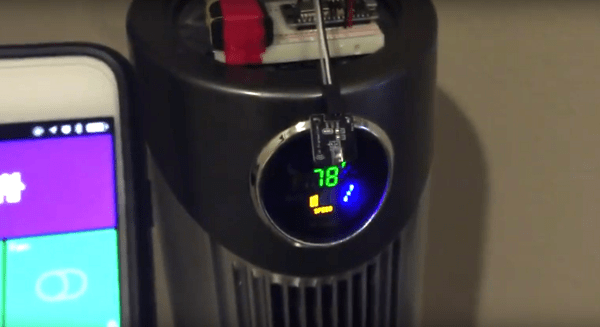
Minimal MQTT: Building A Broker

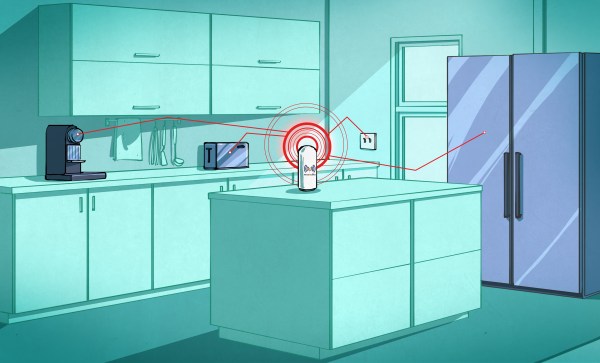
In this short series, we’re going to get you set up with a completely DIY home automation system using MQTT. Why? Because it’s just about the easiest thing under the sun, and it’s something that many of you out there will be able to do with material on-hand: a Raspberry Pi as a server and an ESP8266 node as a sensor client. Expanding out to something more complicated is left as an exercise to the motivated reader, or can be simply left to mission creep.

We’ll do this in four baby steps. Each one should take you only fifteen minutes and is completely self-contained. There’s a bunch more that you can learn and explore, but we’re going to get you a taste of the power with the absolute minimal hassle.

In this installment, we’re going to build a broker on a Raspberry Pi, which is the hub of your MQTT network. Next time, we’ll get an ESP8266 up and running and start logging some data. After that, we’ll do some back-end scripting in Python to make the data speak, and in the last installment, we’ll explore some of the useful frills and fancy bits. Let’s get started!

Continue reading “Minimal MQTT: Building A Broker”

Thinking Of You: IoT Style

Do you have loved ones who live far away? Or do you just want an interesting starter ESP8266 project to get your feet wet? If the answer to either of these questions is “yes”, we’ve got just the project for you. [Craig Lindley] built a “thinking of you” button-and-LED display device that helps people keep in touch, in a very simple way.

We like the minimalism of the design. One party presses their button, electrons flow, WiFis WiFi, data travels through a set of tubes, and an LED far away glows a pre-arranged color. The other side can signal back to say “hi” as well. It’s a cute item to have on your desk, or wherever you spend the most time. If you’re new to all of this, you can hardly beat the circuit for its simplicity.

Yeah, you could totally just send the other person a text message or an e-mail. But then you don’t get an excuse to play around with NodeMCU, and it just lacks the personal hacker touch. The code is available in a zip file here, and if you want to stay in touch with someone other than [Craig]’s sisters, you’ll probably want to customize it a bit.

Fail Of The Week: ESP8266 Heats Temperature Sensor

[Richard Hawthorn] sent us in this interesting fail, complete with an attempted (and yet failed) clever solution. We love learning through other people’s mistakes, so we’re passing it on to you.

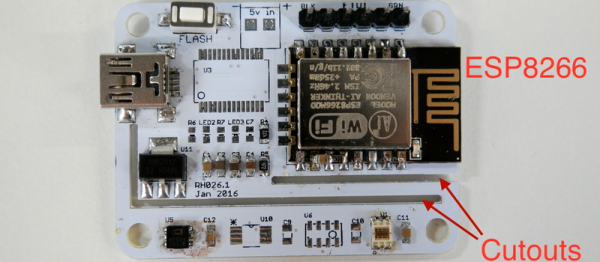
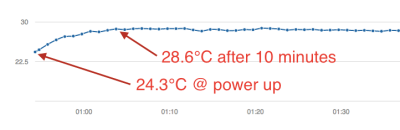
First the obvious-in-retrospect fail. [Richard] built a board with a temperature sensor and an ESP8266 module to report the temperature to the Interwebs. If you’ve ever put your finger on an ESP8266 module when it’s really working, you’ll know what went wrong here: the ESP8266 heated up the board and gave a high reading on the temperature sensor.

temp2Next came the clever bit. [Richard] put cutouts into the board to hopefully stop the flow of heat from the ESP8266 module to the temperature sensor. Again, he found that the board heats up by around four degrees Celcius or nine degrees Farenheit. That’s a horrible result in any units.

What to do? [Richard’s] first ideas are to keep hammering on the thermal isolation, by maybe redoing the board again or adding a heatsink. Maybe a daughterboard for the thermal sensor? We can’t see the board design in enough detail, but we suspect that a flood ground plane may be partly to blame. Try running thin traces only to the temperature section?

[Richard]’s third suggestion is to put the ESP into sleep mode between updates to reduce waste heat and power consumption. He should be doing this anyway, in our opinion, and if it prevents scrapping the boards, so much the better. “Fix it in software!” is the hardware guy’s motto.

But we’ll put the question to you electronics-design backseat drivers loyal Hackaday readers. Have you ever noticed this effect with board-mounted temperature sensors? How did you / would you get around it?


2013-09-05-Hackaday-Fail-tips-tileFail of the Week is a Hackaday column which celebrates failure as a learning tool. Help keep the fun rolling by writing about your own failures and sending us a link to the story — or sending in links to fail write ups you find in your Internet travels.
What’s The Weather Like For The Next Six Hours?

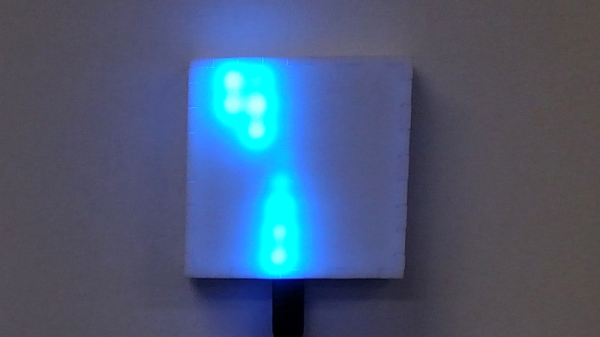
The magic glowing orb that tells the future has been a popular thing to make ever since we realized we had the technology to bring it out of the fortune teller’s tent. We really like [jarek319]’s interpretation of the concept.

Sitting mystically above his umbrella stand, with a single black cord providing the needed pixies for fortune telling, a white cube plays an animation simulating the weather outside for the next six hours. If he sees falling drops, he knows to grab an umbrella before leaving the house. If he sees a thunderstorm, he knows to get the umbrella with the fiberglass core in order to prevent an intimate repeat of Mr. Franklin’s early work.
Continue reading “What’s The Weather Like For The Next Six Hours?”

Not Even Hamsters Are Safe From The Internet Of Things

The internet of things is this strange marketing buzzword that seems to escape from the aether and infect our toasters and refrigerators. Now even a hamster is not safe.

[Mifulapirus]’s hamster, Ham, was living a pleasant hamster life. Then his owner heard about another hamster named Sushi, whose running wheel stats were broadcasted to the internet. Not to be left behind, Ham’s wheel was soon upgraded. Now Ham is burdened by the same social pressures our exercise apps try to encourage us to use. No, we are most certainly not going to tell our friends about two fourteen minute miles with a twenty minute coffee break in the middle, MapMyRun, we are not.

The feat of techno enslavement for the little hamster was accomplished with a custom board, an esp8266, and an arduino as described in the instructable. The arduino can be left out of the project now that the libraries have been ported to the esp8266. A hall effect sensor detects when the 3D printed hamster wheel is spinning.

If you’d like to check in on Ham, the little guy is alive and well, and the twitter is here. It looks like it’s been upgraded since the original article was posted. Now it shows when Ham is awake and running around the cage doing hamster errands.

Minimal 433 MHz Web Home Automation

How minimal can a decent home automation setup be? If you need an HTML frontend, you’re going to need a webserver. An ESP8266 will do the trick. And then you need to be able to control your electronics. The cheapest and easiest way to do that is with the ubiquitous 433 MHz remote-controlled outlets and a $1 radio unit from an online auction site. Add in a cheap ESP8266 module, and your total outlay is going to be under $20.

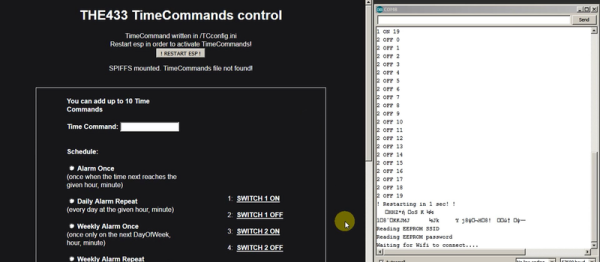
That’s exactly what [Nikos Kantarakias] did. He combined a bunch of available ESP8266 Arduino libraries — one for driving the 433 MHz radio modules, [Paul Stoffregen]’s libraries for keeping time and for setting alarms, and another for keeping track of time zones — with some of his own code for setting up WiFi access, and it’s done.

It’s all available on GitHub for your perusal. The code does some strange things — like requiring a complete reboot every time you set an alarm — but it does let you set recurring and one-off activations of the attached devices with a web interface that’s served off the ESP8266 itself. If you want your coffee machine to turn itself on in the mornings, and want a system that’s easy for the other inhabitants of your house to configure, something like this might be just the ticket.

But if you’re looking for a project on the other end of the ESP-tech spectrum, [CNLohr] wrote a standalone Ethernet controller for the thing. Woah.

1btn – An Open Source Dash

The availability of cheap radios, omni-present WiFi and powerful web services means the IoT wave is here to stay. Amazon got into the act with its “do only one thing” Dash button. But a more interesting solution would be an IoT “do it all” button.

[Anand] has been working on his 1btn Open Source WiFi connected IoT button for a while. It connects to the Internet over WiFi to trigger whatever action you have assigned to it using a simple, online interface. It’s reconfigurable and open source. Which means it can be used in pretty imaginative ways, and if needed, can be re-flashed with your own custom firmware should you decide to really get under its hood.

The 1btn’s ESP8266 module is usually in sleep mode, waking up when the button is pressed, making the connection, performing the task and then going back to sleep once confirmation is received. A Red/Green LED indicates if the action was successful or not. You can set it up to send e-mails, messages, tweets or perform actions via a custom script, API or the IFTTT – maker channel. To make it hacker friendly, all of the ESP8266 GPIO pins are accessible via headers. This makes it convenient to add external sensors, for example. There’s also a (unpopulated) QFN footprint to allow adding an ATmega device (168P/328P) whose GPIO pins are also accessible via headers. This opens up a large number of additional applications for the device such as home automation.

On the software side, the 1btn connects to a web console, where you can set up an account, configure the device, register its MAC ID, assign it an alias and set up its actions. All of the source files for the 1btn – firmware, enclosure, schematic, BOM, PCB layout and example use cases – are posted on his Github repository.

The HackadayPrize2016 is Sponsored by: