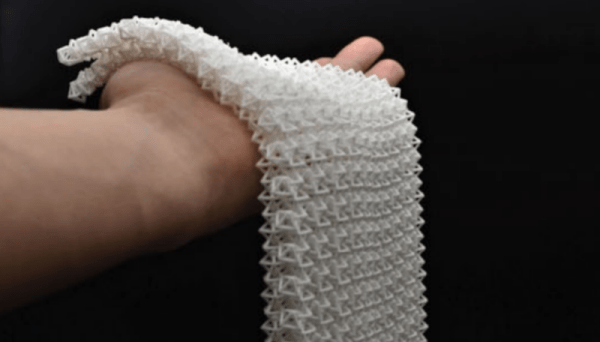
Researchers in Singapore and at CalTech have developed a 3D printed fabric with an interesting property: it is generally flexible but can stiffen on demand. You can see a video about the new fabric, below.
The material consists of nylon octahedrons interlocked. The cloth is enclosed in a plastic envelope and vacuum-packed. Once in a vacuum, the sheet becomes much stiffer and can hold many times its own weight.
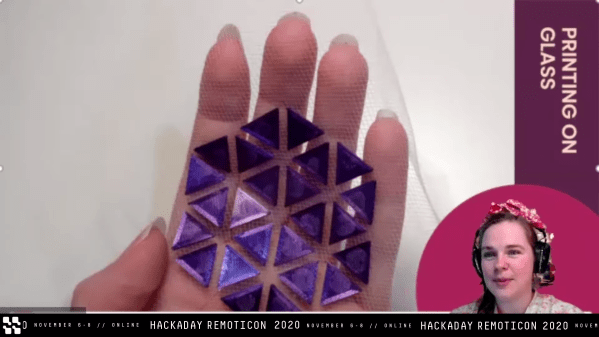
We’re impressed to see the continued flow of new and interesting ways to utilize 3D printing despite its years in the hacker limelight. At the 2020 Hackaday Remoticon [Billie Ruben] came to us from across the sea to demonstrate how to use 3D printing and fabric, or other flexible materials, to fabricate new and interesting creations. Check out her workshop below, and read on for more detail about what you’ll find.
The workshop is divided into two parts, a hands-on portion where participants execute a fabric print at home on their own printer, and a lecture while the printers whirr away describing ways this technique can be used to produce strong, flexible structures.
The technique described in the hands on portion can be clumsily summarized as “print a few layers, add the flexible material, then resume the printing process”. Of course the actual explanation and discussion of how to know when to insert the material, configure your slicer, and select material is significantly more complex! For the entire process make sure to follow along with [Billie]’s clear instructions in the video.
The lecture portion of the workshop was a whirlwind tour of the ways which embedded materials can be used to enhance your prints. The most glamourous examples might be printing scales, spikes, and other accoutrement for cosplay, but beyond that it has a variety of other uses both practical and fashionable. Embedded fabric can add composite strength to large structural elements, durable flexibility to a living hinge, or a substrate for new kinds of jewelry. [Billie] has deep experience in this realm and she brings it to bear in a comprehensive exposition of the possibilities. We’re looking forward to seeing a flurry of new composite prints!
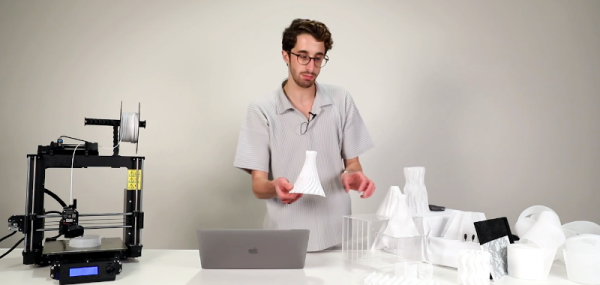
Normally, a 3D printer that under extrudes is a bad thing. However, MIT has figured out a way to deliberately mix full extrusions with under extruded layers to print structures that behave more like cloth than normal 3D printed items. The mesh-like structure apparently doesn’t require any modification to a normal 3D printer, just different software to create special code sequences to create the material.
Called DefeXtiles, [Jack Forman] is producing sheets and complex structures that appear woven. The process is known as “blob-stretch” because of the way the plastic makes blobs connected by fine filaments of plastic.
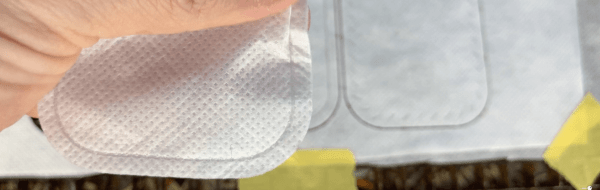
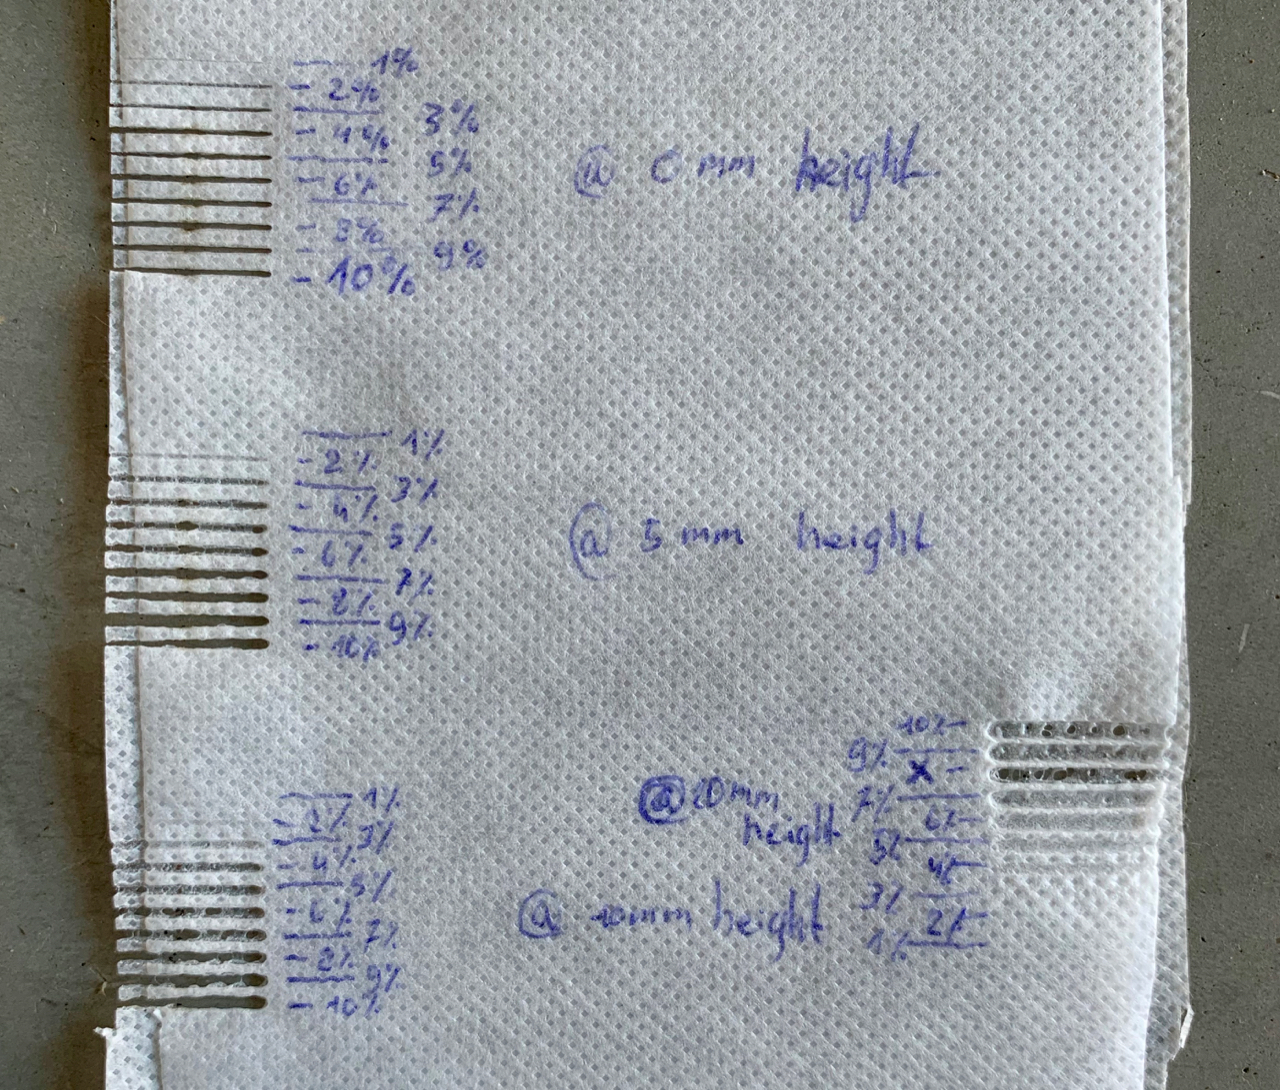
Laser cutters are certainly a Hackerspace staple for cutting fabrics in some circles. But for the few fabrics derived from non-woven plastics, why not try fusing them together? That’s exactly what [Dries] did, and with some calibration, the result is a speedy means of seaming together two fabrics–no needles necessary!
The materials used here are non-woven goods often used in disposable PPE like face masks, disposable aprons, and shoe coverings. The common tool used to fuse non-woven fabrics at the seams is an ultrasonic welder. This is not as common in the hackerspace tool room, but laser cutters may be a suitable stand-in.
Getting the machine into a production mode of simply cranking out clothes took some work. Through numerous sample runs, [Dries] found that defocusing the laser to a spot size of 1.5mm at low power settings makes for a perfect threadless seam. The resulting test pockets are quite capable of taking a bit of hand abuse before tearing. Best of all, the fused fabrics can simply be cut out with another pass of the laser cutter. For fixtures, [Dries] started with small tests by stretching the two fabrics tightly over each other but suggests fixtures that can be pressed for larger patterns.
It’s great to see laser-cutters doubled-up as both the “glue” and “scissors” in a textile project. Once we get a handle on lasering our own set of scrubs, why not add some inflatables into the mix?
Some folks bring out an heirloom table runner when they have company, but what if you sewed your own and made it musical? We’d never put it away! [kAi CHENG] has an Instructable about how to recreate his melodic material, and there is a link to his website, which describes his design process, not just the finished product. We have a video below showing a jam session where he exercises a basic function set.
GarageBand is his DAW of choice, which receives translated MIDI from a Lilypad. If you don’t have a Lilypad, any Arduino based on the ATmega328P chip should work seamlessly. Testing shows that conductive threads in the soft circuit results in an occasional short circuit, but copper tape makes a good conductor at the intersections. Wide metallic strips make for tolerant landing pads beneath modular potentiometers fitted with inviting foam knobs. Each twist controls a loop in GarageBand, and there is a pressure-sensitive pad to change the soundset. Of course, since this is all over MIDI, you can customize to your heart’s content.
You’ve designed PCBs. You’ve cut, drilled, Dremeled, and blow-torched various objects into project enclosurehood. You’ve dreamed up some object in three dimensions and marveled as the machine stacked up strings of hot plastic, making that object come to life one line of g-code at a time. But have you ever felt the near-limitless freedom of designing in fabric?
I don’t have to tell you how satisfying it is to make something with your hands, especially something that will get a lot of use. When it comes to that sweet cross between satisfaction and utility, fabric is as rewarding as any other medium. You might think that designing in fabric is difficult, but let’s just say that it is not intuitive. Fabric is just like anything else — mysterious until you start learning about it. The ability to design and implement in fabric won’t solve all your problems, but it sure is a useful tool for the box.
WoF? Fat quarter? How much is a yard of fabric, anyway?
To prove it, I’m going to take you through the process of designing something in fabric. More specifically, a tool roll. These two words may conjure images of worn, oily leather or canvas, rolled out under the open hood of a car. But the tool roll is a broad, useful concept that easily and efficiently bundles up anything from socket wrenches to BBQ utensils and from soldering irons to knitting needles. Tool rolls are the best in flexible, space-saving storage — especially when custom-designed for your need.
In this case, the tools will be pens, notebooks, and index cards. You know, writer stuff. But the same can just as easily organize your oscilloscope probes. It’s usefully and a great first foray into building things with fabric if this is your first time.
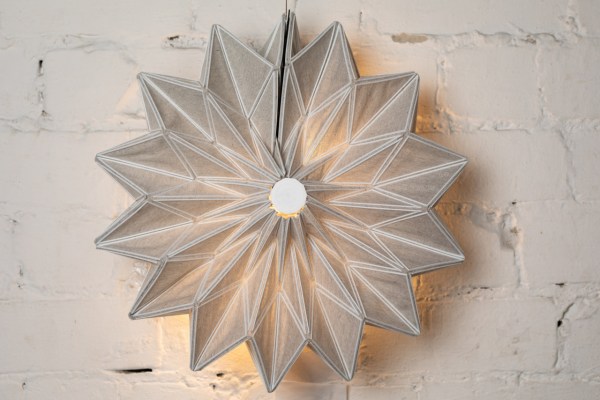
It’s taken mobile phone developers years to develop electric circuits and displays that can fold. Finally he first few have come to market — with mixed reviews and questionable utility at best. For all that R&D, there are a lot of other cases where folding circuitry might have been more useful than it seems these handsets have been. One of those is conductive origami, which in this case allows for light fixtures that turn themselves on as they are unfolded.
This conductive origami is produced by [Yael Akirav] using a 3D printer to deposit the conductive material onto fabric. From there, the light fixture can be unfolded into its final position and turned on. This isn’t just a decorative curiosity though, the design of the folding material actually incorporates the ability to turn itself on as it is unfolded. One device brightens itself as it is slowly unfolded.
This is an interesting take on foldable circuits in general, especially with some of the functionality incorporated into the physical shape of the material. We’ve seen conductive elements embroidered into fabric before, but this takes it to a new level. Surely there are more applications for a device like this that we will see in the future as well.