Quick-Turn PCB Fab Hack Chat

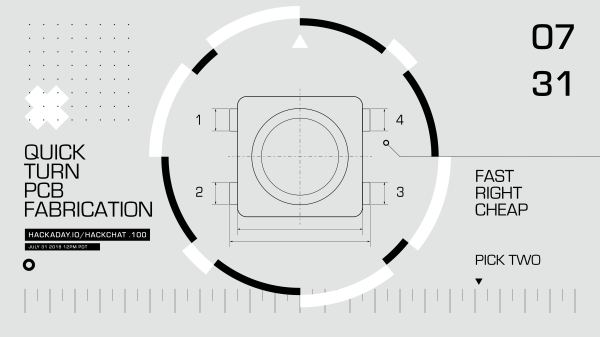
Join us on Wednesday, July 31st at noon Pacific for the Quick-Turn PCB Fab Hack Chat with Mihir Shah!

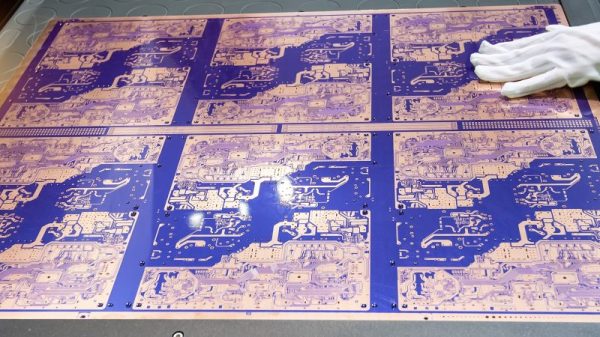
We’ve all become used to designing a PCB and having it magically appear at our doorstep – after a fashion. Modern PCB fabs rely on economies of scale to deliver your design cheaply, at the expense of time – the time it takes to put enough orders onto a panel, and the time it takes to ship the finished boards from Far, Far Away.

Not everyone has that kind of time to burn, though. That’s where quick-turn fabs come in. These manufacturers specialize in getting boards to their customers as quickly as possible, helping them deal with sudden design changes or supporting specialty applications for customers.

It’s a niche industry, but an important one, and Royal Circuits is at the forefront. Mihir Shah is Director of Special Projects there, and he’s deep into the business of getting PCBs to customers as quickly as possible. He’ll drop by the Hack Chat to answer all your questions about how the quick-turn industry fits into the electronics manufacturing ecosystem, and to show off some of the tools of the future that they’re developing and investing in to streamline PCB design and analysis – from DebuggAR to PCBLayout.com, and more.

join-hack-chatOur Hack Chats are live community events in the Hackaday.io Hack Chat group messaging. This week we’ll be sitting down on Wednesday July 31 at 12:00 PM Pacific time. If time zones have got you down, we have a handy time zone converter.

Click that speech bubble to the right, and you’ll be taken directly to the Hack Chat group on Hackaday.io. You don’t have to wait until Wednesday; join whenever you want and you can see what the community is talking about.

Flexible PCBs Hack Chat With OSH Park

Join us Thursday at noon Pacific time for the Flexible PCBs Hack Chat with Drew and Chris from OSH Park!
Note the different day from our usual Hack Chat schedule!
Printed circuit boards have been around for decades, and mass production of them has been an incalculable boon to the electronics industry. But turning the economics of PCB production around and making it accessible to small-scale producers and even home experimenters is a relatively recent development, and one which may have an even broader and deeper impact on the industry in the long run.

And now, as if professional PCBs at ridiculous prices weren’t enough, the home-gamer now has access to flexible PCBs. From wearables to sensor applications, flex PCBs have wide-ranging applications and stand to open up new frontiers to the hardware hacker. We’ve even partnered with OSH Park in the Flexible PCB Contest, specifically to stretch your flexible wings and get you thinking beyond flat, rigid PCBs.

join-hack-chatOur Hack Chats are live community events in the Hackaday.io Hack Chat group messaging. This week we’ll be sitting down on Thursday, May 23 at 12:00 PM Pacific time. If time zones have got you down, we have a handy time zone converter.

Click that speech bubble to the right, and you’ll be taken directly to the Hack Chat group on Hackaday.io. You don’t have to wait until Thursday; join whenever you want and you can see what the community is talking about.

WOPR: Building Hardware Worth Sharing

It wouldn’t be much of a stretch to assume that anyone reading Hackaday regularly has at least progressed to the point where they can connect an LED to a microcontroller and get it to blink without setting anything on fire. We won’t even chastise you for not doing it with a 555 timer. It’s also not a stretch to say if you can successfully put together the “Hello World” of modern electronics on a breadboard, you’re well on the way to adding a few more LEDs, some sensors, and a couple buttons to that microcontroller and producing something that might come dangerously close to a useful gadget. Hardware hacking sneaks up on you like that.

Here’s where it gets tricky: how many of us are still stuck at that point? Don’t be shy, there’s no shame in it. A large chunk of the “completed” projects that grace these pages are still on breadboards, and if we had to pass on every project that still had a full-on development board like the Arduino or Wemos D1 at its heart…well, let’s just say it wouldn’t be pretty.

Of course, if you’re just building something as a personal project, there’s often little advantage to having a PCB spun up or building a custom enclosure. But what happens when you want to build more than one? If you’ve got an idea worth putting into production, you’ve got to approach the problem with a bit more finesse. Especially if you’re looking to turn a profit on the venture.

At the recent WOPR Summit in Atlantic City, there were a pair of presentations which dealt specifically with taking your hardware designs to the next level. Russell Handorf and Mike Kershaw hosted an epic four hour workshop called Strategies for your Projects: Concept to Prototype and El Kentaro gave a fascinating talk about his design process called Being Q: Designing Hacking Gadgets which together tackled both the practical and somewhat more philosophical aspects of building hardware for an audience larger than just yourself.

Continue reading “WOPR: Building Hardware Worth Sharing”

Threading 3D Printed Parts: How To Use Heat-Set Inserts

We can make our 3D-printed parts even more capable when we start mixing them with some essential “mechanical vitamins.” By combining prints with screws, nuts, fasteners, and pins, we get a rich ecosystem for mechanism-making with capabilities beyond what we could simply print alone.

Today I’d like to share some tips on one of my favorite functional 3D-printing techniques: adding heat-set inserts. As someone who’s been installing them into plastic parts for years manually, I think many guides overlook some process details crucial to getting consistent results.

Make no mistake; there are a handful of insert guides already out there [1, 2]. (In fact, I encourage you to look there first for a good jump-start.) Over the years though, I’ve added my own finishing move (nothing exotic or difficult) which I call the Plate-Press Technique that gives me a major boost in consistency.

Join me below as I fill in the knowledge gaps (and some literal ones too) to send you back to the lab equipped with a technique that will give you perfectly-seated inserts every time.

Continue reading “Threading 3D Printed Parts: How To Use Heat-Set Inserts”

This Beer Keg Is A Side Car

Bikes are a great way to get around. They’re cheap compared to cars and can be faster through city traffic, and you can get some exercise at the same time. The one downside to them is that the storage capacity is often extremely limited. Your choices are various bags strapped to the bike (or yourself), a trailer, or perhaps this bicycle side car made from a beer keg.

Sidecars are traditionally the realm of motorcycles, not bicycles, but this particular bike isn’t without a few tricks. It has an electric motor to help assist the rider when pedaling. With this platform [Laura Kampf] has a lot of potential. She got to work cutting the beer keg to act as the actual side car, making a hinged door to cover the opening. From there, she fabricated a custom mount for the side car that has a custom hinge, allowing the side car to stay on the road when the bike leans for corners.

For those unfamiliar, [Laura] is a master welder with a shop located in Germany. We’ve seen some of her work here before, and she also just released a video showing off all of her projects for the last year. If you’re an aspiring welder, or just like watching a master show off her craft, be sure to check those out or go straight to the video below.

Continue reading “This Beer Keg Is A Side Car”

Oreo Construction: Hiding Your Components Inside The PCB

In recent months, the ability to hide components inside a circuit board has become an item of interest. We could trace this to the burgeoning badgelife movement, where engineers create beautiful works of electronic art. We can also attribute this interest to Bloomberg’s Big Hack, where Jordan Robertson and Michael Riley asserted Apple was the target of Chinese spying using components embedded inside a motherboard. The Big Hack story had legs, but so far no evidence of this hack’s existence has come to light, and the companies and governments involved have all issued denials that anything like this exists.

That said, embedding components inside a PCB is an interesting topic of discussion, and thanks to the dropping prices of PCB fabrication (this entire project cost $15 for the circuit boards), it’s now possible for hobbyists to experiment with the technique.

But first, it’s important to define what ‘stuffing components inside a piece of fiberglass’ is actually called. My research keeps coming back to the term ’embedded components’ which is utterly ungooglable, and a truly terrible name because ’embedded’ means something else entirely. You cannot call a PCB fabrication technique ’embedded components’ and expect people to find it on the Internet. For lack of a better term, I’m calling this ‘Oreo construction’, because of my predilection towards ‘stuf’, and because it needs to be called something. We’re all calling it ‘Oreo construction’ now, because the stuf is in the middle. This is how you do it with standard PCB design tools and cheap Chinese board houses.

Continue reading “Oreo Construction: Hiding Your Components Inside The PCB”

Hackaday Superconference: Estefannie’s Daft Punk Helmet

There’s no single formula for success, but if we’ve learned anything over the years of covering cons, contests, and hackathons, it’s that, just like in geology, pressure can create diamonds. Give yourself an impossible deadline with high stakes, and chances are good that something interesting will result. That’s what Estefannie from the YouTube channel “Estefannie Explains It All” did when Bay Area Maker Faire was rolling around last year, and she stopped by the 2018 Hackaday Superconference to talk about the interactive Daft Punk helmet that came out of it.

It’s a rapid-fire tour of Estefannie’s remarkably polished replica of the helmet worn by Guy-Manuel de Homem-Christo, one half of the French electronic music duo Daft Punk. Her quick talk, video of which is below, gives an overview of its features, but we miss the interesting backstory. For that, the second video serves as a kickoff to a whirlwind month of hacking that literally started from nothing.

You’ll Learn it Along the Way

Before deciding to make the helmet, Estefannie had zero experience in the usual tools of the trade. With only 28 days to complete everything, she had to: convert her living room into a workshop; learn how to 3D print; print 58 separate helmet parts, including a mold for thermoforming the visor; teach herself how to thermoform after building the tools to do so; assemble and finish all the parts; and finally, install the electronics that are the hallmark of Daft Punk’s headgear.

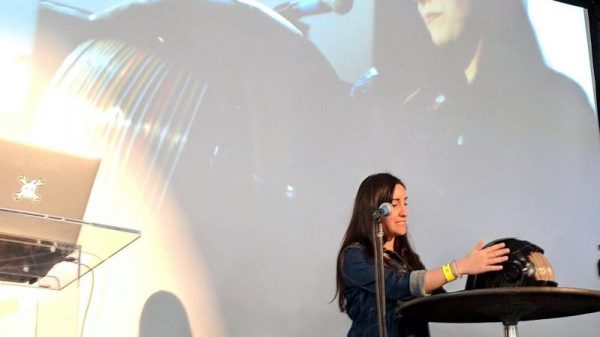
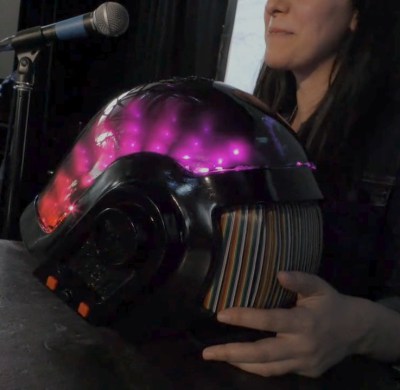
The three videos in her series are worth watching to see what she put herself through. Estefannie’s learning curve was considerable, and there were times when nothing seemed to work. The thermoforming was particularly troublesome — first too much heat, then not enough, then not enough vacuum (pretty common hurdles from other thermoforming projects we’ve seen). But the finished visor was nearly perfect, even if it took two attempts to tint.

We have to say that at first, some of her wounds seemed self-inflicted, especially seeing the amount of work she put into the helmet’s finish. But she wanted it to be perfect, and the extra care in filling, sanding, priming, and painting the printed parts really paid off in the end. It was down to the wire when BAMF rolled around, with last minute assembly left to the morning of the Faire in the hotel room, but that always seems to be the way with these kinds of projects.

In the end, the helmet came out great, and we’re glad the run-up to the Superconference wasn’t nearly as stressful for Estefannie — or so we assume. And now that she has all these great new skills and tools, we’re looking forward to her next build.

Continue reading “Hackaday Superconference: Estefannie’s Daft Punk Helmet”