Reprogramming Bluetooth Headphones For Great Justice

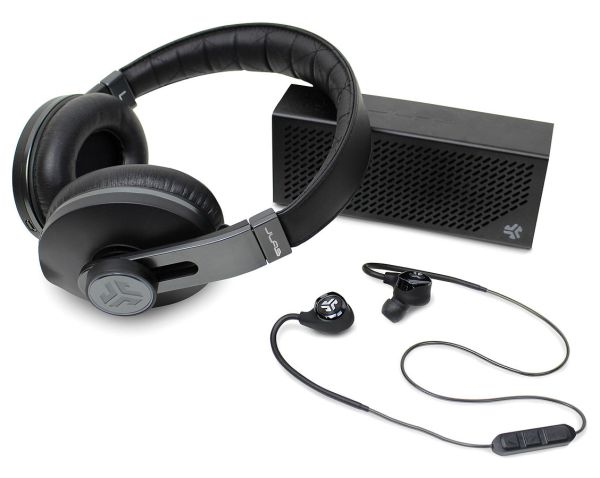
Like a lot of mass-produced consumer goods, it turns out that the internal workings of Bluetooth headphones are the same across a lot of different brands. One common Bluetooth module is the CSR8645, which [lorf] realized was fairly common and (more importantly) fairly easy to modify. [lorf] was able to put together a toolkit to reprogram this Bluetooth module in almost all of these headphones.

This tip comes to us from [Tigox] who has already made good use of [lorf]’s software. Using the toolkit, he was able to reprogram his own Bluetooth headphones over a USB link to his computer. After downloading and running [lorf]’s program, he was able to modify the name of the device and, more importantly, was able to adjust the behavior of the microphone’s gain which allowed him to have a much more pleasant user experience.

Additionally, the new toolkit makes it possible to flash custom ROMs to CSR Bluetooth modules. This opens up all kinds of possibilities, including the potential to use a set of inexpensive headphones for purposes other than listening to music. The button presses and microphones can be re-purposed for virtually any task imaginable. Of course, you may be able to find cheaper Bluetooth devices to repurpose, but if you just need to adjust your headphones’ settings then this hack will be more useful.

[Featured and Thumbnail Image Source by JLab Audio LLC – jlabaudio.com, CC BY-SA 4.0]

Raspberry Pi Camera Flash

The Raspberry Pi Camera is a great tool; it allows projects that require a camera to be put together quickly and on a budget. Plus, having a Linux back end for a little processing never hurt anybody. What can be difficult however, is imaging in low light conditions. Most smartphones have an LED flash built in for this purpose. [Wim Van Gool] decided to follow suit and build an LED flash for the Raspberry Pi.

The project consists of a custom PCB with surface-mount LEDs in an attractive concentric layout. This is a good way to get a nice even distribution of light, particularly when taking photos close up. The board is designed around the Texas Instruments TPS61169 LED driver, which is controlled by a PWM signal from the Raspberry Pi. The flash mounts as a Raspberry Pi HAT, and there’s a hole routed in the centre to allow the camera to fit in nice and snug when using standard 11mm standoffs. It might seem simple, but it’s an impressively tidy piece of engineering and a testament to [Wim]’s abilities.

The Raspberry Pi Camera turns up in all sorts of projects — like these far-seeing PiNoculars.

[Huan] Liberates A Router

[Huan Truong] was given a WiFi router and thought he’d improve it by installing a free firmware on it. Unfortunately, the router in question is a bit old, and wasn’t ever popular to begin with, which meant that it was unsupported by the usual open firmware suspects. The problem was that it only had a 4 MB flash to boot off of, but [Huan] was determined to make it work. (Spoiler: he did it, and documented it fully.)

The flash workaround consisted basically of repartitioning the space, and then telling u-boot where to find everything. On a router like the WNR2000 that [Huan] had, the flash is memory-mapped, which meant adding an offset to the flash start (0xbf000000 instead of 0x00000000) and remembering to do this consistently so that he doesn’t overwrite things like the MAC address.

[Huan] went for the LEDE fork of OpenWRT, and rebuilt it from source because he needed a small version to fit inside his limited flash. With this task completed, it worked. All done? Nope, [Huan] then submitted a pull request to LEDE, and now you can enjoy the fruits of his labor without replicating it. But if you’ve got another low-flash, obscure router, you’ve got a head start in getting LEDE up and running on it.

Routers are perhaps the most-hacked device that we see here, and they can be made pretty darn useful with the right firmware. Sometimes getting a custom firmware running is relatively easy, as it was here, and sometimes it requires some deep reverse engineering. But it’s good to keep up your router-hacking chops, because they may not always be as open as they are now.

Harrowing Story Of Installing Libreboot On ThinkPad

As an Apple user, I’ve become somewhat disillusioned over the past few years. Maybe it’s the spirit of Steve Jobs slowly vanishing from the company, or that Apple seems to care more about keeping up with expensive trends lately rather than setting them, or the nagging notion Apple doesn’t have my best interests as a user in mind.

Whatever it is, I was passively on the hunt for a new laptop with the pipe dream that one day I could junk my Apple for something even better. One that could run a *nix operating system of some sort, be made with quality hardware, and not concern me over privacy issues. I didn’t think that those qualities existed in a laptop at all, and that my 2012 MacBook Pro was the “lesser of evils” that I might as well keep using. But then, we published a ThinkPad think piece that had two words in it that led me on a weeks-long journey to the brand-new, eight-year-old laptop I’m currently working from. Those two words: “install libreboot”.

Continue reading “Harrowing Story Of Installing Libreboot On ThinkPad”

IPhone NVMe Chip Reversed With Custom Breakout Boards

Ever so slowly, the main storage in our computers has been moving from spinning disks, to SSDs over SATA, to Flash drives connected to a PCI something or other. The latest technology is NVMe — Non-Volitile Memory Express — a horribly named technology that puts a memory controller right on the chip. Intel has a PCI-based NVMe drive out, Samsung recently released an M.2 NVMe drive, and the iPhone 6S and 6S Plus are built around this storage technology.

New chips demand a reverse engineering session, and that’s exactly what [Ramtin Amin] did (Internet Archive). He took a few of these chips out of an iPhone, created a board that will read them, and managed to analyze the firmware.

Any reverse engineering will begin with desoldering the chip. This is easy enough, with the real trick being getting it working again outside whatever system it was removed from. For this, [Ramtin] built his own PCIe card with a ZIF socket. This socket was custom-made, but the good news is you can buy one from ITEAD. Yes, it is expensive — that’s what you get with a custom-made ZIF socket.

With the chip extracted, a custom PCIe card, and a bit of work with the NVMe implementation for Linux, [Ramtin] had just about everything working. Eventually, he was able to dump the entire file system on the chip, allowing anyone to theoretically back up the data on their iPhone or MacBook Air. Of course, and especially for the iPhone, this data is encrypted. It’s not possible to clone an iPhone using this method, but it is a remarkably deep dive into the hardware that makes our storage tick.

Staring At The Sun: Erasing An EPROM

Flash memory is the king today. Our microcontrollers have it embedded on the die. Phones, tablets, and computers run from flash. If you need re-writable long term storage, flash is the way to go. It hasn’t always been this way though. Only a few years ago EPROM was the only show in town. EPROM typically is burned out-of-circuit in a programming fixture. When the time comes to erase the EPROM, just pop it under an ultraviolet (UV) bulb for 30 minutes, and you’re ready to go again. The EPROM’s quartz window allows UV light to strike the silicon die, erasing the memory.

The problem arises when you want to use an EPROM for long term storage. EPROM erasers weren’t the only way to blank a chip. The sun will do it in a matter of weeks. Even flourescent light will do it — though it could take years.

Continue reading “Staring At The Sun: Erasing An EPROM”

Don’t Take Photos Of Your Arduino 101 Either, It’s Light Sensitive

Wafer level chips are cheap and very tiny, but as [Kevin Darrah] shows, vulnerable to bright light without the protective plastic casings standard on other chip packages.

We covered a similar phenomenon when the Raspberry Pi 2 came out. A user was taking photos of his Pi to document a project. Whenever his camera flash went off, it would reset the board.

[Kevin] got a new Arduino 101 board into his lab. The board has a processor from Intel, an accelerometer, and Bluetooth Low Energy out of the box while staying within the same relative price bracket as the Atmel versions. He was admiring the board, when he noticed that one of the components glittered under the light. Curious, he pulled open the schematic for the board, and found that it was the chip that switched power between the barrel jack and the USB. Not only that, it was a wafer level package.

So, he got out his camera and a laser. Sure enough, both would cause the power to drop off for as long as the package was exposed to the strong light. The Raspberry Pi foundation later wrote about this phenomenon in more detail. They say it won’t affect normal use, but if you’re going to expose your device to high energy light, simply put it inside a case or cover the chip with tape, Sugru, or a non-conductive paint to shield it.

EDIT: [Kevin] also tested it under the sun and found conditions in which it would reset. Videos after the break.

Continue reading “Don’t Take Photos Of Your Arduino 101 Either, It’s Light Sensitive”