Bike-Mounted Synthetic-Aperture Radar Makes Detailed Images

Synthetic-aperture radar, in which a moving radar is used to simulate a very large antenna and obtain high-resolution images, is typically not the stuff of hobbyists. Nobody told that to [Henrik Forstén], though, and so we’ve got this bicycle-mounted synthetic-aperture radar project to marvel over as a result.

Neither the electronics nor the math involved in making SAR work is trivial, so [Henrik]’s comprehensive write-up is invaluable to understanding what’s going on. First step: build a 6-GHz frequency modulated-continuous wave (FMCW) radar, a project that [Henrik] undertook some time back that really knocked our socks off. His FMCW set is good enough to resolve human-scale objects at about 100 meters.

Moving the radar and capturing data along a path are the next steps and are pretty simple, but figuring out what to do with the data is anything but. [Henrik] goes into great detail about the SAR algorithm he used, called Omega-K, a routine that makes use of the Fast Fourier Transform which he implemented for a GPU using Tensor Flow. We usually see that for neural net applications, but the code turned out remarkably detailed 2D scans of a parking lot he rode through with the bike-mounted radar. [Henrik] added an auto-focus routine as well, and you can clearly see each parked car, light pole, and distant building within range of the radar.

We find it pretty amazing what [Henrik] was able to accomplish with relatively low-budget equipment. Synthetic-aperture radar has a lot of applications, and we’d love to see this refined and developed further.

[via r/electronics]

The March Toward A DIY Metal 3D Printer

[Hyna] has spent seven years working with electron microscopes and five years with 3D printers. Now the goal is to combine expertise from both realms into a metal 3D printer based on electron-beam melting (EBM). The concept is something of an all-in-one device that combines traits of an electron beam welder, an FDM 3D printer, and an electron microscope. While under high vacuum, an electron beam will be used to fuse metal (either a wire or a powder) to build up objects layer by layer. That end goal is still in the future, but [Hyna] has made significant progress on the vacuum chamber and the high voltage system.

The device is built around a structure made of 80/20 extruded aluminum framing. The main platform showcases an electron gun, encased within a glass jar that is further encased within a metal mesh to prevent the glass from spreading too far in the event of an implosion.

The design of the home-brewed high-voltage power supply involves an isolation transformer (designed to 60kV), using a half-bridge topology to prevent high leakage inductance. The transformer is connected to a buck converter for filament heating and a step up. The mains of the system are also connected to a voltage converter, which can be current-fed or voltage-fed to operate as either an electron beam welder or scanning electron microscope (SEM). During operation, the power supply connects to a 24V input and delivers the beam through a Wehnelt cylinder, an electrode opposite an anode that focuses and controls the electron beam. The entire system is currently being driven by an FPGA and STM32.

The vacuum enclosure itself is quite far along. [Hyna] milled a board with two outputs for a solid state relay (SSR) to a 230V pre-vacuum pump and a 230V pre-vacuum pump valve, two outputs for vent valves, and inputs from a Piranni gauge and a Cold Cathode Gauge, as well as a port for a TMP controller. After demoing the project at Maker Faire Prague, [Hyna] went back and milled a mold for a silicone gasket, a better vacuum seal for the electron beam.

While we’ve heard a lot about different metal 3D printing methods, this is the first time we’ve seen an EBM project outside of industry. And this may be the first to attempt to combine three separate uses for an HV electron beam into the same build.

XFM: A 32-Voice Polyphonic FM Synthesizer On An FPGA

There’s something about Frequency Modulation (FM) synthesizer chips that appeals to a large audience. That’s one of the reasons behind [René Ceballos]’s XFM project, aiming to duplicate on an FPGA the sound of pure-FM synthesizer chips of the past such as the Yamaha DX series, OPL chip series and TX81Z/802/816. The result is a polyphonic, 32-voice, 6-operator FM synthesizer stereo module.

The project page goes into a lot of detail about the design choices which ultimately led to XFM being implemented on an FPGA, instead of using a dedicated DSP or MCU. Coming from the world of virtual synthesizers running on PCs, [René ]’s first impulse was to implement something on a Raspberry Pi or equivalent. Unfortunately these boards require a lot of power (ruling out battery-powered operation) and can hardly be called real-time, which led [René ] to abandon this attempt.

The design choice against the use of an MCU is simple: though capable of real-time processing, they lack the necessary power to make them a good choice for audio-processing. Working through the calculations to determine what kind of processing power would be needed, it was found that around 650 MIPS would be needed, a figure which most MCUs struggle to achieve a fraction of.

As one of the further requirements for XFM was that it should be as cheap as possible, this ruled out as too expensive the DSP chips which do have the power and hardware features needed. The component chosen was a Xilinx Spartan 6 FPGA, which though somewhat infamous and shunned in FPGA circles turns out to be a very economical option for this project.

Continue reading “XFM: A 32-Voice Polyphonic FM Synthesizer On An FPGA”

Bringing FPGA Development To The Masses

The Field Programmable Gate Array (FPGA) is one of the most exciting tools in the modern hacker’s arsenal. If you can master the FPGA, you can create hardware devices that not only morph and change based on your current needs, but can power through repetitive tasks at phenomenal rates. The only problem is, working with FPGAs can be a bit intimidating for newbies. One could argue that the technology is waiting on its “Arduino” moment; the introduction of a cheap development board coupled with easy to use software that brings FPGA hacking into the mainstream.

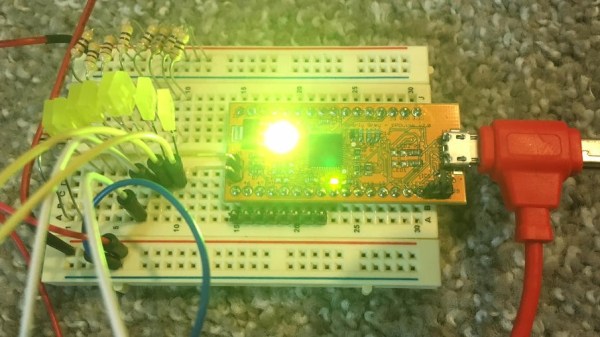
If everything goes according to plan, the wait might soon be over. [Ryan Jacobs] believes his project WebFPGA is the easiest and fastest way to get your hands dirty with this incredible technology. Outwardly the hardware could pass for an Arduino Nano clone, with a bunch of GPIO pins and a couple of LEDs on a small breadboard-friendly PCB. Certainly a no-frills presentation. It’s the software side is where things get interesting: all you need to develop for this FPGA is a modern web browser.

Currently Chrome, Opera, and Edge are supported, even if they’re running on relatively low-end computers. [Ryan] says this makes it much easier and cheaper to roll out FPGA classes in schools, as students can do everything with their existing Chromebooks. As the video after the break shows, you can even get away with using a sufficiently powerful smartphone to do some FPGA hacking on the go.

So what’s the trick? Essentially the heavy-lifting is done remotely: all of the synthesis is performed in their cloud backend, with the final bitstream delivered to the user for installation through WebUSB. If you’re more comfortable on the command line, [Ryan] says they’re currently working on tools which will allow you to perform all the necessary interactions with their cloud service without the browser.

The more critical Hackaday reader will likely be concerned about lock-in. What happens if you buy one of these development boards without a license for the service, or worse, what happens if WebFPGA goes belly-up down the road? To that end, [Ryan] makes it clear that their hardware is completely compatible with existing offline FPGA development tools such as the open source IceStorm.

We’ve seen considerable interest in low-cost FPGA development platforms, with readers perhaps recalling the excitement surrounding the fire sale of the Pano Logic thin clients. Despite efforts to make developing for these systems even easier, it’s hard to imagine the bar getting much lower than what WebFPGA is shooting for. Their Kickstarter campaign is close to crossing the finish line, and we’re very interested to see where the product goes from here.

Continue reading “Bringing FPGA Development To The Masses”

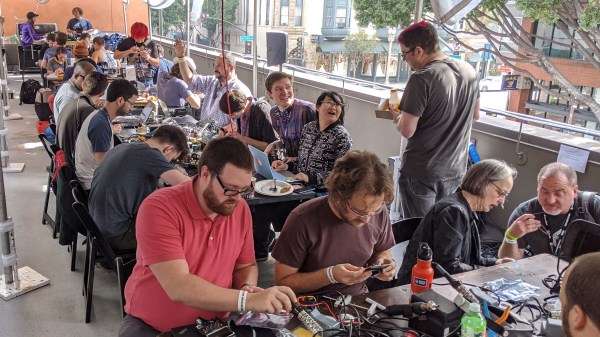
Teardown 2019: A Festival Of Hacking, Art, And FPGAs

As hackers approached the dramatic stone entrance of Portland’s Pacific Northwest College of Arts, a group of acolytes belonging to The Church of Robotron beckoned them over, inviting them to attempt to earn the title of Mutant Saviour. The church uses hazardous environments, religious indoctrination, a 1980s arcade game and some seriously funny low tech hacks to test your abilities to save humanity. This offbeat welcome was a pretty good way to set the tone for Teardown 2019: an annual Crowd Supply event for engineers and artists who love hardware. Teardown is halfway between a conference and a party, with plenty of weird adventures to be had over the course of the weekend. Praise the Mutant! Embrace Futility! Rejoice in Error!

For those of us who failed to become the Mutant Saviour, there were plenty of consolation prizes. Kate Temkin and Mikaela Szekely’s talk on accessible USB tools was spectacular, and I loved following Sophi Kravitz’s journey as she made a remote-controlled blimp. Upstairs in the demo room, we had great fun playing with a pneumatic donut sprinkle pick and place machine from tinkrmind and Russell Senior’s hacked IBM daisywheel typewriter that prints ASCII art and runs a text-based Star Trek adventure game.

It wouldn’t be much of a hardware party if the end of the talks, demos and workshops meant the end of each day’s activities, but the Teardown team organised dinner and an afterparty in a different locations every night: Portland’s hackerspace ^H PDX, the swishy AutoDesk offices, and the vintage arcade game bar Ground Kontrol. There also was a raucous and hotly-contested scavenger hunt across the city, with codes to crack, locks to pick and bartenders to sweet talk into giving you the next clue (tip: tip).

Join me below for my favorite highlights of this three day (and night) festival.

Continue reading “Teardown 2019: A Festival Of Hacking, Art, And FPGAs”

Amiga In The MiST Gets Online With An ESP8266

While he couldn’t quite come up with the cash to buy one in their hayday, [Bruno Antunes] has always been fascinated with the Amiga. When PCs got fast enough he used emulators like UAE to get a taste of the experience, but it was never quite the same thing. Not until he found the MiST anyway, which uses an FPGA to implement several retro computers such as the Apple II, Atari, and of course his beloved Amiga.

The only downside for [Bruno] was that the MiST has no network interfaces. To get onto the Internet, he had to install an ESP8266 inside the device and spend some quality time tweaking various software settings to get everything talking to each other. The end result is a BBS hosted on an Amiga 1200, that’s running on an FPGA, that’s connected to WiFi via an ESP8266. What a time to be alive.

Adding the ESP8266 to the MiST was actually quite straightforward, as there’s an unpopulated serial port header right on the board. Though [Bruno] cautions this header has been removed as of version 1.4 of the device, so if you’re in the market for an FPGA retro box and might want to get it online at some point, that may be a detail to keep in mind. The ESP is running a firmware which implements Serial Line IP (SLIP); which allows you to use TCP/IP over a serial port, albeit very slowly.

The hardware implant went well enough, but unfortunately [Bruno] found the ESP8266 was unable to communicate through the thick metal case of the MiST. He enlisted his girlfriend to make a new papercraft enclosure for the MiST that the ESP could talk though, and it even has the added benefit of glowing thanks to the internal LEDs. We probably would have just got one of the ESP modules that includes an external antenna, but to each their own.

With the hardware taken care of, the rest of the considerable write-up details how he got the Amiga operating system to talk to the Internet through the SLIP connection. He goes over everything from setting the system time with NTP to getting a Telnet daemon installed. As you might expect, this involves installing a number of additional software packages, but [Bruno] is kind enough to provide links for everything you’ll need.

We’ve seen the ESP8266 used to get other retro computers onto the modern Internet before, but it’s usually through the use of an external device. This internal modification is very clean, and seems like a no-brainer for anyone who owns a MiST and a soldering iron.

Continue reading “Amiga In The MiST Gets Online With An ESP8266”

Yo Dawg, I Heard You Like FPGAs

When the only tool you have is a hammer, all problems look like nails. And if your goal is to emulate the behavior of an FPGA but your only tools are FPGAs, then your nail-and-hammer issue starts getting a little bit interesting. That’s at least what a group of students at Cornell recently found when learning about the Xilinx FPGA used by a researcher in the 1990s by programming its functionality into another FPGA.

Using outdated hardware to recreate a technical paper from decades ago might be possible, but an easier solution was simply to emulate the Xilinx in a more modern FPGA, the Cyclone V FPGA from Terasic. This allows much easier manipulation of I/O as well as reducing the hassle required to reprogram the device. Once all of that was set up, it was much simpler to perform the desired task originally set up in that 90s paper: using evolutionary algorithms to discriminate between different inputs.

While we will leave the investigation into the algorithms and the I/O used in this project as an academic exercise for the reader, this does serve as a good reminder that we don’t always have to have the exact hardware on hand to get the job done. Old computers can be duplicated on less expensive, more modern equipment, and of course video games from days of yore are a snap to play on other hardware now too.

Thanks to [Bruce Land] for the tip!