A Real GPU On The Raspberry Pi — Barely.

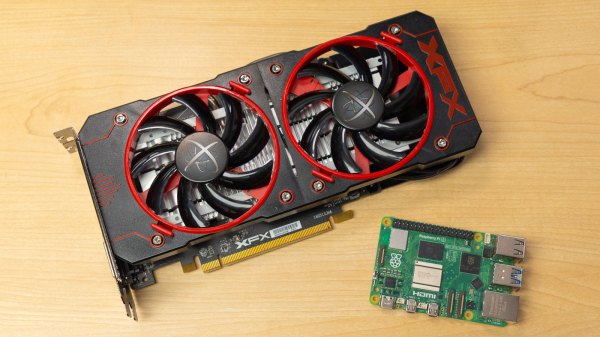
[Jeff Geerling] saw the Raspberry Pi Compute Module 4 and its exposed PCI-Express 1x connection, and just naturally wondered whether he could plug a GPU into that slot and get it to work. It didn’t. There were a few reasons why, such as the limited Base Address Register space, and drivers that just weren’t written for ARM hardware. A bit of help from the Raspberry Pi software engineers and other Linux kernel hackers and those issues were fixed, albeit with a big hurdle in the CPU. The Broadcom chip in the Pi 4, the BCM2711, has a broken PCIe implementation.

There has finally been a breakthrough — Thanks to the dedicated community that has sprung up around this topic, a set of kernel patches manage to work around the hardware issues. It’s now possible to run a Radeon HD 5000/6000/7000 card on the Raspberry Pi 4 Compute Module. There are still glitches, and the Kernel patches to make this work will likely never land upstream. That said, It’s possible to run a desktop environment on the Radeon GPU on a Pi, and even a few simple benchmarks. The results… aren’t particularly inspiring, but that wasn’t really ever the point. You may be asking what real-world use is for a full-size GPU on the Pi. Sure, maybe crypto-mining or emulation, or being able to run more monitors for digital signage. More than that, it might help ensure the next Pi has a working PCIe implementation. But like many things we cover here, the real reason is that it’s a challenge that a group of enthusiasts couldn’t leave alone.

Continue reading “A Real GPU On The Raspberry Pi — Barely.”

WebGPU… Better Than WebGL?

As the browser becomes more like an operating system, we are seeing more deep features being built into them. For example, you can now do a form of assembly language for the browser. Sophisticated graphics have been around using WebGL since around 2011, but some people find it hard to use. [Surma] was one of those people and tried a new method that is just surfacing to do the same thing: WebGPU.

[Surma] liked it better and shares a lot of information in the post and — oddly — the post doesn’t use WebGPU for graphics very much. Instead, the post focuses on using GPU cores for fast computation, something else you can do with WebGPU. If your goal is to draw on the screen, though, you need to know the basics and the post links to a site with examples of doing this.

Continue reading “WebGPU… Better Than WebGL?”

90s PC With Modern Parts Throws Many Off Track

When building a desktop computer, usually the budget is the limiting factor. Making sacrifices on one part in order to improve another without breaking the bank is part of the delicate balance of putting together a capable PC. If you’re lucky enough to have the sponsors that [Shank] has though, caution can be thrown to the wind with regards to price for some blisteringly fast parts. Putting them in a ’90s Hot Wheels case to build the ultimate sleeper PC, though, is just icing on the top.

This isn’t quite as simple as replacing a motherboard in a modern PC case, though. The Hot Wheels PC used a mini-ITX standard and is quite a bit smaller than most modern computers outside of something like a Mac Mini. To get the RTX 3060 GPU into the computer the shrouds needed to be removed to save space, plus an unusual 92mm form factor liquid CPU cooler needed to be installed. An equally obscure power supply was included to round out the Ryzen 9 build and after a lot of tinkering eventually all the parts were fitted into this retro case including the original, working floppy disk drive. After that some additional case modding was installed such as RGB lighting, wheels with spinning rims, a spoiler, and an exhaust pipe.

The main issue with this build was temperatures, and both the CPU and GPU were topping out at dangerously high temperatures until [Shank] installed a terrifying 11,000 RPM case fan. With a series of original CRT monitors to go along with this sleeper PC he can have up to 9 displays with surprisingly high video quality thanks to the fundamental properties of CRTs. The video is definitely worth a watch and falls right in line with some of [Shank]’s other console mods that he is famous for such as this handheld Virtual Boy.

Thanks to [Fast Rock Productions] for the tip!

Continue reading “90s PC With Modern Parts Throws Many Off Track”

A GPU PCB mounted on top of a preheater, with a hot air gun blowing on top of one of the DDR chips, held with tweezers, about to be removed from the board. Most of the other chips are already gone from the board, with only a few left.

GPU RAM Upgrades Are Closer Than You Think

We’re all used to swapping RAM in our desktops and laptops. What about a GPU, though? [dosdude1] teaches us that soldered-on RAM is merely a frontier to be conquered. Of course, there’s gotta be a good reason to undertake such an effort – in his case, he couldn’t find the specific type of Nvidia GT640 that could be flashed with an Apple BIOS to have his Xserve machine output the Apple boot screen properly. All he could find were 1GB versions, and the Apple BIOS could only be flashed onto a 2GB version. Getting 2GB worth of DDR chips on Aliexpress was way too tempting!

The video goes through the entire replacement process, to the point where you could repeat it yourself — as long as you have access to a preheater, which is a must for reworking relatively large PCBs, as well as a set of regular tools for replacing BGA chips. In the end, the card booted up, and, flashed with a new BIOS, successfully displayed the Apple bootup logo that would normally be missing without the special Apple VBIOS sauce. If you ever want to try such a repair, now you have one less excuse — and, with the GT640 being a relatively old card, you don’t even risk all that much!

This is not the first soldered-in RAM replacement journey we’ve covered recently — here’s our write-up about [Greg Davill] upgrading soldered-in RAM on his Dell XPS! You can upgrade CPUs this way, too. While it’s standard procedure in sufficiently advanced laptop repair shops, even hobbyists can manage it with proper equipment and a good amount of luck, as this EEE PC CPU upgrade illustrates. BGA work and Apple computers getting a second life go hand in hand — just two years ago, we covered this BGA-drilling hack to bypass a dead GPU in a Macbook, and before that, a Macbook water damage revival story.

Continue reading “GPU RAM Upgrades Are Closer Than You Think”

A GPU card with a home-made fan assembly

3D-printed Fan Mount Keeps Server GPU Cool In Desktop Case

Most readers of Hackaday will be well aware of the current shortages of semiconductors and especially GPUs. Whether you’re planning to build a state-of-the art gaming PC, a mining rig to convert your kilowatt-hours into cryptocoins, or are simply experimenting with machine-learning AI, you should be prepared to shell out quite a bit more money for a proper GPU than in the good old days.

Bargains are still to be had in the second-hand market though. [Devon Bray] chanced upon a pair of Nvidia Tesla K80 cards, which are not suitable for gaming and no longer cost-effective for mining crypto, but ideal for [Devon]’s machine-learning calculations. However, he had to make a modification to enable proper thermal management, as these cards were not designed to be used in regular desktop PCs.

The reason for this is that many professional-grade GPU accelerators are installed in rack-mounted server cases, and are therefore equipped with heat sinks but no fans: the case is meant to provide a forced air flow to carry away the card’s heat. Simply installing the cards into a desktop PC case would cause them to overheat, as passive cooling will not get rid of the 300 W that each card pumps out on full load.

[Devon] decided to make a proper thermal solution by 3D printing a mount that carries three fans along with an air duct that snaps onto the GPU card. In order to prevent unnecessary fan noise, he added a thermal control system consisting of a Raspberry Pi Pico, a handful of MOSFETs, and a thermistor to sense the GPU’s temperature, so the fans are only driven when the card is getting hot. The Pi Pico is of course way more powerful than needed for such a simple task, but allowed [Devon] to program it in MicroPython, using more advanced programming techniques than would be possible on, say, an Arduino.

We love the elegant design of the fan duct, which enables two of these huge cards to fit onto a motherboard side-by-side. We’ve seen people working on the opposite problem of fitting large fans into small cases, as well as designs that discard the whole idea of using fans for cooling.

Continue reading “3D-printed Fan Mount Keeps Server GPU Cool In Desktop Case”

An AMD GPU plugged into an ATX PSU and Raspberry PI CM4

Raspberry Pi With Some Serious Graphical Muscle

[Jeff Geerling] routinely tinkers around with Raspberry Pi compute module, which unlike the regular RPi 4, includes a PCI-e lane. With some luck, he was able to obtain an AMD Radeon RX 6700 XT GPU card and decided to try and plug it into the Raspberry Pi 4 Compute Module.

While you likely wouldn’t be running games with such as setup, there are many kinds of unique and interesting compute-based workloads that can be offloaded onto a GPU. In a situation similar to putting a V8 on a lawnmower, the Raspberry Pi 4 pulls around 5-10 watts and the GPU can pull 230 watts. Unfortunately, the PCI-e slot on the IO board wasn’t designed with a power-hungry chip in mind, so [Jeff] brought in a full-blown ATX power supply to power the GPU. To avoid problems with differing ground planes, an adapter was fashioned for the Raspberry Pi to be powered from the PSU as well. Plugging in the card yielded promising results initially. In particular, Linux detected the card and correctly mapped the BARs (Base Address Register), which had been a problem in the past for him with other devices. A BAR allows a PCI device to map its memory into the CPU’s memory space and keep track of the base address of that mapped memory range.

AMD kindly provides Linux drivers for the kernel. [Jeff] walks through cross-compiling the kernel and has a nice docker container that quickly reproduces the built environment. There was a bug that prevented compilation with AMD drivers included, so he wasn’t able to get a fully built kernel. Since the video, he has been slowly wading through the issue in a fascinating thread on GitHub. Everything from running out of memory space for the Pi to PSP memory training for the GPU itself has been encountered.

The ever-expanding capabilities of the plucky little compute module are a wonderful thing to us here at Hackaday, as we saw it get NVMe boot earlier this year. We’re looking forward to the progress [Jeff] makes with GPUs. Video after the break.

Continue reading “Raspberry Pi With Some Serious Graphical Muscle”

What Kind Of GPU Are You?

In the old days, big computers often had some form of external array processor. The idea is you could load a bunch of numbers into the processor and then do some math operations on all of the numbers in parallel. These days, you are more likely to turn to your graphics card for number crunching support. You’ll usually use some library to help you do that, but things are always better when you understand what’s going on under the hood. That’s why we enjoyed [RasterGrid’s] post on GPU architecture types.

If you can tell the difference between IMR (immediate mode) and TBR (tile-based) rendering this might not be the post for you. But while we knew the terms, we found a lot of interesting detail including some graphics and pseudo code that clarified the key differences.

Continue reading “What Kind Of GPU Are You?”