A Look Inside A DIY Rocket Motor

[Joe Barnard] made a solid propellant rocket motor, and as one does in such situations, he put it through its paces on the test stand. The video below is not about the test, nor is it about the motor’s construction. Rather, it’s a deconstruction of the remains of the motor in order to better understand its design, and it’s pretty interesting stuff.

Somewhere along the way, [Joe], aka “BPS.Space” on YouTube, transitioned from enthusiastic model rocketeer to full-fledged missile-man, and in the process stepped up his motor game considerably. The motor that goes under the knife — or rather, the bandsaw — in this video is his “Simplex V2,” a completely DIY build of [Joe]’s design. For scale, the casing is made from a 6″ (15 cm) diameter piece of aluminum tubing over a meter in length, with a machined aluminum forward closure and a composite nozzle assembly. This is a pretty serious piece of engineering.

The closure and the nozzle are the focus of the video, which makes sense since that’s where most of the action takes place. To understand what happened during the test, [Joe] lopped them off and cut them roughly in half longitudinally. The nozzle throat, which was machined from a slug of graphite, fared remarkably well during the test, accumulating only a little slag from the propellant, a combination of powdered aluminum, ammonium perchlorate, and HTBP resin. The lower part of the nozzle, made from phenolic-impregnated linen, did pretty well too, building up a pyrolyzed layer that acted much like a space capsule’s ablative heat shield would. The forward closure, whose sole job is to contain the inferno and direct the exhaust anywhere but up, took more of a beating but stood up to the challenge. Especially interesting was the state of the O-rings and the way that the igniter interfaced with the closure.

Post mortems like these are valuable teaching tools, and while it must be heartbreaking to destroy something you put so much work into, you can’t improve what you can’t measure. Hats off to [Joe] for the peek inside his world. Continue reading “A Look Inside A DIY Rocket Motor”

Evidence For Graphite As A Room Temperature Superconductor

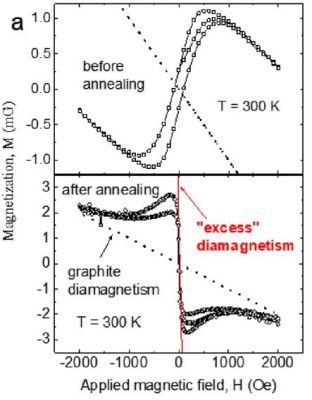
Magnetization M(H) hysteresis loops measured for the HOPG sample, before and after 800 K annealing to remove ferromagnetic influences. (Credit: Kopelevich et al., 2023)

Little has to be said about why superconducting materials are so tantalizing, or what the benefits of an ambient pressure, room temperature material with superconducting properties would be. The main problem here is not so much the ‘room temperature’ part, as metallic hydrogen is already capable of this feat, if at pressures far too high for reasonable use. Now a recent research article in Advanced Quantum Technologies by Yakov Kopelevich and colleagues provides evidence that superconducting properties can be found in cleaved highly oriented pyrolytic graphite (HOPG). The fact that this feat was reported as having been measured at ambient pressure and room temperature makes this quite noteworthy.

What is claimed is that the difference from plain HOPG is the presence of parallel linear defects that result from the cleaving process, a defect line in which the authors speculate that the strain gradient fluctuations result in the formation of superconducting islands, linked by the Josephson effect into Josephson junctions. In the article, resistance and magnetization measurements on the sample are described, which provide results that provide evidence for the presence of these junctions that would link superconducting islands on the cleaved HOPG sample together.

As with any such claim, it is of course essential that it is independently reproduced, which we are likely to see the results of before long. An interesting part of the claim made is that this type of superconductivity in linear defects of stacked materials could apply more universally, beyond just graphite. Assuming this research data is reproduced successfully, the next step would likely be to find ways to turn this effect into practical applications over the coming years and decades.

Mining And Refining: Graphite

In my teenage years I worked for a couple of summers at a small amusement park as a ride operator. Looking back on it, the whole experience was a lot of fun, although with the minimum wage at $3.37 an hour and being subjected to the fickle New England weather that ranged from freezing rains to heat stroke-inducing tropical swelter, it didn’t seem like it at the time.

One of my assignments, and the one I remember most fondly, was running the bumper cars. Like everything else in the park, the ride was old and worn out, and maintenance was a daily chore. To keep the sheet steel floor of the track from rusting, every morning we had to brush on a coat of graphite “paint”. It was an impossibly messy job — get the least bit of the greasy silver-black goop on your hands, and it was there for the day. And for the first few runs of the day, before the stuff worked into the floor, the excited guests were as likely as not to get their shoes loaded up with the stuff, and since everyone invariably stepped on the seat of the car before sitting on it… well, let’s just say it was easy to spot who just rode the bumper cars from behind, especially with white shorts on.

The properties that made graphite great for bumper cars — slippery, electrically conductive, tenacious, and cheap — are properties that make it a fit with innumerable industrial processes. The stuff turns up everywhere, and it’s becoming increasingly important as the decarbonization of transportation picks up pace. Graphite is amazingly useful stuff and fairly common, but not all that easy to extract and purify. So let’s take a look at what it takes to mine and refine graphite.

Continue reading “Mining And Refining: Graphite”

Retrotechtacular: Circuit Potting, And PCBs The Hard Way

There was a time when the very idea of building a complex circuit with the intention of destroying it would have been anathema to any electrical engineer. The work put into designing a circuit, procuring the components, and assembling it, generally with point-to-point wiring and an extravagant amount of manual labor, only to blow it up? Heresy!

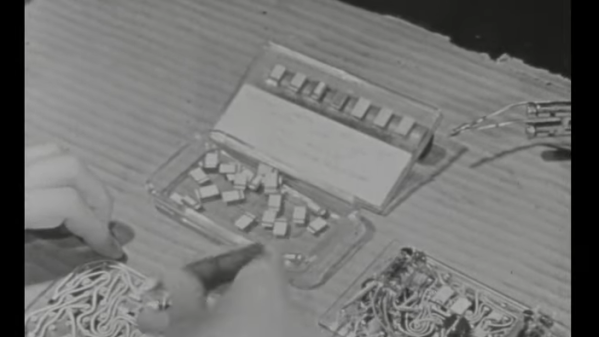
But, such are the demands of national defense, and as weapons morphed into “weapon systems” after World War II, the need arose for electronics that were not only cheap enough to blow up but also tough enough to survive the often rough ride before the final bang. The short film below, simply titled Potted and Printed Circuits, details the state of the art in miniaturization and modularization of electronics, circa 1952. It was produced by the Telecommunications Research Establishment (TRE), the main electronics R&D entity in the UK during the war which was responsible for inventions such as radar, radio navigation, and jamming technology.

Continue reading “Retrotechtacular: Circuit Potting, And PCBs The Hard Way”

Casting Metal With A Microwave And Vacuum Cleaner

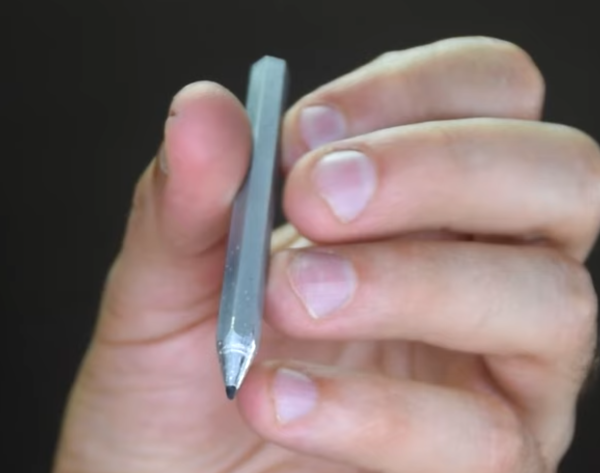
Metalworking might conjure images of large furnaces powered by coal, wood, or electricity, with molten metal sloshing around and visible in its crucible. But metalworking from home doesn’t need to use anything more fancy than a microwave, at least according to [Denny] a.k.a. [Shake the Future]. He has a number of metalworking tools designed to melt metal using a microwave, and in this video he uses them to make a usable aluminum pencil with a graphite core.

Before getting to the microwave kiln, the pencil mold needs to be prepared. A 3D-printed pencil is first created with the graphite core, and then [Denny] uses a plaster of Paris mixture to create the mold for the pencil. The 3D printed plastic is left inside the mold and placed in the first microwave kiln, which is turned on just enough to melt the plastic out of the mold, leaving behind the graphite core. From there a second kiln goes into the microwave to melt the aluminum.

Once the molten aluminum is ready, it is removed from the kiln and poured in the still-warm pencil mold. This is where [Denny] has another trick up his sleeve. He’s using a household vacuum cleaner to suck the metal into place before it cools, creating a rudimentary but effective vacuum forming machine. The result is a working pencil, at least after he wears down a few razor blades attempting to sharpen the metal pencil. For more information about how [Denny] makes these microwave kilns, take a look at some of his earlier projects.

Continue reading “Casting Metal With A Microwave And Vacuum Cleaner”

A Quick And Easy Recipe For Synthetic Rubies

With what it takes to make synthetic diamonds – the crushing pressures, the searing temperatures – you’d think similar conditions would be needed for any synthetic gemstone. Apparently not, though, as [NightHawkInLight] reveals his trivially easy method for making synthetic rubies.

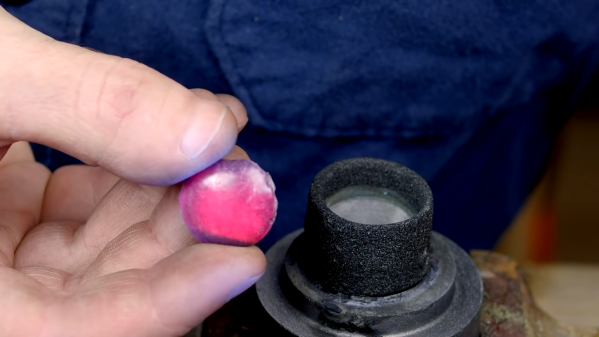
Like their gemstone cousin the sapphire, rubies are just a variety of corundum, or aluminum oxide. Where sapphire gets its blue tint mainly from iron, rubies get their pink to blood-red hue from chromium. So [NightHawkInLight]’s recipe starts with aluminum oxide grit-blasting powder and chromium (III) oxide, a common green pigment and one of the safer compounds in a family that includes spectacularly toxic species like hexavalent chromium compounds. When mixed together, the two powders are heated in a graphite crucible using an arc welder with a carbon electrode. The crucible appears to be made from an EDM electrode; we’ve seen them used for air bearings before, but small crucibles are another great use for the stuff. There’s some finesse required to keep the nascent rubies from scattering all over the place, but in the end, [NightHawkInLight] was rewarded with a large, deep pink ruby.

This looks like a fun, quick little project to try sometime. We wonder if the method can be refined to create the guts of a ruby laser, or if perhaps it can be used to create sapphires instead.

Continue reading “A Quick And Easy Recipe For Synthetic Rubies”

[Ben Krasnow]’s Take On DIY Air Bearings

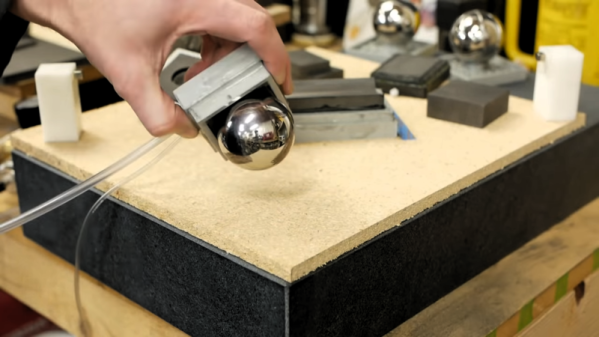
We’ve got to admit that watching [Ben Krasnow]’s new video on air bearings is tough. We found our eyes constantly checking the spherical air bearing in the foreground, which for the first eight minutes of the video just kept going. It was strangely hypnotic, and made it hard to concentrate on all the other cool stuff [Ben] was up to.

If the topic of air bearings seems familiar, it might be because we recently reported on DIY air bearings made from used EDM electrodes. [Ben] saw that too, and dusted off his old air bearing project. Literally, as it turns out, because the graphite blocks whose porosity and softness make them the perfect material for air bearings also makes for a dusty workshop. We’d recommend breathing protection of some sort while machining graphite. In addition to simple puck bearings, [Ben] came up with more complicated designs, including the aforementioned spherical bearing. He used the steel ball itself as a precision tool to grind the graphite out, first by coating it with abrasive and then by cutting grooves in it to act like a file. A cylindrical bearing was also cut, this time with sandpaper glued directly to the ground steel rod that would seat in the bearing.

[Ben]’s other innovation is vacuum preloading, where he applies both vacuum and pressure to the bearing plenum. The vacuum provides the force needed to capture the moving element while the pressure bears the load. It’s a careful balancing act, but it works well enough to capture the large steel ball and keep it turning effortlessly.

We really liked [Ben]’s take on air bearings, especially his thoughts on creating fully enclosed cylindrical bearings. Those could be useful for low-friction linear drives, and we look forward to seeing more on those.

Continue reading “[Ben Krasnow]’s Take On DIY Air Bearings”