The simplest and easiest way to charge a battery with a solar panel is to connect the panel directly to the battery. Assuming the panel has a diode to prevent energy from flowing through it from the battery when there’s no sunlight. This is fairly common but not very efficient. [Debasish Dutta] has built a charge controller that addresses the inefficiencies of such a system though, and was able to implement maximum power point tracking using an Arduino.
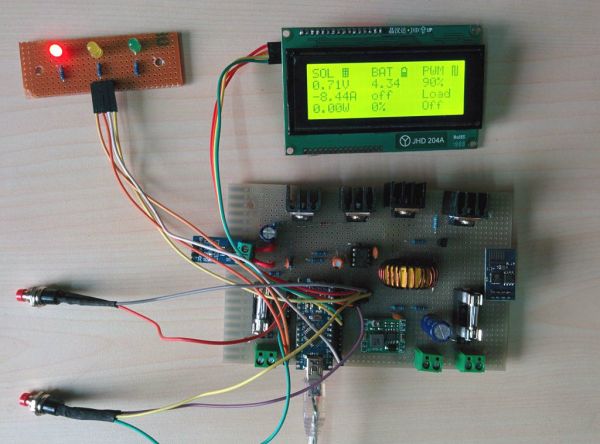
Maximum power point tracking (MPPT) is a method that uses PWM and a special DC-DC converter to match the impedance of the solar panel to the battery. This means that more energy can be harvested from the panel than would otherwise be available. The circuit is placed in between the panel and the battery and regulates the output voltage of the panel so it matches the voltage on the battery more closely. [Debasish] reports that an efficiency gain of 30-40% can be made with this particular design.
This device has a few bells and whistles as well, including the ability to log data over WiFi, an LCD display to report the status of the panel, battery, and controller, and can charge USB devices. This would be a great addition to any solar installation, especially if you’ve built one into your truck.
This is [Debasish]’s second entry to The Hackaday Prize. We covered his first one a few days ago. That means only one thing: start a project and start documenting it on hackaday.io
[Thomas Snow] found himself in a bit of a pickle. His kitchen lights didn’t adequately light his counter-tops. So instead of inventing a light bending device that could warp space-time enough to get the light where it needs to go, he decided to take the easy road and installed a motion controlled LED strip under the cabinets.
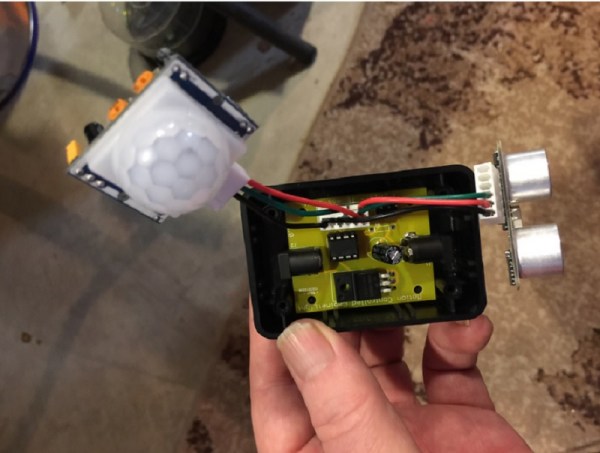
Now, these aren’t just any ‘ol motion control lights. Not only is [Thomas] able to turn the lights on and off with a wave of his hand, he can control the brightness as well. He’s doing the magic with an ultrasonic range sensor and PIR sensor. An ATTiny85 ties everything together to form the completed system.
The PIR sensor was incorporated because [Thomas] didn’t want to bug his pets with the 40kHz chirp from the ultrasonic sensor. So it only comes on when the PIR sensor sees your hand. Be sure to check out [Thomas’s] project for full source and schematics.
[Oriol Galceran] has constructed an interesting robotic chess player for his end of school project. It’s called the ChessM8, and is an impressive feat considering [Oriol] is only 17! He’s using an Arduino Mega that connects to the host PC via a Python script.
The AI can be any chess engine that uses the Universal Chess Interface protocol, which [Oriol] points out that most of them do. We’ve seen other chess robots here before, along with others that you can play on your wall and uses Nixie Tubes. But [Oriol’s] build is the largest of them all.
He says there’s a network of REED switches under the chess board to detect when a piece is present or not. It would be interesting to know how he dealt with debouncing issues, and if Hall Effect sensors might have been a better choice. Let us know in the comments how you would detect the chess piece.
And be sure to check out the video below to see the chess robot in action.
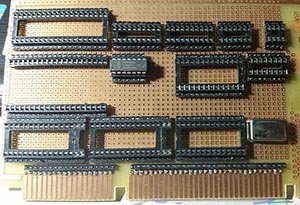
The 6502 CPU is probably the most famous of all the 8-bit processors out there, whether in the form of bare chips for homebrew computers, or as slightly modified derivative chips found in everything from the C64, the NES, and the BBC Micro. For this edition of the Hacklet, we’re taking a look at all the 6502-based builds on hackaday.io.
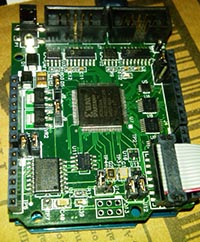
There aren’t many transistors on a 6502, making it perfect for implementing on an FPGA. [Michael A. Morris] has an Arduino FPGA shield, and his soft-6502 project is called Cameleon. There’s a bunch of SPI Flash and FRAM on board, and the 128kB of (parallel) SRAM on the board is more than enough to handle any computational task you can throw at it.
Since the Cameleon is built on programmable logic, [Michael] thought it would be a good idea to put some of those unused opcodes to use. There are instructions for coprocessor support, and a bunch of instructions specifically designed to make the Forth implementation easier.
Maybe programmable logic isn’t your thing, and you’d just like a simple computer like the Ohio Scientific or the Apple I. The L-Star is for you. That’s [Jac Goudsmit]’s build featuring a 6502, a Parallax Propeller, and little else.
The Parallax Propeller is a powerful (multi-core!) chip that’s easily capable of handling video out, keyboard in, and serving up the ROM and RAM of a computer. [Jac]’s build does it all beautifully, and if you’re looking for the easiest way to run code on a 6502, this is how you do it.
There’s some weird stuff going on in this machine – 18-bit addressing and 80kB of RAM. So far [Eric] has managed to dump the ROM, and he’s taking a look at the floppy controller board to see if he can figure out how it’s mapped. It’s one thing to figure out what’s broken on an Apple II or C64; those are well documented machines. It’s another thing entirely to figure out a machine very few people have heard of, and we tip our hat to [Eric] and his efforts.
Here’s a build that both does and doesn’t have a 6502 in it. [BladeRunner]’s SheMachine is a single board computer that has a 65c816 in it. The ‘816 is an interesting beast that operates as a standard 6502 until a bit is flipped in one of its registers. After that, it has a 24-bit address space for addressing 16 Megabytes of memory, 16-bit registers, but is still completely backwards compatible with the 6502. Yes, it does have weird interleaved address pins, but we can only imagine what the world would be like if this chip came out a few years earlier…
[BladeRunner] is designing the SheMachine with 1MB of SRAM – more than enough, really – and is mapping all the memory through a CPLD. That’s how you should do it, anyway.
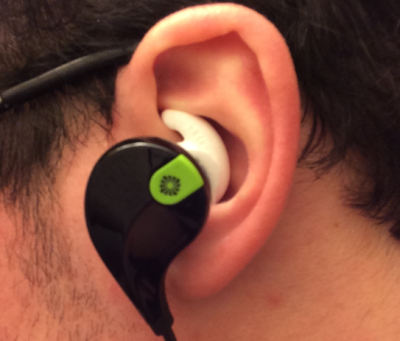
Have you ever had a pair of ear buds fit perfectly out of the package? Probably not. Well, [Joe] decided to take matters into his own hands and cast his own silicone ear bud covers custom made for him.
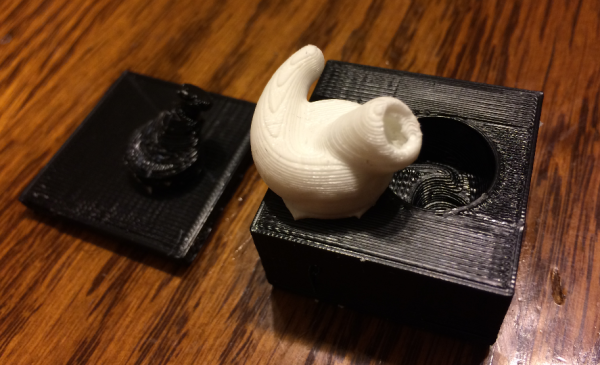
The traditional route would have been to make an ear bud model, make a mold from it, cast a copy from it… etc, etc. But [Joe] wanted to try something else — he designed and 3D printed the two-part mold, and used plain old silicone caulking to fill it.
First he 3D modeled the ear bud covers in SolidWorks, then he had to learn how to design the mold for it, but luckily, there’s a handy tutorial. After printing the mold he opted to use 100% silicone caulking in order to make the part since he had some lying around the house. The problem is, this stuff can take days to cure — unless you mix in some cornstarch.
The golden ratio [Joe] found was about 5:1 silicone to cornstarch, which resulted in a cure time of about 20 minutes.
After curing you just need to trim off the excess silicone. In the molding process this is known as “flash”.
Since this is caulking he’s using, you’re going to want to wash off the part a few times because this type of silicone produces acetic acid as it cures.
The ear buds fit great and inspired [Joe] to try molding even more things, like a custom sleeping mask using the 3D scan of your own face!
Provided you have an NTSC-compatible TV you can build yourself a really inexpensive spectrum analyzer. From there you just need one trivial piece of hardware to complete this build. [Bruce Land] has come up with a spectrum analyzer that shouldn’t cost any more than $5, if that’s what’s been keeping you from adding this tool to your workbench!
The spectrum analyzer is based on a PIC32 microcontroller which was previously proven in his Oscilloscope project. [Bruce] has managed to squeeze quite a bit out of this robust chip; the spectrum analyzer has 450 kHz bandwidth and runs a 256 Hz TV display and can output over 30 updates per second. The microcontroller runs the Fast Fourier Transform (FFT) to do calculations, with great results.
[Bruce] notes that the project was based on TV framework from another project, and that the FFT was added on top of that. Be sure to check out the source code on the project site if you’ve been on the hunt for an inexpensive spectrum analyzer, and if you need something with more processing power but only slightly more money, check out the FFT that runs on the Raspberry Pi’s GPU.
Last year we challenged you to build the next generation of connected devices. Six months later, the best teams and projects from around the world battled for the greatest prize of all: the respect of their peers and a trip to space. This year, we’re issuing a call to hackers, engineers, makers and startups from all over the world, to focus their creative efforts on nothing less than solving serious issues facing humanity.
Fix the World
We’ll all be facing a lot of problems in the next few decades, whether they’re from rising costs and consumption of oil, droughts, access to food, demographic shifts in populations, or increasing health care costs. These problems need to be dealt with, and there’s no better time than right now to start working on solutions.
What do we want from you? We want you to identify the greatest problems faced by humanity in the next few years and come up with a solution. This can be anything from better, lower-cost solar power components, inexpensive ultrasound machines, better ways to store drugs, more advanced ways of measuring farm production, or cheaper, more sustainable smartphones to bridge the digital divide. The world is full of problems, but if there’s one thing hackers have taught us, it’s that there are more than enough people willing to find solutions.
Prizes
If worldwide notoriety isn’t enough personal incentive, Hackaday is back with a huge slate of prizes for those devices that best exemplify solutions to problems that matter.
The Grand Prize is a trip to space on a carrier of your choice or $196,883 (a Monster Group number). Other top prizes include a 90-Watt laser cutter, a builder kit (pcb mill, 3d printer, cnc router, bench lathe), a tour of CERN in Geneva, and a tour of Shenzhen in China.
New this year is the Best Product award. Go the extra mile and show a production-ready device (in addition to supplying three beta test units for judging) and you can score $100,000! The entry is of course still eligible to compete for the Grand prize and other top prizes.
We’re able to pull this off once again thanks to the vision of Supplyframe who managed to unite giants of the electronics industry as sponsors of the 2015 Hackaday Prize. Atmel, Freescale, Microchip, Mouser, and Texas Instruments have all signed on in supporting this mission.
Individuals, Colleges, Hackerspaces, and Startups
If you just don’t want to go-it alone, get your team excited. After all, it was a team that won the Grand Prize last year. SatNOGS transformed the cash-option of $196,418 into a jumpstart for a foundation to carry the project forward. Get the boss on board by touting the notoriety your company will get from showing off their engineering prowess. Or help build your resume by herding your college buddies into some brainstorming session. And the Best Product prize is perfect for Startups who want to show off their builds.
Judges
Joining the Judging Panels this year are Akiba (Freaklabs), Pete Dokter (Sparkfun), Heather Knight (Marilyn MonRobot), Ben Krasnow (GoogleX & host of Applied Science on YouTube), Lenore Edman & Windell Oskay (Evil Mad Scientist Labs), and Micah Scott (Scanlime).
Our returning judges are Limor “Ladyada” Fried (Adafruit), Jack Ganssle (Ganssle Group, & The Embedded Muse), Dave Jones (EEVBlog), Ian Lesnet (Dangerous Prototypes), and Elecia White (Logical Elegance).
You can read all of the judge bios and find social media and webpage links for them on our Judges page. We are indebted to these industry experts for sharing their time and talent to make the Hackaday Prize possible.
Tell Everyone
We don’t ask often: please tell everyone you know about the 2015 Hackaday Prize! Social media share icons are just above the image at the top of this post. Submit this page or the prize page (http://hackaday.io/prize) to all your favorite sites. No hacker should get through this day without hearing about #HackadayPrize and we can’t reach total media saturation without your help. Thanks in advance!
GET STARTED NOW
Don’t wait, put up an idea right now and tag it with “2015HackadayPrize”. We’re sending out swag for early ideas that help get the ball rolling. And as you flesh out your plans you could score prizes to help build the prototype like PCBs, 3D prints, laser cutting, etc. Make it to the finals and you’ll be looking at the five top prizes we mentioned earlier. A simple idea can change the world.


 There aren’t many transistors on a 6502, making it perfect for implementing on an FPGA. [Michael A. Morris] has an Arduino FPGA shield, and his soft-6502 project
 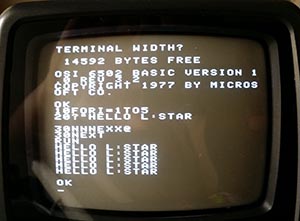 Maybe programmable logic isn’t your thing, and you’d just like a simple computer like the Ohio Scientific or the Apple I.