Minimal MQTT With Micropython

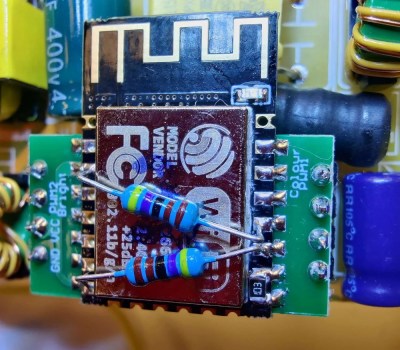
I have been meaning to play around with MQTT for some time now, and finally decided to take the plunge one evening last week. I had three cheap home temperature and humidity sensors, and was bothered that they often didn’t agree. Surprisingly, while the analog one had a calibration adjustment in the back, I have no idea how to calibrate the two digital ones. I took this as a sign that it was time to learn MQTT and be able to install my own, accurate sensors. Of course, I began by ordering the cheapest sensors I could find, but I can always upgrade later on.

Three Cheap Sensors

While we have written quite a bit about MQTT in Hackaday, I had to go all the way back to 2016 to find this introductory four-part series by Elliot Williams. Five years is a long time in the tech world, but I decided to give it a try anyway. Continue reading “Minimal MQTT With Micropython”

Automating Your Car With A Spare Fob And An ESP8266

Despite the name, home automation doesn’t have to be limited to only the devices within your home. Bringing your car into the mix can open up some very interesting possibilities, such as automatically getting it warmed up in the morning if the outside air temperature drops below a certain point. The only problem is, not everyone is willing to start hacking their ride’s wiring to do it.

Which is exactly why [Matt Frost] went the non-invasive route. By wiring up an ESP8266 to a cheap aftermarket key fob for his Chevrolet Suburban, he’s now able to wirelessly control the door locks and start the engine without having to make any modifications to the vehicle. He was lucky that the Chevy allowed him to program his own fob, but even if you have to spend the money on getting a new remote from the dealer, it’s sure to be cheaper than the repair bill should you cook something under the dash with an errant splice or a misplaced line of code.

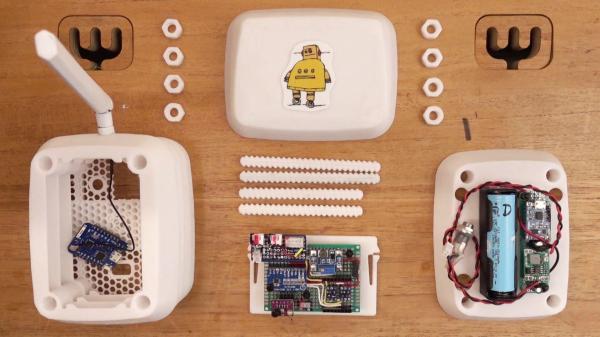
The hardware for this project is about as simple as it gets. The fob is powered by the 3.3 V pin on the Wemos D1 Mini, and the traces for the buttons have been hooked up to the GPIO pins. By putting both boards into a custom 3D printed enclosure, [Matt] came up with a tidy little box that he could mount in his garage and run off of a standard USB power supply.

On the software side of things [Matt] has the device emulating a smart light so it can easily be controlled by his Alexa, with a few helpful routines sprinkled in that allow him to avoid the awkward phraseology that would be required otherwise. There’s also a minimal web server running on the microcontroller that lets him trigger various actions just by hitting the appropriate URLs, which made connecting it to Home Assistant a snap. One downside of this approach is that there’s no acknowledgement from the vehicle that the command was actually received, but you can always send a command multiple times to be sure.

This isn’t the first time we’ve seen an ESP8266 used to “push” buttons on a remote. If you’ve got a spare fob for your device, or can get one, it’s an excellent way to automate it on the cheap.

Making Smart Bulbs Smarter With The Power Of MQTT

What’s the point of smart home automation? To make every day tasks easier, of course! According to [Tomasz Cybulski], that wasn’t the case when he installed IKEA smart lights in his closet. It’s handy to have them in a common switch, in this case a remote control, but having to look for it every time he needed the lights could use some improvement. Enter his project to make smart bulbs smarter, through the use of a simple ESP8266.

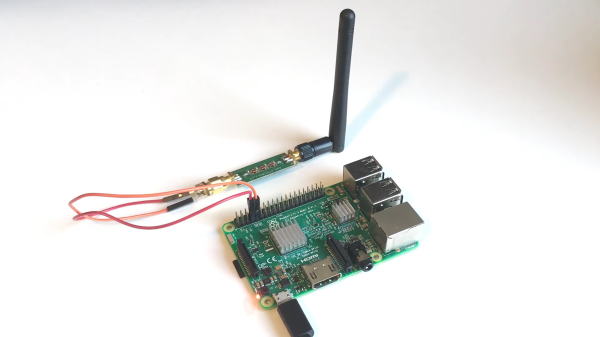
While hooking a door switch to the lights’ power supply could provide a quick solution, [Tomasz]’s wife wanted to keep the functionality of the remote control, so he had to look elsewhere. These light bulbs use the simple Zigbee protocol, so arranging for other devices was rather trivial. A USB dongle to interface with the protocol was configured for his existing Raspberry Pi automation controller, while an ESP8266 served as the real-world sensor by connecting it to reed switches installed in the closet doors.

With all the hardware sorted out, it’s a simple matter of making it all talk to each other. The ESP8266, using the Tasmota firmware, sends a signal to an MQTT server running on the Raspberry Pi, which in turn translates it to a remote trigger on the Zigbee frequency with the dongle. The lights turn on when the door opens, and off again once it closes. And since there were no further modifications to the lights themselves, the original IKEA controller still works as expected, which we’re sure [Tomasz]’s wife appreciates!

MQTT can be an interesting piece of software that goes beyond just home automation though, and if you already have a server in your home you can use it to transfer your clipboard’s contents to another device. If you are using it for home automation though, here’s an inspiration for a rather unusual dashboard to keep things interesting. Check out this hack in action after the break.

Continue reading “Making Smart Bulbs Smarter With The Power Of MQTT”

DIY ESP32 Video Doorbell Locks Out Big Brother

There’s no question that being able to see who’s at your front door from your computer or mobile device is convenient, which is why the market is currently flooded with video doorbells. Unfortunately, it’s not always clear who else has access to the images these devices capture. Organizations such as the Electronic Frontier Foundation have argued that by installing one of these Internet-connected cameras on their front door, consumers are unwittingly contributing to a mass surveillance system that could easily be turned against them.

Luckily, there’s a solution. As [Sebastian] shows in his latest project, you can build your own video doorbell that replicates the features of the commercial offerings while ensuring you’re the only one who has access to the data by leveraging open source, community developed projects such as ESPHome and Home Assistant. At the same time, modern manufacturing techniques like desktop 3D printing and low-cost PCB fabrication mean your DIY doorbell doesn’t have to look like you made it yourself.

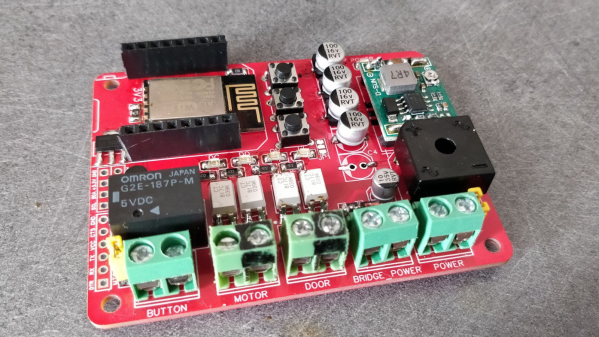
The project starts with a custom PCB that combines the ESP32, a camera module, a capacitive touch sensor, a relay to optionally trigger an electronic door lock, and a DC-DC converter that will let you power the device from a wide range of input voltages. The board even has a spot where you can solder on an additional 8 MB of external PSRAM for the ESP32, which will enable the chip to capture higher resolution video.

The electronics are housed in a minimalistic 3D printed enclosure that would fit right in alongside similar gadgets from the likes of Ring and Arlo; especially if you have access to a CNC and can cut the front panel out of acrylic. The lighted touch sensor looks phenomenal, and really gives the device a professional feel. That said, it doesn’t look like the case would last very long if exposed to harsh weather and there are some obvious physical security issues with this approach. But to be fair, we’ve seen the same problem with commercial hardware.

Naturally with a project like this, the hardware is only half of the story. It takes a considerable amount of software poking and prodding to get things like mobile device notifications working, and as a special added annoyance, the process is different depending on which MegaCorp produced the OS your gadget is running. [Sebastian] has documented the bulk of the process in the video after the break, but the finer points will likely need some adjustment depending on how you want to set things up.

This is an exceptionally impressive project for sure, but if the whole slick futuristic look isn’t your style, you could always opt to go with the DIY video door bell that looks like it came from an alternate reality version of 1986.

Continue reading “DIY ESP32 Video Doorbell Locks Out Big Brother”

An Open Source IR Gateway Based On The ESP8266

The market is absolutely inundated with smart gadgets, with everything from coffee makers to TVs advertising that they support the latest and greatest in home automation platforms. Don’t worry about how many of those platforms and services will still up up and running in the next few years, the thing will probably stop working before then anyway. No sense worrying about the details in a disposable world.

Of course, not all of us are so quick to dump working hardware in the name of the latest consumer trend. Which is why [Viktor] has developed an open source infrared gateway that can connect your “dumb” devices to the latest flash in the pan backend service with nothing more than a software update. Though even modern smart TVs still include IR remotes, so there’s nothing stopping you from using it with newer gear if you don’t trust like the built-in implementation.

The hardware here is really quite simple, essentially boiling down to a few IR LEDs and an IR receiver hanging off the GPIO ports of an ESP8266. While the receiver isn’t strictly necessary, it does allow [Viktor] to rapidly implement new IR codes. He just points the existing remote at the board, hits a button, and the decoded command gets sent out over MQTT where he can easily snap it up.

[Viktor] has done the hard work of creating the PCB design and testing out different IR LEDs to find the ones with the best performance. But if you wanted to just throw something together in a weekend, you should be able to get his firmware running with little more than a bare ESP and a random IR LED salvaged from an old remote. But don’t be surprised if you get hooked on the concept and end up rolling your own home automation system.

Electric Window Mechanism Into A Electric Screen Door

In many parts of the world leaving open a door or window is a good way to get a house full of bugs. Remembering to close doors behind them can be surprisingly hard for members of the human race, so the [DuctTape Mechanic] used the components from a car’s electric window to automate his sliding screen door.

After the excess pieces were cut off the rail, the motor and rail were mounted on top of the door frame. A long bolt is attached to the moving plate on the rail, which pushes on the pack of the door to close it. After closing, the mechanism returns to its open position, allowing the door to be opened by hand again. The motor is controlled by an Arduino running a very simple sketch, which senses if the door is closed with a microswitch and starts a 10 second countdown once opened. Two relays are used to create an H-bridge circuit to drive the motor in both directions.

It doesn’t look like there is any provision to detect if it is obstructed. A simple solution could be to make the push rod spring-loaded, so it can slide over the door if there is excessive resistance.

If you only want to let certain creatures into your house, we have no shortage of automated pet door for your hacking pleasure.

Continue reading “Electric Window Mechanism Into A Electric Screen Door”

Garbage Can Takes Itself Out

Home automation is a fine goal but typically remains confined to lights, blinds, and other things that are relatively stationary and/or electrical in nature. There is a challenge there to be certain, but to really step up your home automation game you’ll need to think outside the box. This automated garbage can that can take itself out, for example, has all the home automation street cred you’d ever need.

The garbage can moves itself by means of a scooter wheel which has a hub motor inside and is powered by a lithium battery, but the real genius of this project is the electronics controlling everything. A Raspberry Pi Zero W is at the center of the build which controls the motor via a driver board and also receives instructions on when to wheel the garbage can out to the curb from an Nvidia Jetson board. That board is needed because the creator, [Ahad Cove], didn’t want to be bothered to tell his garbage can to take itself out or even schedule it. He instead used machine learning to detect when the garbage truck was headed down the street and instruct the garbage can to roll itself out then.

The only other thing to tie this build together was to get the garage door to open automatically for the garbage can. Luckily, [Ahad]’s garage door opener was already equipped with WiFi and had an available app, unbeknownst to him, which made this a surprisingly easy part of the build. If you have a more rudimentary garage door opener, though, there are plenty of options available to get it on the internets.

Continue reading “Garbage Can Takes Itself Out”