The Great Automotive AM Radio War of 2023 rages on, with the news this week that Ford has capitulated, at least for now. You’ll recall that the opening salvo came when the US automaker declared that AM radio was unusable in their EV offerings thanks to interference generated by the motor controller. Rather than fixing the root problem, Ford decided to delete the AM option from their EV infotainment systems, while letting their rolling EMI generators just keep blasting out interference for everyone to enjoy. Lawmakers began rattling their sabers in response, threatening legislation to include AM radio in every vehicle as a matter of public safety. Ford saw the writing on the wall and reversed course, saying that AM is back for at least the 2024 model year, and that vehicles already delivered without it will get a fix via software update.
inkjet33 Articles
Label Your SMD Tapes With An Inkjet Printer
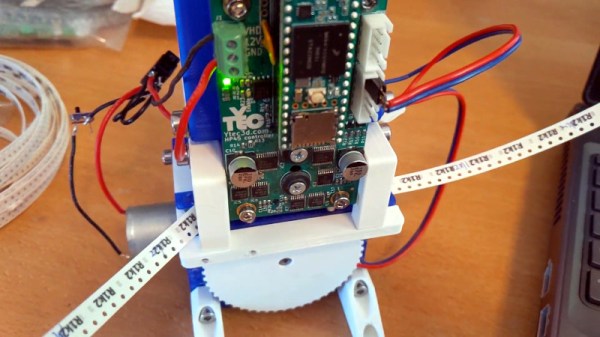
If you’ve ever had to use SMD components on tape outside the realm of the automated assembly machines for which they were designed, you’ll know that one tape looks very like another and it can be very annoying to keep track of which is which. We can’t help admiring [Yvo de Haas’] inkjet printer for SMD tapes then, which efficiently prints whatever identifying marks you need on the back of your tapes.
The printer uses the venerable HP45 inkjet cartridge, and teams it with a 3D printed mechanism and [Yvo]’s self-designed driver board. A worm gear motor and a sprocket take care of advancing the tape through the mechanism past the printhead, and there is a well-assembled piece of software to drive it all. With extremely comprehensive build instructions it should be within the reach of anyone who handles component tape, and from our experience of hand-labeling tape for kits we can see that it could be a Godsend. Take a look at it in action in the video below.
So far the tape-handling machinery we’ve seen has mostly been for cutting sections rather than labeling. We can see that this printer paired with a tape cutter should be essential equipment for anyone starting a kit business.
Continue reading “Label Your SMD Tapes With An Inkjet Printer”
This Is A 3D Ink Jet Printer
We spend a lot of time thinking of how to create 3D objects, but what about being able to print full color graphics on the objects we create? This isn’t just multicolor, this is full-color! Here’s one elegant solution that uses ink jets to print full color images on 3D terrain models.
Admittedly we are very late to the party on this one as the technology was spotted on season 22, episode 7 of How It’s Made that aired way back in 2013. The segment shows terrain models — think of the physical contour map under glass that you might see at a National Park or at the main lodge of a ski resort. It’s easy enough to envision how the elevation is carved out of foam by a CNC. But the application of color printing to those surfaces is what caught our eye this time around. It’s a custom rig that a company called Solid Terrain Modeling built for this purpose. Since the height at any point on the work material is already known from the milling process, four ink heads (black, cyan, magenta, yellow) have been added to individual Z-axis actuators, applying a raster image as they traverse the surface.
Part of what makes this work is the post-processing steps that follow milling. The model is very carefully cleared of debris before being sprayed with primer. Another coat of an undetermined material (“a specialty coating to receive the ink”) gets the piece ready for the ink. The final step after printing is a protective clear coat. In the How It’s Made episode, buildings and other structures are then 3D-printed and added.
It seems like the trick is to get the heads to have as small of a footprint as possible for clearance when printing in sloped areas. We’re not experts in all the available consumer ink-jet printers out there, but finding a setup where the heads are separated from the reservoirs would be key. Watching this segment made us so excited to think of the person/people who got to hack this rig together as part of their job.
Looking for other ways to abuse ink jet parts? [Sprite_TM] came up with a way to make them handheld so you print on anything from latte foam to your buddy’s forearm. There’s no better name for that than the Magic Paintbrush.
No Need For Speed With This Arduino-Based Inkjet Printer
When it comes to computers, it seems like the only thing that matters is speed. The more the better, in general, and the same applies to peripherals. We want the fastest network adapters, the fastest video card, and the fastest printer. So why in the world would anyone intentionally build a really slow inkjet printer? For art, of course.
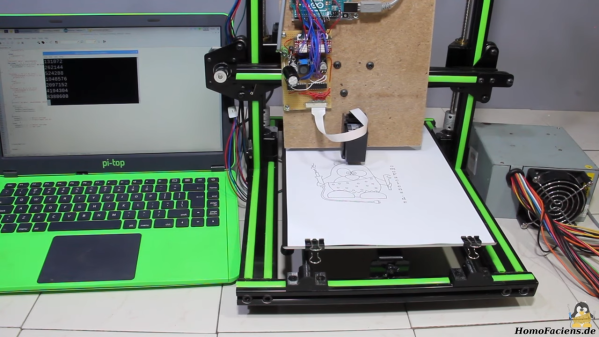
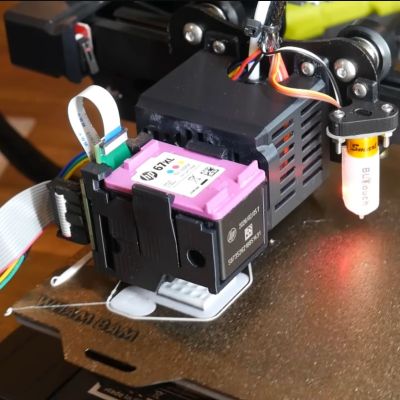
At least that’s the story [HomoFaciens] tells us in the video below. His efforts are in support of a friend’s art project, which seeks to print slowly but continuously on a roll of paper. [HomoFaciens]’s printer is based on an H-P C6602 inkjet cartridge, one of those high-priced consumables that make buying a new printer more attractive than replacing them once depleted. After figuring out how to drive the printhead — 5 to 6 μs pulses of 18 volts through a ULN2803 Darlington array driver chip seemed to do the trick — he mounted everything to the gantry of an old 3D printer. It’s interesting to watch the images slowly being built up — something that printers usually hide from prying eyes — and to see how the DPI count of the printer can be increased by interlacing each printed line.
Near the end of the video, we get a glimpse of his “tattoo gun printer”, which reminded us of all the other cool things he’s done over the years. From a CNC machine made from paperclips and cardboard to an encoder made from a wheel of resistors, [HomoFaciens] has some interesting designs that you really should check out.
Continue reading “No Need For Speed With This Arduino-Based Inkjet Printer”
This Camera Captures Piezo Inkjet Micro-Drops For DIY Microfluidics
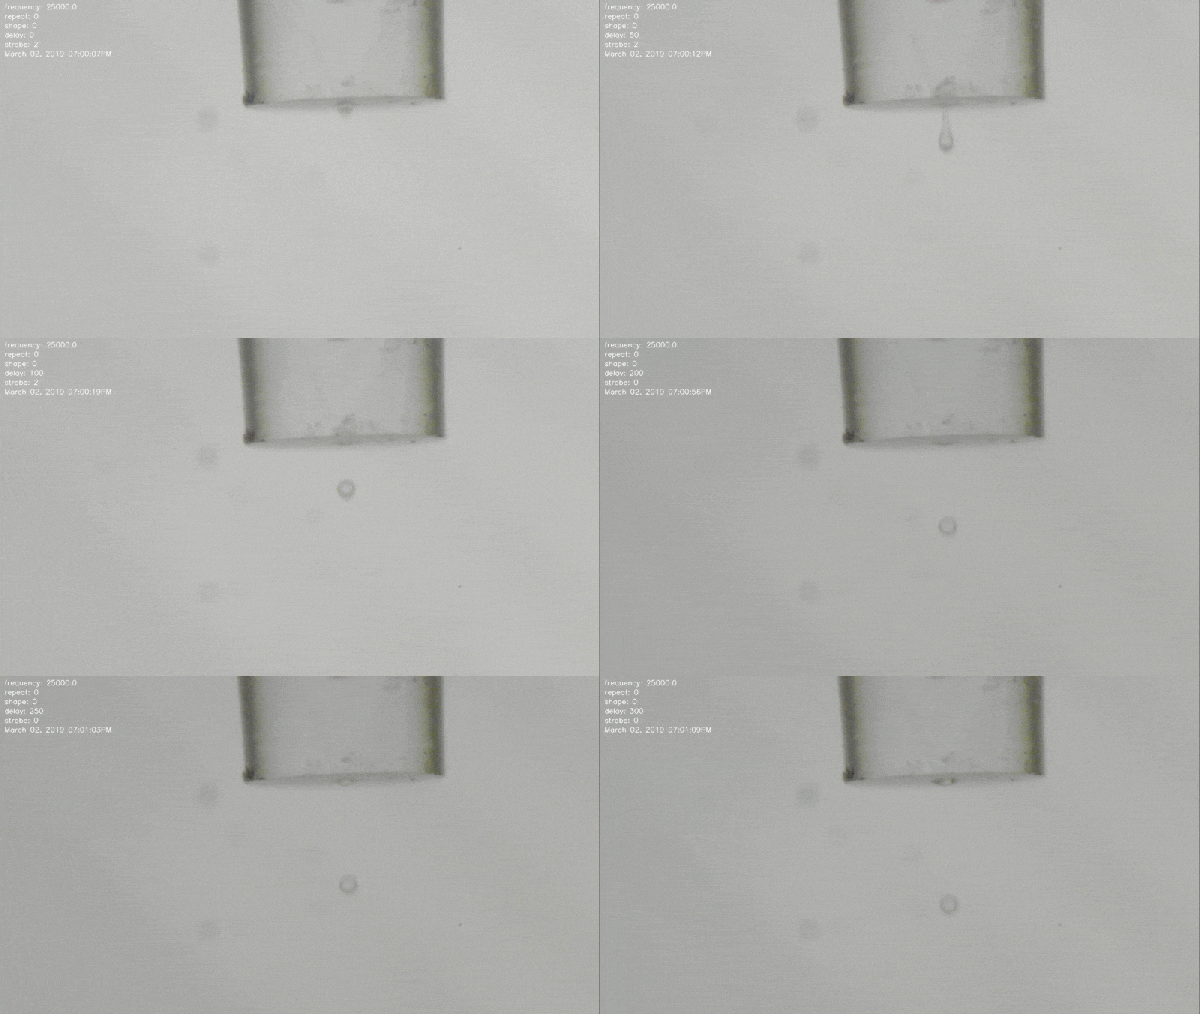
In microfluidics, there are “drop on demand” instruments to precisely deposit extremely small volumes (pico- or nano-liters) of fluid. These devices are prohibitively expensive, so [Kyle] set out to design a system using hobbyist-level parts for under $1000. As part of this, he has a fascinating use case for a specialized camera: capturing the formation and shape of a micro-drop as it is made.
There are so many different parts to this effort that it’s all worth a read, but the two big design elements come down to:
- Making the microdrop using a piezo element
- Ensuring the drop is made correctly, and visually troubleshooting
It’s one thing to make an inkjet element in a printer work, but it’s quite another to make a piezoelectric element dispense arbitrary liquids in a controlled, repeatable, and predictable way. Because piezoelectric elements force liquid out with a mechanical motion, different liquids require different drive signals and that kind of experimentation requires a way to see what is going on, hence the need for a drop observation camera.
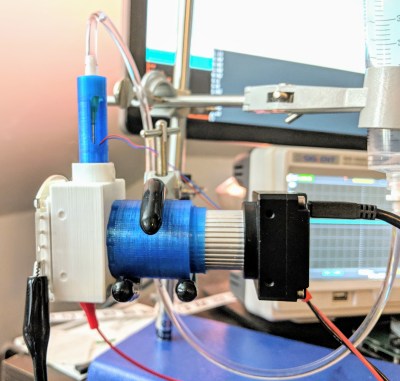
[Kyle] ended up taking the lens assembly from a cheap USB microscope and mating it to his Korukesu C1 USB Camera with a 3D printed assembly. Another 3D printed enclosure doubles as a lightbox, holding the piezo tube in the center with the LED strobe and camera on opposite sides. The whole assembly had a few false starts, but in the end [Kyle] seems pretty happy with his results. The device is briefly described at a high level here. There are some rough edges, but it’s a working system.
Inkjet technology has been around for a long time (you can see a thirty-plus year old inkjet printer in action here) but it’s worth mentioning that not all inkjet heads are alike. Most inkjet printer heads operate thermally, which means a flash of heat vaporizes some ink to expel a micro-drop. These heads aren’t very suitable for microfluidics because not only do they rely on vaporizing the liquid, but they also don’t work well with anything other than the ink they’re designed for. Piezoelectric print heads are less common, but are more suited to the kind of work [Kyle] is doing.
Can You Print With Highlighter Ink?
With huge swathes of people either out of work or working from home, many are now attempting all manner of exciting or silly projects in their downtime. [Emily Velasco] is no exception. She decided to explore the feasability of printing with highlighter ink.
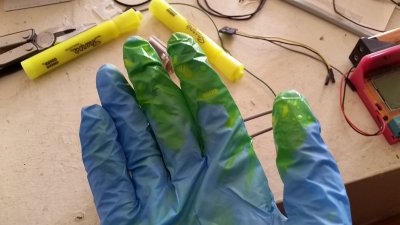
The hack starts with a rather ancient inkjet printer, so old that it works with tractor feed paper. [Emily] set about gutting several highlighter pens and squeezed out the ink reservoirs into a ladle. The printer’s ink cartridge was then filled with the fluid, and a test print was fired off. Upon initial extraction, it appears blank. However, with the aid of a UV light, the printed pattern is revealed. It appears that the inkjet is printing a very faint image, such that the system almost works as an “invisible ink”.
It’s a fun little hack with an old printer, made easier as it lacks the DRM of newer models. It’d probably be quite achievable with a dot-matrix, too. If you’re similarly tinkering in the innards of your peripherals, be sure to let us know. Video after the break.
Vintage Mini Inkjet Prints On-Demand ASCII Art
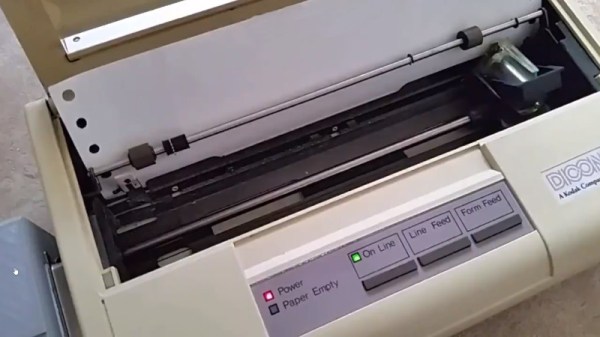
Readers of a certain age may fondly remember ASCII art emerging from line printers in a long-gone era of computing; for others, it’s just wonderfully retro. Well, when [Emily Velasco] found a vintage Kodak Diconix 150 inkjet at a local thrift store for $4, she knew what she had to do: turn it into a dedicated ASCII-art machine.
Dating to the mid-1980s, the diminutive printer she scored was an early example of consumer inkjet technology; with only 12 “jets,” it sported a resolution roughly equivalent to the dot-matrix impact printers of the day. [Emily] notes that this printer would have cost around $1000 in today’s money — this is from a time before printer companies started selling the printer itself as a loss leader to make revenue on the back end selling consumables. It seems you can’t escape the razor-and-blades model, though: [Emily] had to pay $16 for a new ink cartridge to revive the $4 printer.
With the new ink in place, and some tractor-feed paper acquired, [Emily] started work on the art generator. The concept is something that might have been sold on late-night TV ads: a “cartridge” you plug into your printer to make ASCII masterpieces. Starting with a stripped-down Centronics printer cable that matches the printer’s port, she added an Arduino nano to store and serve up the art. The user interface is foolproof: a single button press causes a random selection from one of ten ASCII images to be printed. The whole thing is ensconced within a slick 3D printed case.
One of the coolest aspects of this project is the lack of power supply. When she first hooked the Arduino to the printer’s parallel port, [Emily] noticed that it powered right up with no external supply, and in true hacker fashion, just ran with it. Upon reflection, it seems that power is being supplied by the printer status lines, Busy and/or Ack, through the input protection diodes of the Atmega328 on the nano.
We really like this project, and are more than a little bummed we tossed those old printers that were kicking around the Hackaday labs for years. If you still have yours, and would like turn out some rad ASCII art, the code for this project is up on GitHub.
We’re no strangers to [Emily]’s work, but if you aren’t familiar with it, check out her inspiring talk from the 2019 Hackaday Superconference. Meanwhile, don’t miss the excellent video about the ASCII art printer cartridge, after the break.
Continue reading “Vintage Mini Inkjet Prints On-Demand ASCII Art”