An animated GIF of Engineer Bo's Precision Bluetooth Scroll Wheel wirelessly, and effortlessly scrolling down the Hack A Day blog with a single finger

Doomscroll Precisely, And Wirelessly

Around here, we love it when someone identifies a need and creates their own solution. In this case, [Engineer Bo] was tired of endless and imprecise scrolling with a mouse wheel. No off-the-shelf solutions were found, and other DIY projects either just used hacked mice scroll wheels, customer electronics with low-res hardware encoders, or featured high-res encoders that were down-sampled to low-resolution. A custom build was clearly required.
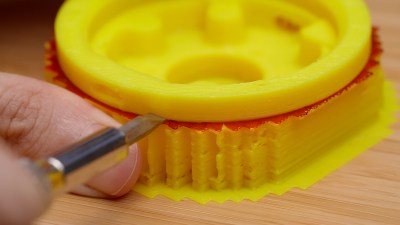
A photo of a 3D printed yellow plastic form with red marker drawn on the top of the support material and used in Engineer Bo's Precision Bluetooth Scroll Wheel

We loved seeing hacks along the whole process by [Engineer Bo], working with components on hand, pairing sensors to microcontrollers to HID settings, 3D printing forms to test ergonomics, and finishing the prototype device. When 3D printing, [Engineer Bo] inserted a pause after support material to allow drawing a layer of permanent marker ink that acts as a release agent that can later be cleaned with rubbing alcohol. 

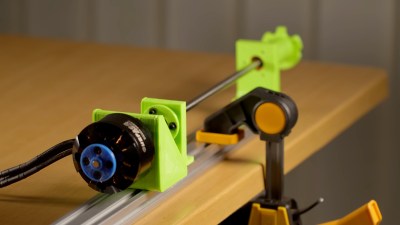
We also liked the detail of a single hole inside used to install each of the three screws that secure the knob to the base. While a chisel and UV-curing resin cleaned up some larger issues with the print, more finishing was required. For a project within a project, [Engineer Bo] then threw together a mini lathe with 3D printed and RC parts to make sanding easy.
Scroll down with your clunky device to see the video that illustrates the precision with a graphic of a 0.09° rotation and is filled with hacky nuggets. See how the electronics were selected and the circuit designed and programmed, the use of PCBWay’s CNC machining in addition to board assembly services, and how to deal with bearings that spin too freely. [Engineer Bo] teases that a future version might use a larger bearing for less wobble and an anti-slip coating on the base. Will the board files and 3D models be released, too? Will these be sold as finished products or kits? Will those unused LED drivers be utilized in an upcoming version? We can’t wait to see what’s next for this project.

Continue reading “Doomscroll Precisely, And Wirelessly”

This OSHW Trackball Is Ready To Be Customized

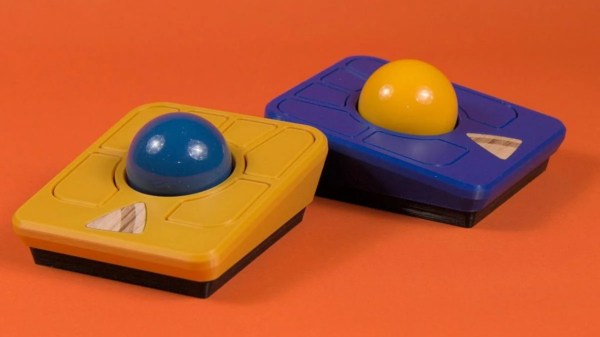
Oh sure, Amazon can deliver any number of Logitech peripherals to your door in 48 hours, but where’s the fun in that? With open source hardware (OSHW) input devices like the Ploopy Adept Trackball, you not only get to say you built the thing yourself, but there’s also an opportunity to tune the gadget to your exacting specifications — even if that just means packing it full of RGB LEDs.

The trackball is powered by the Raspberry Pi Pico running QMK, features a high-accuracy PMW3360 sensor that can be found in commercial gaming mice, and uses a snooker ball for the business end. All the hardware is wrapped up in a 3D printed enclosure, and thanks to the VIA project, configuring the device can be done right in the browser through a web app.

Like the other devices in the (somewhat unfortunately named) Ploopy family, all of the design files for the Adept Trackball are released under the CERN license, which combined with the project’s fantastic documentation means you’ve got everything you need to build it from scratch. There are official parts kits if you don’t want to source or print all the components yourself, but as of this writing, the Ploopy Shop will only let you preorder them.

DIY Gaming Mouse Beats The Competition, Costs Less

We’ve seen plenty of custom keyboards here on Hackaday. Seriously, like more than we can count. But custom mice? Those are far more elusive. Though we wouldn’t be surprised to see that change should this excellent example from [Tyler Richard] catch on.

How the mouse sees the date on a US quarter

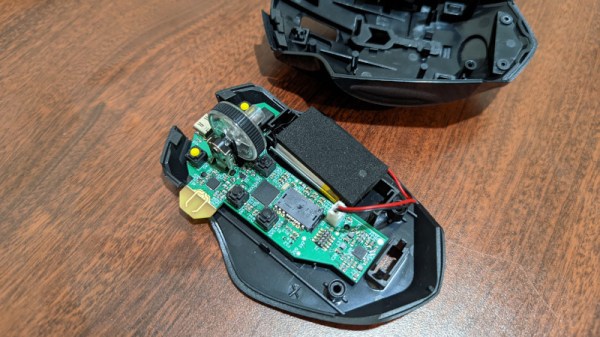
The goal was to build a customizable mouse that could match the performance of Logitech’s MX Master 3, but without the $100 USD price tag. In the end, [Tyler] says his mouse is around 10x as responsive thanks to a 1,000 Hz refresh rate, and the total cost is just a fraction of the retail price of the Logitech. Though as you might expect, there’s a catch or two.

For one thing, he says getting your hands on the PixArt PMW3389 mouse sensor in single quantities can be difficult. It seems like he was able to secure a sample because he’s a student, but you’ll have to figure out your own way to con secure one from the company. There’s also no friendly GUI to configure the mouse, and indeed, you’ll need to write some code should you want to modify any of its buttons. Oh, and despite the fact that the cheapo donor mouse you need to use for parts is wireless, the replacement guts you’ll be fitting it with currently only support wired operation.

Alright, we’ll admit it’s not perfect. But it’s still a huge step in the right direction if you care about being able to spin up your own input devices. With some refinement, and perhaps somebody willing to do bulk buy of the sensors, we could see this project becoming quite popular. In the meantime, you may have to settle for a macro stool.

Show Us Your Odd Inputs And Peculiar Peripherals!

Just as the Jedi youngling would have to build their light saber, so is it a rite of passage for a true geek to build their own computer interfaces. And nothing makes a personal computer more personal than a custom keyboard, a bespoke mouse, an omnipotent macropad, a snazzy jog wheel, or a fancy flight yoke.

In this contest, we encourage you to make your strangest, fanciest, flashiest, or most custom computer peripherals, and share that work with all the rest of us. Wired or wireless, weird or wonderful, we want to see it. And Digi-Key is sponsoring this contest to offer three winners an online shopping spree for $150 each at their warehouse! More parts, more projects.

Make It Yours

Anyone can just go out an buy a keyboard, but if you want a custom ergonomic keyboard that’s exactly fit to your own two hands, you probably have to make one with your own two hands. And if you an engraved brass mouse, well, you’ve got some engraving to do — Logitech ain’t gonna make one for you. Maybe you only type in binary, or maybe you need a keyboard for some alien language that has 450 individual letters. Or maybe the tiniest keyboard ever? You’ve got this. Continue reading “Show Us Your Odd Inputs And Peculiar Peripherals!”

Raspberry Pi Pico Makes For Expeditious Input Device

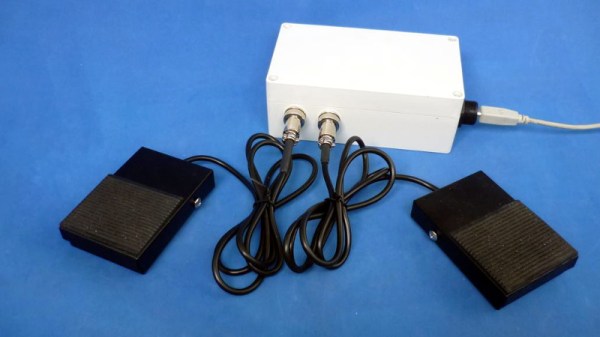
With its copious number of GPIO pins and native USB, the Raspberry Pi Pico is arguably the ideal microcontroller for developing your own platform agnostic USB Human Input Devices. But you don’t have to take our word for it. Check out how quickly the $4 USD board allowed [Alberto Nunez] to put together a pair of foot pedals for his computer.

Wiring doesn’t get much easier than this.

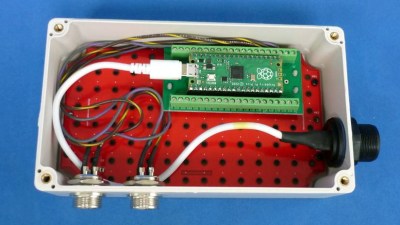
A peek inside the enclosure reveals…well, not a whole lot. All that’s hiding inside that heavy-duty plastic box is the Pi Pico and some screw down terminals that let [Alberto] easily wire up the female bulkhead connectors for the pedals themselves. Incidentally, while you could certainly make your own pedals, the ones used for this project appear to be the sort of commercially available units we’ve seen used in similar projects.

With the hardware sorted, [Alberto] just needed to write the software. While he could have taken the easy way out and hard coded everything, we appreciate that his CircuitPython script loads its configuration from a text file. This allows you to easily configure which GPIO pins are hooked up to buttons, and what key codes to associate them with. He didn’t really need to go through this much effort for his own purposes, but it makes the project far easier to adapt for others, so our hats off to him.

If you’re looking for a bit more inspiration, our very own [Kristina Panos] put together a Python-powered macro foot stool that you can put under your desk for rapid fire keyboard shortcuts. Plus you can stand on it to reach the top shelf, if need be.

Flashpen Is A High Fidelity Pen Input Device

Pen input has never really taken off in the computing mainstream, though it’s had somewhat of a renaissance in the last decade or so. Various smartphones and tablets are shipping with the technology, and some diehard users swear by it as the best way to take notes on the go. Recently, researchers at the Sensing, Interaction and Perception Lab at ETH Zurich have been working on Flashpen, a high-fidelity pen interface for a wide range of applications. 

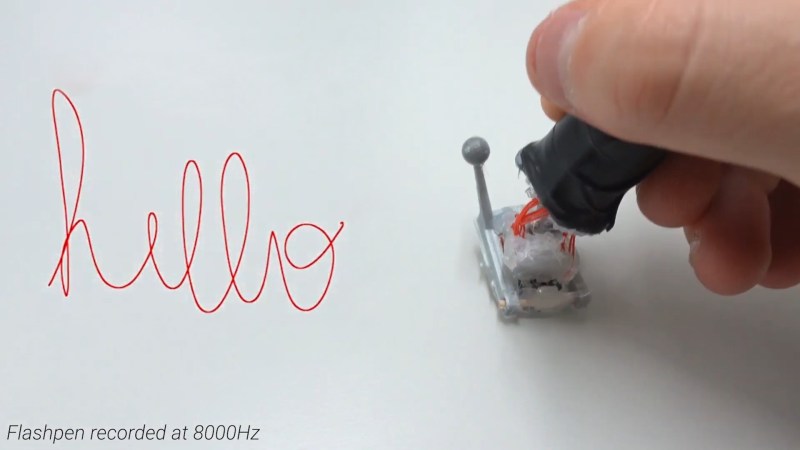
The fundamental technology behind the pen is simple, with the device using an optical flow sensor harvested from a high-end gaming mouse. This is a device that uses an image sensor to detect the motion of the sensor itself across a surface. Working at an update rate of 8 KHz, it eclipses other devices in the market from manufacturers such as Wacom that typically operate at rates closer to 200Hz. The optical sensor is mounted to a plastic joint that allows the user to hold the pen at a natural angle while keeping the sensor parallel to the writing surface. There’s also a reflective sensor on the pen tip which allows cameras to track its position in space, for use in combination with VR technology.
The team show off the device being used in several ways, primarily in VR tasks, but also in simple handwriting and coloring work. It’s a project that could readily be replicated by any eager experimenter by gutting a gaming mouse and getting down to work; our writers will expect six of your submissions by June 1st to the tipsline. Those eager to learn more can check out the project paper, and may also find the team’s TapID technology interesting. Video after the break. Continue reading “Flashpen Is A High Fidelity Pen Input Device”

Arduino Gets Old PC Booted And Back Into Action

How many people still have a PS/2 keyboard kicking around in 2020? Admittedly asking such a question of the Hackaday audience is probably cheating (there’s a decent chance one of you will type a comment on one just to prove a point), but even the most pedantic reader has to admit that it’s a long dead standard. So we’re hardly surprised to hear that [Turbaned Engineer] didn’t have one handy when he tried to boot a motherboard so old that he couldn’t access the BIOS with a USB keyboard.

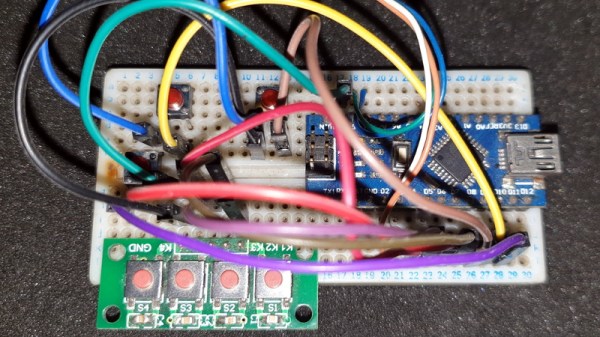
But rather than waiting for an adapter to show up in the mail, he decided to rig up an Arduino Nano to mimic a PS/2 keyboard just long enough for him to navigate the system configuration. Since that basically meant he only needed the arrow keys and Enter, he was able to rig up a handful of momentary buttons to serve as input. We wouldn’t recommend typing out your memoirs with such a spartan board, but it’s certainly good enough to juggle around the order of boot devices.

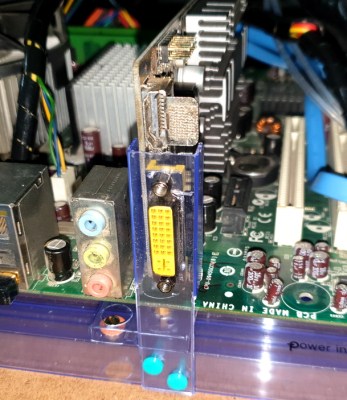
The fun didn’t stop there, though. [Turbaned Engineer] also had to clean some corrosion and fix a blown resistor on a bank of RAM to drag this old soldier over the finish line. He didn’t have a case handy, so he made a free-form one using the polycarbonate packaging that ICs ship in. The final machine isn’t exactly a sleeper, but it’s good enough to play Super Mario Bros. 3 on the TV.

At the end of the day, the minimal input device [Turbaned Engineer] put together isn’t so far removed from other homebrew keyboards we’ve seen recently. It seems that QMK even has some basic support for the PS/2 interface. Not that it would come up very often, but a “retro” mode might be an interesting addition to your next custom keyboard build.