Most of us probably have a vision of how “The Robots” will eventually rise up and deal humanity out of the game. We’ve all seen that movie, of course, and know exactly what will happen when SkyNet becomes self-aware. But for those of you thinking we’ll get off relatively easy with a quick nuclear armageddon, we’re sorry to bear the news that AI seems to have other plans for us, at least if this report of dodgy AI-generated mushroom foraging manuals is any indication. It seems that Amazon is filled with publications these days that do a pretty good job of looking like they’re written by human subject matter experts, but are actually written by ChatGPT or similar tools. That may not be such a big deal when the subject matter concerns stamp collecting or needlepoint, but when it concerns differentiating edible fungi from toxic ones, that’s a different matter. The classic example is the Death Cap mushroom (Amanita phalloides) which varies quite a bit in identifying characteristics like color and size, enough so that it’s often tough for expert mycologists to tell it apart from its edible cousins. Trouble is, when half a Death Cap contains enough toxin to kill an adult human, the margin for error is much narrower than what AI is likely to include in a foraging manual. So maybe that’s AI’s grand plan for humanity — just give us all really bad advice and let Darwin take care of the rest.
iphone240 Articles
Ski Season Sees Apple’s Crash Detection System Fire Deluge Of False Positives
Smartphone features used to come thick and fast. Cameras proliferated, navigation got added, and then Apple changed the game by finally making touch computing just work. Since then, truly new features have slowed to a trickle, but Apple’s innovative crash detection system has been a big deal where safety is concerned.
The problem? It’s got a penchant for throwing false positives when iPhone and Apple Watch users are in no real danger at all. We first covered this problem last year, but since then, the wintery season has brought yet more issues for already-strained emergency responders.
Continue reading “Ski Season Sees Apple’s Crash Detection System Fire Deluge Of False Positives”
Virtualizing IPhoneOS 1.0
Virtualizing computers is nothing new. However, Apple devices always present challenges. Just ask anyone who has built a Hackintosh. At least computer hardware is usually exposed, but on phones, the challenge is even harder due to mysterious devices. [Martijn] managed to reverse engineer the iPod Touch 1G enough to run iPhoneOS 1.0 on it and has several blog posts explaining how he did it.
The emulator is the ubiquitous QEMU. He has emulation for the critical hardware, including the cryptographic modules, the hardware clock, and the timer, along with memory and display and interface hardware. However, Wifi, some USB, audio, the light sensor, and some graphics hardware are still absent. That doesn’t stop the OS from booting, however.
First Folding IPhone Doesn’t Come From Apple
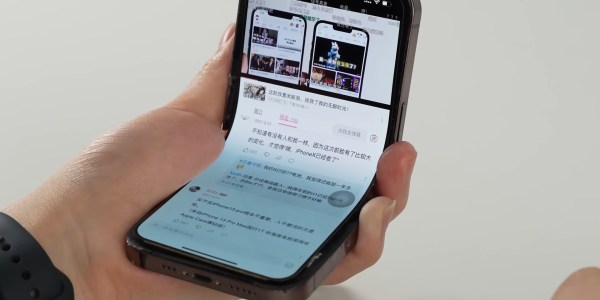
Folding phones are all the rage these days, with many of the major smartphone manufacturer’s having something in this form factor. Apple has been conspicuously absent in this market segment, so [KJMX] decided to take matters into their own hands with the “iPhone V.” (YouTube – Chinese w/subtitles via MacRumors).
Instead of trying to interface an existing folding phone’s screen with the iPhone, these makers delaminated an actual iPhone X screen to use in the mod. It took 37 attempts before they had a screen with layers that properly separated to be both flexible and functional. Several different folding phones were disassembled, and [KJMX] found a Motorola Razr folding mechanism would work best with the iPhone X screen. Unfortunately, since the iPhone screen isn’t designed to fold, it still will fail after a relatively small number of folds.
Other sacrifices were made, like the removal of the Taptic Engine and a smaller battery to fit everything into the desired form factor. The “iPhone V” boasts the worst battery life of any iPhone to date. After nearly a year of work though, [KJMX] can truly claim to have made what Apple hasn’t.
Curious about other hacks to let an iPhone do more than Apple intended? Check out how to add USB-C to an iPhone, try to charge it faster, or give one a big memory upgrade.
Just How Fast Could You Charge An IPhone?
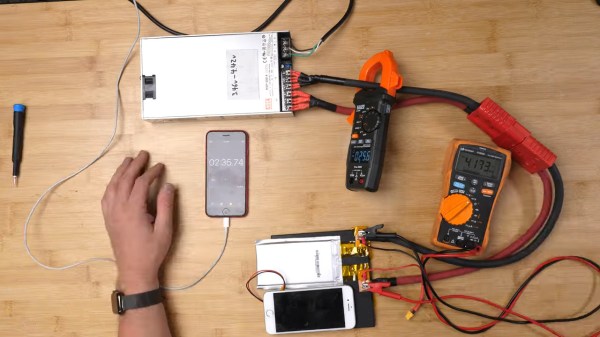
An iPhone 8, now a relatively cheap model, can charge its battery fully in two hours’ time. There’s hardly ever a need for faster charging, but it’s fair to ask – how much faster could it really go? [Scotty Allen] from [Strange Parts], back after a hiatus, is back to stretching the limits of what a regular iPhone can do, and decides to start off with an exploration of battery technologies.
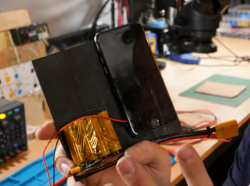 What people commonly encounter is that charging speed depends on the charger involved, but even one hundred chargers in parallel won’t speed up this iPhone’s charging rate, so what’s up? First off, the phone’s charger chip and the battery’s BMS will both limit charging current, so for experiment purposes, those had to be bypassed. First attempt was using a hefty DC power supply with the original cell, and, unsatisfied with the lack of fire and still relatively slow charging, [Scotty] decides to up the ante.
Continue reading “Just How Fast Could You Charge An IPhone?”
Apple’s Satellite Emergency Texts, How Do They Work?
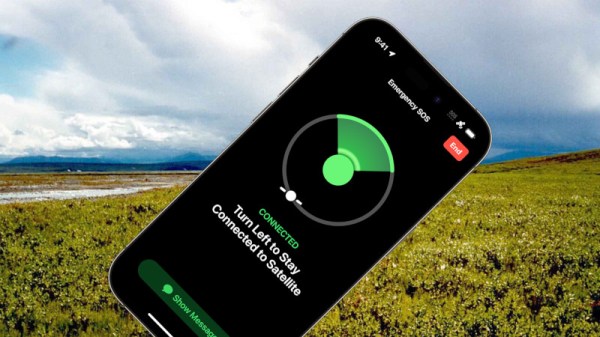
There is always some hype surrounding an Apple product announcement, and while maybe it’s not in the same league as those for the original iPod or iPhone, their iPhone 14 model will include emergency texting by satellite has generated quite a bit of coverage. It’s easy to find a lot about the system from the software end in terms of its interface and even Apple’s use of compression, but what about the radio side? Whose satellite constellation are they using, and how does it work?
As has been widely reported, their communication partner for the service is Globalstar, a provider of satellite data services that like their competitor Iridium have their origins in the 1990s when satellite phones were briefly seen as the Next Big Thing. They have a 24-satellite constellation, and they sell a range of off-the-grid voice, data, paging, tracking, and IoT connectivity services. The Apple emergency texting looks a lot like Globalstar’s Spot texting service. It’s only available in North America for now, we’re guessing because the satellites aren’t smart relays but straightforward transponders, and the network lacks sufficient ground station coverage outside that region.
With all the talk about low-earth-orbit connectivity surrounding services such as SpaceX’s Starlink it’s a bit unexpected to find ourselves back with a satellite constellation using 1990s technology. But we can see that as well as a major win for Globalstar as their service begins to look outdated by comparison to Starlink, it’s a perfect match for Apple in not requiring a complex ground station for low-bandwidth text messages. We expect that there will be some form of exclusivity in the deal, so it will be interesting to see how the larger Android vendors respond.
It’s worth noting, we’ve looked at satellite IoT services before.
Wilderness image: U.S. Fish and Wildlife Service, Public Domain.
Now There’s USB-C On The IPhone SE
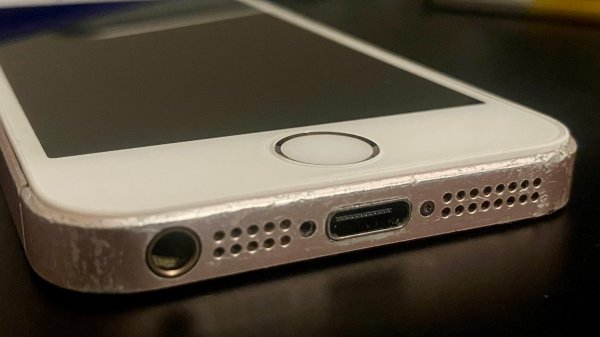
As confusing as it can be, USB-C is actually pretty good, and certainly has its fans. [David Buchanan] must be one of them, for he did a great job putting a USB-C port into his iPhone SE.
[David] didn’t want to ruin a pristine example, so set about hacking the cheapest first-gen iPhone SE he could find on eBay. His approach was simple: get a USB-C to Lightning dongle and hack it into the phone’s body.
The first step was to strip the adapter down and melt off the Lightning connector. He then de-soldered the Lightning port from the phone, and found a bunch of test pads on the motherboard corresponding to its pins. Soldering leads from the adapter to the test pads got things up and running, once he properly hooked up a connection-detect pin to ground.
With a bit more trimming, some hot glue and some enameled wire, [David] was able to cram everything inside the iPhone. Paired with a new screen and home button, and he had an iPhone SE with a working USB-C port. It works for both charging and USB data, too.
If you’re rocking an iPhone SE, you might dig this conversion as it gives you access to more chargers out in the wild. Plus, you’ve still got the regular headphone jack. Be sure to check out the iPhone 13 with a USB C port, too. It’s the hottest new hack until the new EU regulations hit Apple in coming years.


