[TK] is a retro computer enthusiast who’s had some difficulty locating a joystick for his trusty Amiga 500. New ‘sticks are expensive, and battered survivors from the 80s go for more than they should.
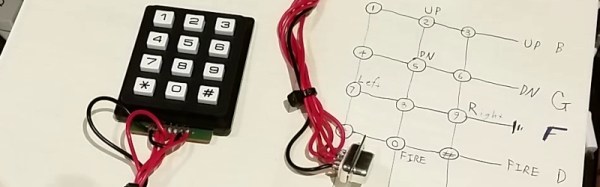
Happily these old controllers were simple devices, having only five control lines for the four directions and a fire button which were active low. [TK] therefore cast around the available components and decided to craft his own controller from a numerical keypad.
Numerical joypad schematic
Numerical keypads may be ubiquitous, but they’re not the perfect choice for a joypad. Instead of individual switches, they are wired as a matrix. [TK]’s controller works within that constraint without butchering the keypad PCB, though his layout has the left and right buttons below the up and down buttons. Looking at the schematic we wonder whether the 4-5-6 and 7-8-9 rows could be transposed , though joypad layout is probably a matter of personal choice.
Making the controller was a simple case of wiring the pad to a 9-pin D socket in the correct order, and plugging it into the Commodore. He reports that it’s comfortable to use and better than some of the lower-quality joysticks that were on the market back in the day. Veterans of Amiga gaming will understand that sentiment, there were some truly shocking offerings to be had at the time.
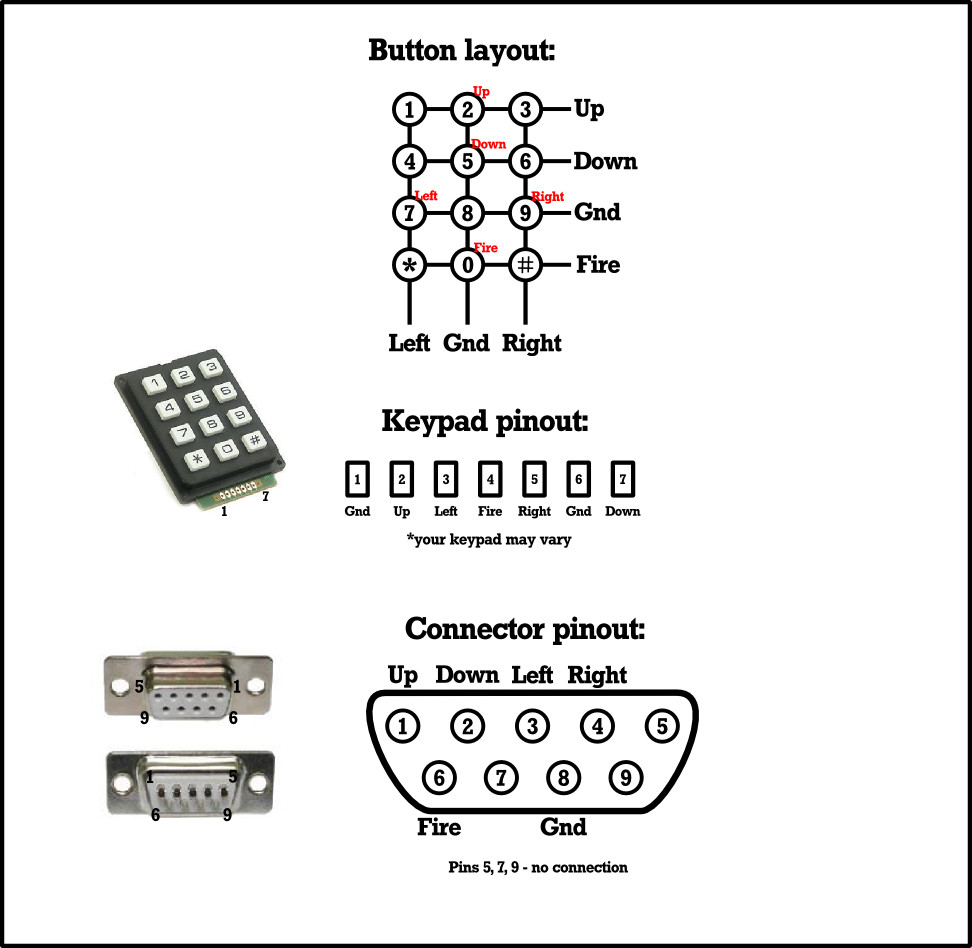
We’re not certain where [NoPleaseDont] got an F-15 Throttle Grip, but it would certainly be a waste not to make something cool out of one. The F-15 is a twin engine air superiority fighter, and in it’s niche, it is one of the most successful ever made. We imagine this makes it a popular choice in air simulators.
Equipped with his successful scrounge [NoPleaseDont] decided to build a full HOTAS, Hands On Throttle and Stick, joystick. He started by taking apart the throttle grip. As each layer was pulled a part, we were pleased to see the reassuring infestation of quality control stamps you’d expect to find on the input of a 26million dollar machine. The pinouts were presumably taken and the handle was reassembled. After that, a lot of custom sheet metal parts, 3D prints, and clever bracketry came together to form the frame of the joystick.
Finally came the electronics. Many of the photos were too blurry to decode, but at minimum a Teensy and custom LED control board is involved. The frame got a few additional buttons and control panels added.
The resulting joystick has a great history, and more buttons than we can guess the purpose of.
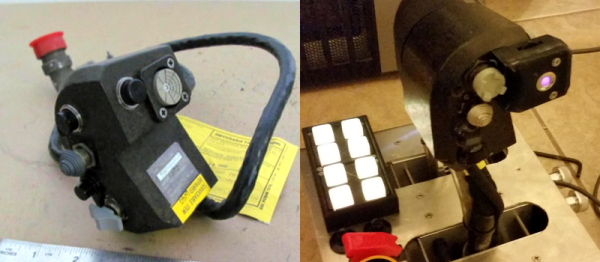
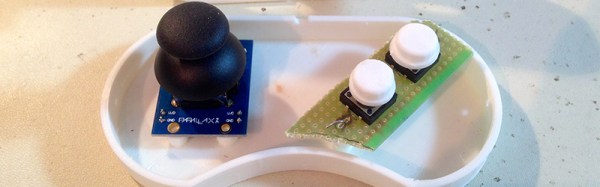
We thought the construction was really neat; suspending a wooden ball in the middle of three retractable key rings. By moving the ball around you can control the motion of a cube displayed on the computer. We first thought this was done by encoders or potentiometers measuring the amount of string coming out of the key fobs. However, what’s actually happening is a little bit cleverer.
[Nicolas] has joined each string with its own 2 axis joystick from Adafruit. He had some issues with these at first because the potentiometers in the joysticks weren’t linear, but he replaced them with a different module and got the expected output. He takes the angle values from each string, and a Python program numerically translates the output from the mouse into something the computer likes. The code is available on his GitHub. A video of the completed mouse is after the break.
[Matt] created an animated gif of New Horizon’s Pluto flyby. The source images were taken from the the raw LORRI images, modified so the background star field could be seen, and assembled with OpenCV. Because Pluto and Charon orbit each other around a point above Pluto’s surface, simply putting Pluto in the center of each frame wouldn’t work. It’s the best visual explanation of this weird arrangement yet, all brought to you by the magic of OpenCV and Python.
On the subject of Kickstarter creators that don’t understand the conservation of energy, I present this.
[Frank]’s 2011 Hundai Santa Fe wasn’t cool enough, so he added an F16 flight stick to his shift knob. The choice of joystick is paramount here: Saitek joysticks look too techy, Logitech ones are too expensive, and the Warthog H.O.T.A.S costs $400. Joysticks are extremely niche peripherals these days, it seems. He ended up strapping an old F16 joystick from the 90s on his shift knob, and it looks close enough to the real thing.
Two bodgers are stuffing the engine from a Toyota Celica into a 1980 Mini, and they’re trying to make it look stock. We’ve seen their project before, and now there’s a new episode. In this episode: the pedal box, the steering wheel, and figuring out how to make the car drive straight.
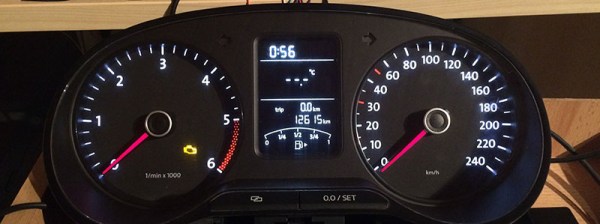
[Leon] plays Euro Truck Simulator 2, and like any good simulator, there are people out there building consoles, cockpits, and dashboards. In [Leon]’s case, he wanted a dashboard for his virtual trucks and cobbled one together out of a dash taken from a VW Polo.
This project was inspired by [Silas Parker] and his Arduino-based dashboard made out of a cardboard box, some servos, and a few LEDs. It worked, but [Leon] realized just about every dashboard made in the last decade or so has a CAN bus. You can just buy a CAN bus shield for an Arduino, and a dashboard can be easily found at any junkyard.
Right now, [Leon] is in the process of finding the CAN bus addresses of the relavent dials and LEDs on the dashboard. He found the tachometer at 0x280, and a bunch of indicator lights can be found at 0x470. Combined with a standard computer steering wheel and the telemetry SDK for Euro Truck Simulator 2, [Leon] has the beginnings of a virtual big rig on his desk.
[Quinn Dunki] has been hard at work building a Teddy Top – an Apple IIc Plus modified for a road warrior. It has a 3.5 inch disk drive, runs at a blistering four megahertz, and has a beautiful integrated color LCD. It would be a shame to have such a great machine and no way to play games as they were intended, so [Quinn] set about building a game pad for her lovable Apple II.
The Apple II joystick port isn’t as simple as an Atari or Commodore joystick port. Where the bog-standard Atari joystick is basically just a bunch of switches connected to pins, the Apple II joystick is analog. Weird, and even weirder is the value of the pots in these joysticks: 150kΩ. Somehow or another, nobody makes pots in this value any more. Luckily the hardware in these joysticks is well documented, and shoehorning in modern components isn’t that bad.
The Apple joystick has a bit of circuitry – a 556 timer chip that reads the values of each pot and converts that into a stream of 0s and 1s for the Apple. The joystick [Quinn] found for her game pad is an analog thumb stick on a neat breakout board manufactured by Parallax. This analog joystick has 10kΩ pots in it, and that just won’t work with the 556 timer chip. However, since this is just resistors and a 556 chip, adjusting some of the values on the original schematics does the trick. [Quinn] added a few capacitors to her circuit, and everything worked beautifully.
With the electronics down, she turned her attention to the case for her Apple II road warrior enclosure. She recently picked up a 3D printer, which means she’s new to 3D printing. After spending a few hours designing a controller in 123D Design, she sent the files over to the printer. Warping happened. She tried an ABS slurry. The part was stuck to the bed. It took a few tries (purple glue sticks are awesome, [Quinn]), but she eventually got her plastic enclosure printed out, and the circuitry installed. The result is a portable computer, with a custom controller, playing Lode Runner. Can’t beat that.
I usually see retro-gaming projects using tiny screens with a fair number of pixels (64×64) but what I really like is the look of making every pixel count. With this in mind I built 1-Pixel Pac-Man, the classic coin-op experience but with characters that consist of just one pixel. Playing a throw-back like this wouldn’t be the same without some vintage controls so I picked up an Atari joystick, patched it into a microcontroller, and started coding. Check it out:
Smartmatrix Bundle
32×32 RGB panel with acrylic diffuser
Back of the Smartmatrix
This piece of hardware made the project build really easy: the Smartmatrix. [Louis Beaudioin] developed the Smartmatrix and it’s been in the Hackaday Store for a while now. The display module itself is a commodity item that is used in LED billboards. There are shrouded headers on the back of the panels, to the left and right sides, which allow them to be daisy chained. The Smartmatrix PCB plugs into one of these shields, provides a soldering footprint for the Teensy 3.1 which drives the display, and gives you the wiring to connect screw terminals from the PCB to the power terminals on the module. Why the need for beefy power jumpers? At full white the thing can draw about 3.5A — don’t worry there’s a power supply included in the bundle.
Also integral to making this look good is the diffuser panel which is frosted acrylic. The Smartmatrix is designed to be housed in a shadowbox frame; it even includes a frame backer board with a cut-out for the Teensy 3.1 so it can be programmed without opening the thing up. I like looking at the guts so I’m leaving my free floating until I come up with an interesting way to mount everything as one unit.
Programming Pac-Man from the Ground Up
If you haven’t looked into it before, the ghost AI and gameplay details for Pac-Man are absolutely brilliant. [Toru Iwatani] did a masterful job with the original, and you should take a look at all of the analysis that has been done over the years. The best collection I could find was the Pac-Man Dossier and I based most of my code on the rules described there.
Basically the ghosts have two modes, chase and scatter. The modes set the enemy targets differently; to points at the four corners of the board in scatter, and to points relative to the player in chase. The relative part is key; only the red enemy actually chases you. Another one of them looks at the red enemy’s distance and angle, and targets the reflection of that vector. Really easy, really clever, and results in enemy behavior that’s believable. It isn’t just the enemy movement, little touches like a speed penalty (1/60 of a second) for each dot the player gobbles up means the enemies can catch up if you continuously eat, but you can escape by taking the path already-eaten.
Library, DMA, and Extra Hardware
Teensy 3.1
DB9 Connector for Joystick
Extras in the Bundle
Kickstarter remote and RTC Module
The hardware and software running the Smartmatrix made the display portions of the project really simple. First off, the Teensy 3.1 is fast, running at 96MHz in this case. Second, it has Direct Memory Access (DMA) which [Louis] used in the Smartmatrix library. This means that driving the display takes almost no CPU time at all, leaving the rest for your own use. This example of a game is under-utilizing this power… it’s totally capable of full-motion video and calculating amazing visualizations on the fly.
The PCB hosting the Teensy 3.1 breaks out several pins to one side. I’m not sure what I’ll add in the future so I actually used the extra surface-mount IO pins on the bottom of the Teensy to connect the Atari joystick (which is simply a set of switches). The are enough pads for two joysticks so I used pin sockets to interface the Teensy to the PCB so that I can get to it again later.
The kit also includes an IR receiver and remote, and also a microSD card to loading animations (there’s an SD socket on the PCB). The bundle in the Hackaday Store is a kit you solder yourself, but [Louis’] company, Pixelmatix, has a Kickstarter running for fully-assembled versions that come with a black remote and sound-visualization hardware.
Future Improvements
The game is fully working, but there are a few key things that I really want to add. The Teensy 3.1 has a single DAC pin available. I’m fairly certain the original coin-op game had mono audio. It should be possible to reproduce the sound quite accurately with this board. That would really make the project pop.
There are also a bunch of touch-ups that need to happen. I’d like to add an animation when the player is eaten by an enemy, and a countdown before the level restarts. The score, shown in binary on the right column, should be scrolled out in decimal when the game ends, and what’s a coin-op recreation without a high-score screen?