Automated Chamber Passes Just The Right Gas

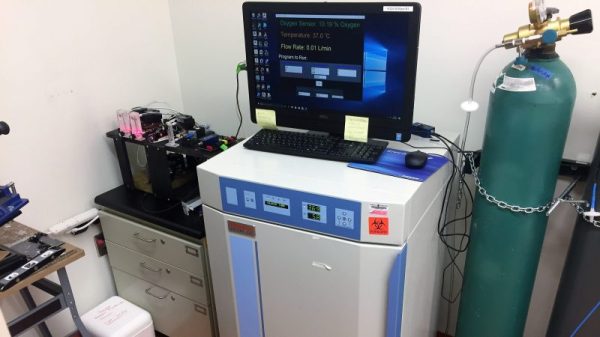
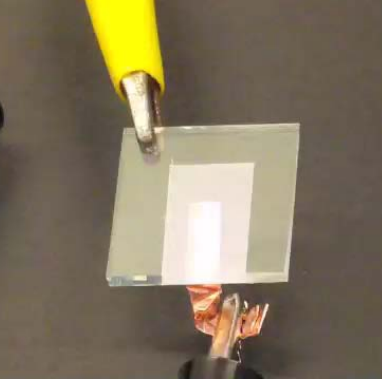
It sounds like an overly complicated method a supervillain would use to slowly and painfully eliminate enemies — a chamber with variable oxygen concentration. This automated environmental chamber isn’t for torturing suave MI6 agents, though; rather, it enables cancer research more-or-less on the cheap.

Tasked with building something to let his lab simulate the variable oxygen microenvironments found in some kinds of tumors, [RyanM415] first chose a standard lab incubator as a chamber to mix room air with bottled nitrogen. With a requirement to quickly vary the oxygen concentration from the normal 21% down to zero, he found that the large incubator took far too long to equilibrate, and so he switched to a small acrylic box. Equipped with a mixing fan, the smaller chamber quickly adjusts to setpoints, with an oxygen sensor providing feedback and controlling the gas valves via a pair of Arduinos. It’s quite a contraption, with floating ball flowmeters and stepper-actuated variable gas valves, but the results are impressive. If it weren’t for the $2000 oxygen sensor, [RyanM145] would have brought the whole project in for $500, but at least the lab can use the sensor elsewhere.

Modern biology and chemistry labs are target-rich environments for hacked instrumentation. From DIY incubators to cheap electrophoresis rigs, we’ve got you covered.

Continue reading “Automated Chamber Passes Just The Right Gas”

Tiny Tunes On An ATtiny13

When you take a microcontroller class in university, one of the early labs they have you drudge through on your way to, promised, mastery over all things embedded, is a tiny music generator.

It’s a more challenging lab than one would expect. It takes understanding the clock of the microcontroller and its sometimes temperamental nature. It takes a clear mental picture of interrupts, and is likely one of the first experiences a burgeoning designer will have worrying about the execution time of one of their loops. Also tables, data structures, and more. It even requires them to go out of their comfort zone a learn about an unrelated field, a challenge often faced in practicing engineering.

Luckily [Łukasz Podkalicki] has done a great job of documenting the adventure. He’s got everything from the schematic and code to the PWM traces on the oscilloscope.

It’s also worth mentioning that he’s got a few other really nice tutorials for the ATtiny13 microcontroller on his blog. A tiny party light generator and a IR receiver among them.

Chemical Hacking At A Store Near You

Imagine for a minute that you aren’t an electronic-savvy Hackaday reader. But you find an old chemistry book at a garage sale and start reading it. It has lots of interesting looking experiments, but they all require chemicals with strange exotic names. One of them is ferric chloride. You could go find a scientific supply company, but that’s expensive and often difficult to deal with as an individual (for example, 2.5 liters of nitric acid costs over $300 for a case of six at a common lab supply company). Where would you go?

As an astute electronics guy (or gal) you probably know that ferric chloride is common for PCB etching, so you would check the electronic store down the street or maybe Radio Shack if you are lucky enough to find one that still stocks it.

So sometimes knowing where to look for a chemical is a key part of acquiring it, especially when the names are not the same. For example, do you have any amylose? No? That’s corn starch. Want to try making your own cadmium sulfide light sensor? Go to the art supply store and ask for cadmium yellow pigment. Need magnesium carbonate? Stop by a sporting goods store and ask for athlete’s chalk.

Continue reading “Chemical Hacking At A Store Near You”

Bring Doping, Microfluidics, Photovoltaics, And More Into The Home

Can you make a spectrometer for your home lab all from materials you have sitting around? We might not believe it from a less credible source, but this MIT course does indeed build a spectrometer from foam board using two razor blades as the silt cover and a writable CD as the diffraction grating. The coolest part is removing the metal backing of the CD.

mit_experiments_thumbHackaday reader [gratian] tipped us off about the course available from MIT courseware called Nanomaker. It boils down some fairly complicated experiments to the kind one can do in the home lab without involving thousands of dollars of lab equipment. The whole point is to demystify what we think of as complicated devices and topics surrounding photovoltaics, organic photovoltaics, piezoelectricity and thermoelectricity.
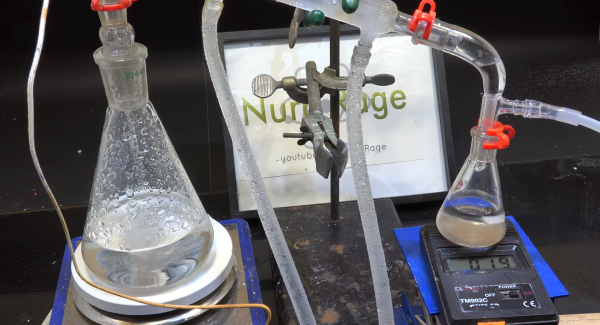
 

Spectrometers are used to analyze the wavelengths of a light source. Now that you have a measurement tool in hand it’s time to build and experiment with some light sources of your own. Here you can see an LED that is the topic of one of the course labs.

If you have a bit of background in chemistry this is a good step-by-step guide for getting into these types of experiments at home. It reminds us of some of the really cool stuff [Jeri Ellsworth] was doing in her garage lab, like making her own EL panels.

Continue reading “Bring Doping, Microfluidics, Photovoltaics, And More Into The Home”

Cheap Vacuum Source For Working With Dangerous Chemicals

[Nurdrage] puts out a lot of neat videos, mostly about home chemistry. For the home chemist it is occasionally desirable to pull a vacuum. For example, a potentially dangerous chemical can be boiled and distilled at a much lower temperature than at atmospheric pressures.

However, there’s a problem with just going to the local import store and buying the first vacuum pump on the shelf.  They are primarily designed for atmospheric gasses and tend to melt when exposed to solvents. If you’re a big university or a commercial lab this is no problem. You just drop three grand on a Teflon diaphragm pump or a liquid nitrogen trap. For the home chemist who’s already having enough trouble just buying the chemicals needed for neat experiments, this is not an option.

[Nurdrage] demonstrates the proper usage of a much cheaper option: an aspirator vacuum pump. You might remember something similar from high school chemistry. School pumps generally use flowing tap water to produce the vacuum. [Nurdrage] is saving water by using a fluid pump and a reservoir to drive his aspirator.

Aspirator pumps use the Venturi effect to create a vacuum. These devices are cheap because there are no moving parts. We looked it up and the one he is using costs ten US dollars on fleabay. It can pull enough vacuum to boil water below room temperature.

The video is really good and provides a lot of useful information. It also seems like a really useful device for other hacking tasks outside of home chemistry. Video after the break.

Continue reading “Cheap Vacuum Source For Working With Dangerous Chemicals”

Lego-Like Chemistry And Biology Erector Set

A team of researchers and students at the University of California, Riverside has created a Lego-like system of blocks that enables users to custom build chemical and biological research instruments. The system of 3D-printed blocks can create a variety of scientific tools.

The blocks, which are called Multifluidic Evolutionary Components (MECs) appeared in the journal PLOS ONE. Each block in the system performs a basic lab instrument task (pumping fluids, making measurements or interfacing with a user, for example). Since the blocks are designed to work together, users can build apparatus — like bioreactors for making alternative fuels or acid-base titration tools for high school chemistry classes — rapidly and efficiently. The blocks are especially well suited for resource-limited settings, where a library of blocks can create a variety of different research and diagnostic tools.

Continue reading “Lego-Like Chemistry And Biology Erector Set”

Hackaday Prize Entry: Helping Millions See Clearly

Slit lamps are prohibitively expensive in the third world areas of India where they are most needed. An invention that’s been around for over a hundred years, the slit lamp is a simple-in-concept way to see and diagnose a large array of ocular issues.

Since they are relatively old by technological standards, the principles behind them have become more and more understood as time has gone on. While a nice lab version with a corneal microscope is certainly better, innovations in manufacturing have brought the theoretical minimum cost of the device way down, or at least that’s what [Kewal Chand Swami] hopes.

His design aims for portability and cost reduction. It must be able to travel to remote locations and it must be significantly cheaper than the lab versions. It uses off-the-shelf lenses in a 3D printed housing with a simple LED torch, the kind you can buy for a dollar at the check-out stand.

The assembly slides onto the user’s head and is held there with straps. The doctor can adjust where the slit the lamp shines and also look through a microscope to diagnose the issue. Hopefully devices like this will see similar community support to the prosthetic projects we’ve covered.