Making A Player Piano Talk MIDI

[Ramon] was always fascinated with pianos, and when he came across a few player piano rolls in an antique shop, a small kernel of a project idea was formed. He wondered if anyone had ever tried to convert a player piano into a full MIDI instrument, with a computer tickling the ivories with a few commands. This led to one of the best builds we’ve ever seen: a player piano connected to a computer.

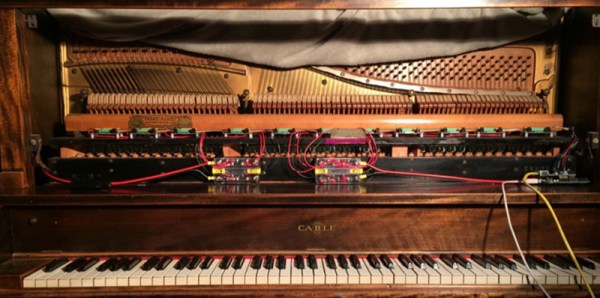
[Ramon] found an old piano in Craigslist for a few hundred dollars, and once it made its way into the workshop the teardown began. Player pianos work via a vacuum, where air is sucked through a few pin points in a piano roll with a bellows. A series of pipes leading to each key translate these small holes into notes. Replicating this system for a MIDI device would be impossible, but there are a few companies that make electronic adapters for player pianos. All [Ramon] would have to do is replicate that.

The lead pipes were torn out and replaced with 88 separate solenoid valves. These valves are controlled via a shift register, and the shift registers controlled by an ATMega. There’s an astonishing amount of electronic and mechanical work invested in this build, and the finished product shows that.

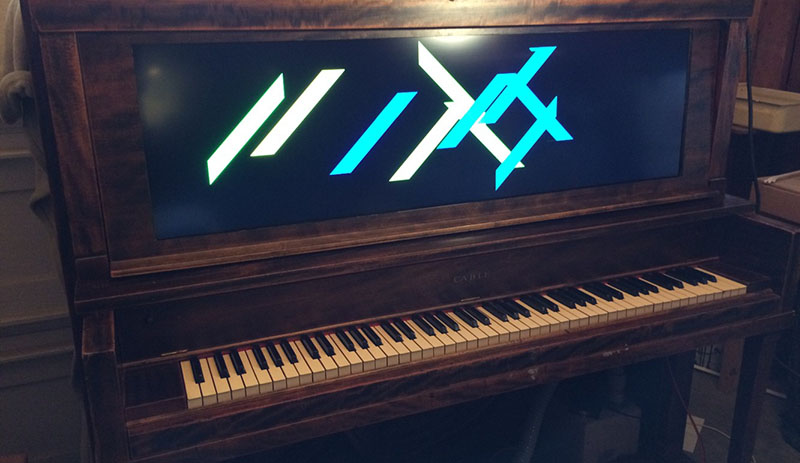
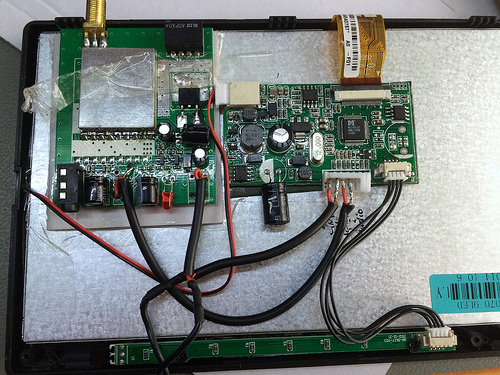
As if turning an ancient player piano into something that can understand and play MIDI music wasn’t enough, [Ramon] decided to add a few visuals to the mix. He found a display with a ratio of 16:4.5 – yes, half as tall as 16:9 – and turned the front of the piano into a giant display. The ten different styles of visualization were whipped up in Processing.

display

The piano has so far been shown at an interactive art exhibit in Oakland, and hopefully it’ll make it to one of the Maker Faires next year. There are also plans to have this piano output MIDI with a key scanner underneath all the keys. Very impressive work.

Video below.

Continue reading “Making A Player Piano Talk MIDI”

Trinket EDC Contest Entry: Can I Borrow A Feeling?

We got a case of the Mondays just reading about [Sascha]’s work environment. Get this: every morning, first thing, the whole team gets together to check in and share how they’re all feeling. And they can’t even be candid about it—there’s actually an approved list of feeling descriptors, both good and bad. It’s an admittedly big list that includes, interestingly enough, both ‘tortured’ and ’embarrassed’. Yeah. We think something like group t’ai chi on the roof each morning sounds a lot more relaxing. Since [Sascha] is between a rock and a hard place on this one, it was time to let chance take over. He raised his HaD-imprinted Trinket skyward and Can I Borrow a Feeling? was born.

The gist is simple: [Sascha] abstracts his disposition out to either ‘good’ or ‘bad’ and pushes the corresponding button. The Trinket accesses an array and returns a randomly selected feeling to the LCD. Since the official list of feelings is about 300 words long, [Sascha] has to push the data into PROGMEM. He used good old Excel to split the list in twain, and her formulas came in very handy for centering the result on the LCD. Once [Sascha] knew how it would all fit together, he designed a cool enclosure in CorelDRAW and turned on the laser cutter. See the Spreadsheet of Acceptable Words for yourself on GitHub, and pick up the code and enclosure file while you’re there.

There’s still time to enter the Trinket Everyday Carry Contest.  The main contest runs until January 2, but we’re having random drawings every week! Don’t forget to write a project log before the next drawing at 9pm EST on Tuesday, December 30th. You and all of the other entrants have a chance to win a Teensy 3.1 from The Hackaday Store!

Cairo Hackerspace Gets A $14 Projector

The Cairo hackerspace needed a projector for a few presentations during their Internet of Things build night, and of course Friday movie night. They couldn’t afford a real projector, but these are hackers. Of course they’ll be able to come up with something. They did. They found an old slide projector made in West Germany and turned it into something capable of displaying video.

The projector in question was a DIA projector that was at least forty years old. They found it during a trip to the Egyptian second-hand market. Other than the projector, the only other required parts were a 2.5″ TFT display from Adafruit and a Nokia smartphone.

All LCDs are actually transparent, and if you’ve ever had to deal with a display with a broken backlight, you’ll quickly realize that any backlight will work, like the one found in a slide projector. By carefully removing the back cover of the display, the folks at the Cairo hackerspace were able to get a small NTSC display that would easily fit inside their projector.

After that, it was simply a matter of putting the LCD inside the display, getting the focus right, and mounting everything securely. The presentations and movie night were saved, all from a scrap heap challenge.

Arduino Lithium Charger Shield

Programmable Lithium Charger Shield For Arduino

Surely you need yet another way to charge your lithium batteries—perhaps you can sate your desperation with this programmable multi (or single) cell lithium charger shield for the Arduino?! Okay, so you’re not hurting for another method of juicing up your batteries. If you’re a regular around these parts of the interwebs, you’ll recall the lithium charging guide and that rather incredible, near-encyclopedic rundown of both batteries and chargers, which likely kept your charging needs under control.

That said, this shield by Electro-Labs might be the perfect transition for the die-hard-‘duino fanatic looking to migrate to tougher projects. The build features an LCD and four-button interface to fiddle with settings, and is based around an LT1510 constant current/constant voltage charger IC. You can find the schematic, bill of materials, code, and PCB design on the Electro-Labs webpage, as well as a brief rundown explaining how the circuit works. Still want to add on the design? Throw in one of these Li-ion holders for quick battery swapping action.

[via Embedded Lab]

Complete FPV Setup For Your Drone

[Ioannis] is like anyone else who has a quadcopter or other drone. Eventually you want to sit in the cockpit instead of flying from the ground. This just isn’t going to happen at the hobby level anytime soon. But the next best option is well within your grasp. Why not decouple your eyes from your body by adding a first-person video to your quad?

There are really only four main components: camera, screen, and a transceiver/receiver pair to link the two. [Ioannis] has chosen the Sony Super HAD CCTV camera which provides excellent quality at the bargain basement price of just $25 dollars. A bit of patient shopping delivered a small LCD screen for just $15. The insides have plenty of room as you can see. [Ioannis] connected the screen’s native driver board up to the $55 video receiver board. To boost performance he swapped out the less-than-ideal antenna for a circular polarized antenna designed to work well with the 5.8 GHz radio equipment.

It seems that everything works like a dream. This all came in under $100 which is half of what some other systems cost without a display. Has anyone figured out a way to connect a transmitter like this to your phone for use with Google Cardboard?

washing machine controller

New Brain For An Old Washing Machine

When the washing machine at [hydronucleus]’s place went on the fritz, he went straight to the toolbox to try to repair it. The problem was with the old mechanical control unit, so [hydronucleus] got an Arduino out of the parts bin to create a brand new electronic controller for his washing machine. (Imgur Link)

drumThe old mechanical controller functioned like a player piano. A rotating drum with ridges actuate different cycles in the washing machine. Some of the cycles weren’t working properly so [hydronucleus] ripped them out. With the help of a schematic posted on the washing machine itself, the cycles were able to be programmed into the Arduino.

The other obstacle in this repair was getting enough relays together to switch everything in the washing machine. This was solved with a Sainsmart 16 relay block, which has more than enough relays for the job. [hydronucleus] wired up an LCD and a pushbutton to control it and his washing machine is as good as new! The cost of the repair certainly beats a new machine, too. Although if it finally gives up the ghost completely, he could always turn it into a windmill.

Want to read more about [hydronucleus]’s washing machine hack? Check out his Reddit thread!

kegerator

End Table Kegerator Hides The Tap When You’re Not Looking

What’s better than an ordinary end table? How about an end table that can serve you beer? [Sam] had this exact idea and used his skills to make it a reality. The first step of the build was to acquire an end table that was big enough to hold all of the components for a functional kegerator. This proved to be a bit tricky, but [Sam] got lucky and scored a proper end table from a garage sale for only $5.00.

Next, [Sam] used bathroom sealant to seal up all of the cracks in the end table. This step is important to keep the inside cold. Good insulation will keep the beer colder, while using less electricity. Next, a hole was cut into the top of the table for the draft tower.

The draft tower is mounted to a couple of drawer slides. This allows the tower to raise up and down, keeping it out of sight when you don’t want it. The tower raises and lowers using a simple pulley system. A thin, high strength rope is attached to the tower. The other end is attached to a spool and a small motor. The motor can wind or unwind the spool in order to raise and lower the tower.

The table houses an Arduino, which controls the motor via a homemade H bridge. The Arduino is hooked up to a temperature sensor and a small LCD screen. This way, the users can see how cold their beer will be before they drink it.

To actually keep the beer cold, [Sam] ripped apart a mini fridge. He moved the compressor and condenser coils to the new table. He had to bend the coils to fit, taking care not to kink them. Finally he threw in the small keg, co2 tank and regulator. The final product is a livingroom gem that provides beer on demand.

Demo video (which is going the wrong way) can be found after the break.

Continue reading “End Table Kegerator Hides The Tap When You’re Not Looking”