There are a number of ways to measure the speed of light. If you’ve got an oscilloscope and a few spare parts, you can build your own apparatus for just a few bucks. Don’t believe the “lies” that “they” tell you: measure it yourself!
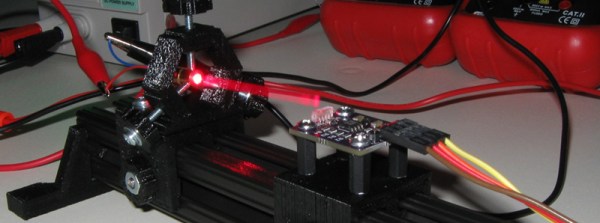
OK, we’re pretty sure that conspiracy theories weren’t the motivation that got [Michael Gallant] to build his own speed-of-light measurement rig, but the result is a great writeup, and a project that includes one of our favorite circuits, the avalanche transistor pulse generator.
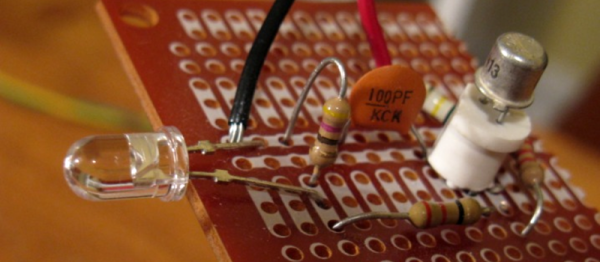
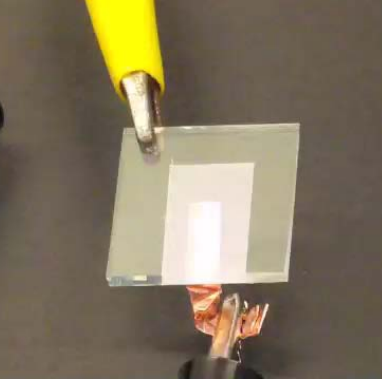
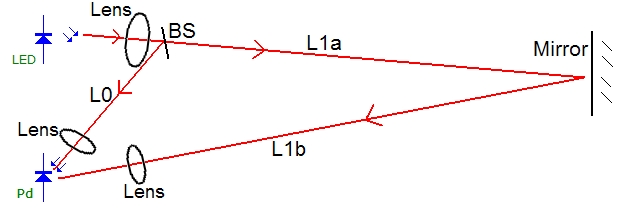 The apparatus starts off with a very quickly pulsed IR LED, a lens, and a beam-splitter. One half of the beam takes a shortcut, and the other bounces off a mirror that is farther away. A simple op-amp circuit amplifies the resulting pulses after they are detected by a photodiode. The delay is measured on an oscilloscope, and the path difference measured with a tape measure.
If you happen to have a photomultiplier tube in your junk box, you can do away with the amplifier stage. Or if you have some really fast logic circuits, here’s another project that might interest you. But if you just want the most direct measurement we can think of that’s astoundingly accurate for something lashed up on breadboards, you can’t beat [Michael]’s lash-up.
Oh and PS: He got 299,000 (+/- 5,000) km/sec.


 Hackaday reader [gratian] tipped us off about the course available from