Creating Video Games With AI: A Mario Example

Artificial intelligence (AI) seems to be doing everything these days. Making images, making videos, and replacing most of us real human writers if you believe the hype. Maybe it’s all over! And yet, we persist, to write about yet another job taken over by AI: creating video games.

The research paper is entitled “Video Game Generation: A Practical Study using Mario.” The basic idea is whether a generative AI model can create an interactive video game by first training it on an existing game.

MarioVGG, as it is called, is a “text-to-video model.” It hasn’t built the Mario game that you’re familiar with, though. It takes player commands as text inputs—such as “run, or “jump”—and then outputs video frames showing the result in the ‘game.’ The model was trained on a dataset of frame-by-frame Super Mario Brothers game play, combined with data on user inputs at the time. The model shows an ability to generate believable video output for given player inputs, including basic game physics, item interactions, and collisions. It’s able to do this in a chained way, so that it can reasonably simulate a player making multiple actions and moving through a level of the game.

It’s not like playing a real Mario game yet, by any means. Regardless, the AI model has shown an ability to replicate the world of the game in a way that behaves relatively consistently with its established rules. If you’re in the field of video game development, though, you probably don’t have a lot to worry about just yet—you probably moved past making basic Mario clones years ago, so you’ve got quite an edge for now!

Super Mario Original Sound Tracks Get High Quality Remaster Thanks To Gigaleak

2020 saw many gigabytes of internal Nintendo data leaked on the broader internet. Known as the “Gigaleak”, it contained source codes and assets from many games. Using data from this leak, a group of enthusiasts has put together high-quality renditions of the SNES Super Mario World Original Sound Tracks (OST).

The work was made possible when source code from the Gameboy Advance remake of Super Mario World was found in the leaked data. The source code included the names of the samples, which were the same as were used in the original SNES game. This allowed the team to find the original samples amongst the gigabytes of leaked files.

We wondered what would be done with all that code, speculating that it would be a poison pill for the emulator scene. This type of hack wasn’t even on our radar and we’re delighted to see the project come to light. The reproduced songs have an altogether different quality than the original SNES soundtrack. This is largely due to the samples not having to be compressed or cut down to fit on a cartridge and work with the console’s sound chip. Other variances in the sound also come from the fact that unlike in the game, the samples in these renditions don’t match the play lengths in the original game.

Regardless of the changes, it’s interesting to hear a more full, rounded sound of these classic video game tunes. It reminds us somewhat of the later CD console era, when sound designers were able to break free of the limitations of earlier hardware. Of course, we still bow at the alter of chiptune, though — and this MIDI Gameboy mod is a great place to start if you’re curious. Video after the break.

Continue reading “Super Mario Original Sound Tracks Get High Quality Remaster Thanks To Gigaleak”

Solid Oak Arcade Cabinet: When Particle Board Won’t Do

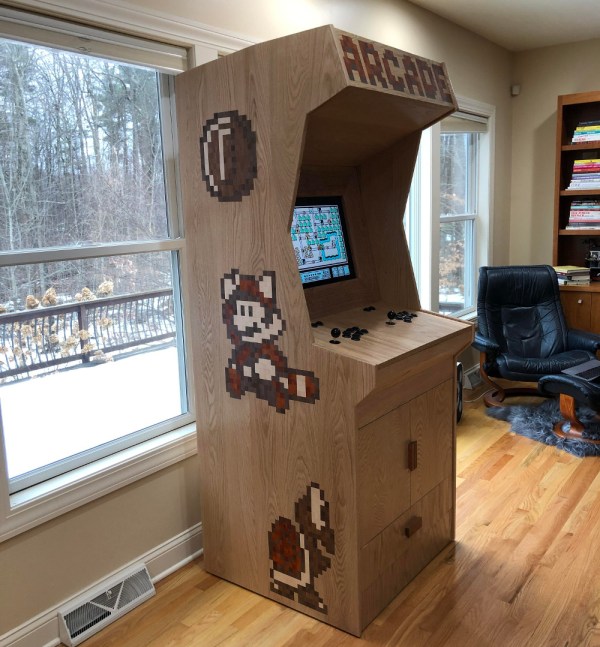
Having an arcade cabinet of one’s own is a common dream among those who grew up during the video game arcade heyday of the 80s and early 90s. It’s a fairly common build that doesn’t take too much specialized knowledge to build. This cabinet, on the other hand, pulled out all of the stops for the cabinet itself, demonstrating an impressive level of woodworking expertise.

The cabinet enclosure is made with red oak boards, which the creator [Obstreperuss] sawed and planed and then glued together to create the various panels (more details are available on his Imgur album). The Mario artwork on the sides and front aren’t just vinyl stickers, either. He used various hardwoods cut into small squares to create pixel art inlays in the oak faces. After the fancy woodwork was completed, the build was finished out with some USB arcade controllers, a flat-panel screen, and a Raspberry Pi to run the games.

While the internals are pretty standard, we have to commend the incredible quality of the woodworking. It’s an impressive homage to classic arcade machines and we wouldn’t mind a similar one in our own homes. If you’re lacking the woodworking equipment, though, it’s possible to get a refined (yet smaller) arcade cabinet for yourself with a 3D printer instead.

Continue reading “Solid Oak Arcade Cabinet: When Particle Board Won’t Do”

Super Mario 64 As Experienced By Mario

Microsoft’s Kinect, a motion-sensing peripherial originally for the Xbox 360, is almost exactly a decade old now. And in that decade it has expanded from its limited existence tied to a console to a widely-used tool for effective and detailed motion sensing, without breaking the bank. While it’s seen use well outside of video games, it’s still being used to reimagine some classic games. In this project, Reddit user [SuperLouis64] has used it to control Mario with his own body.

While the build still involves some use of a hand controller, most of Mario’s movements are controlled by making analogous movements on a small trampoline, including the famed triple jump. The kinect is able to sense all of these movements and translate them into the game using software that [SuperLouis64] built as well. The trickiest movement seems to be Mario’s spin movement, which appears to have taken some practice to get right.

We appreciate the build quality on this one, and [SuperLouis64]’s excitement in playing the game with his creation. It truly looks like a blast to play, and he even mentions in the Reddit thread that he’s gotten a lot of productive excercise with his various VR and augumented reality games in the past few months. Of course if this is too much physical activity, you could always switch to using your car as the unique game controller instead.

Continue reading “Super Mario 64 As Experienced By Mario”

Beat This Mario Block Like It Owes You Money

People trying to replicate their favorite items and gadgets from video games is nothing new, and with desktop 3D printing now at affordable prices, we’re seeing more of these types of projects than ever. At the risk of painting with too broad a stroke, most of these projects seem to revolve around weaponry; be it a mystic sword or a cobbled together plasma rifle, it seems most gamers want to hold the same piece of gear in the physical world that they do in the digital one.

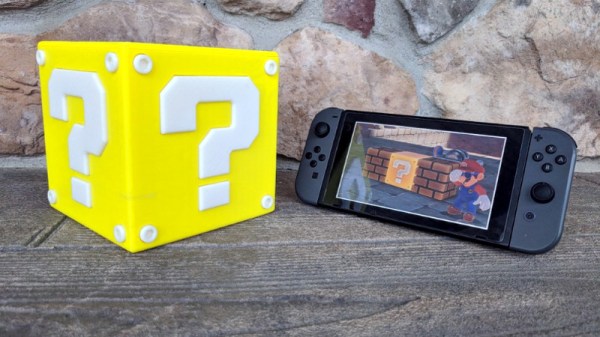
But [Jonathan Whalen] walks a different path. When provided with the power to manifest physical objects, he decided to recreate the iconic “Question Block” from the Mario franchise. But not content to just have a big yellow cube sitting idly on his desk, he decided to make it functional. While you probably shouldn’t smash your head into the thing, if you give it a good knock it will launch gold coins into the air. Unfortunately you have to provide the gold coins yourself, at least until we get that whole alchemy thing figured out.

Printing the block itself is straightforward enough. It’s simply a 145 mm yellow cube, with indents on the side to accept the question mark printed in white and glued in. A neat enough piece of decoration perhaps, but not exactly a hack.

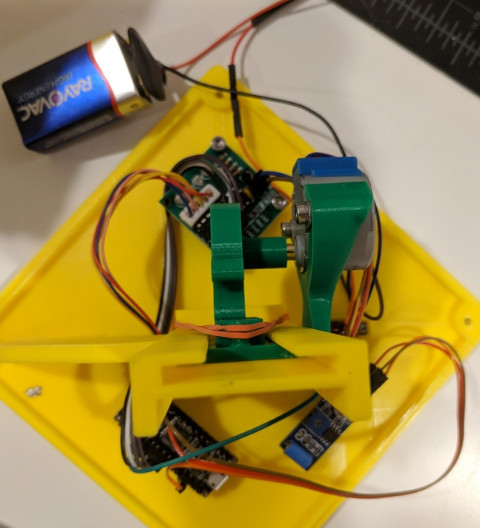
The real magic is on the inside. An Arduino Nano and a vibration sensor are used to detect when things start to get rough, which then sets the stepper motor into motion. Through an ingenious printed rack and pinion arrangement, a rubber band is pulled back and then released. When loaded with $1 US gold coins, all you need to do is jostle the cube around to cause a coin to shoot out of the top.

If this project has got you interested in the world of 3D printed props from the world of entertainment, don’t worry, we’ve got you covered.

Continue reading “Beat This Mario Block Like It Owes You Money”

Playing Mario On An Oscilliscope

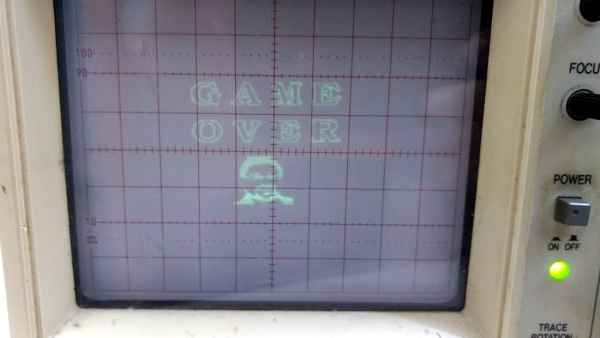
Any display can be connected to a microcontroller and used as a display if you know the protocol to use and have enough power in your micro. Sometimes, an odd display is used just “because it’s there.” This seems to be the case for Reddit user [phckopper], who has used a STM32 and a PS2 joystick to play a version of a Mario game on an oscilloscope.

There’s not many technical details but [phckopper] lets us know that the rendering is done using the SPI on the STM, transferred via DMA, which is synchronized to two saw-tooth waves that are fed in to the X and Y axes of the oscilloscope.  The Z axis, which controls the brightness of the dot, is fed from the MOSI. By making the oscilloscope range all over the screen, similar to the way a CRT’s gun does, [] is able to draw sprites, rather than vector graphics. The display has a resolution of 400×400 and each sprite is 16×16. The input is from a PS2 joystick connected to [phckopper]’s PC, with the information communicated over UART using a simple protocol.

We don’t get to see much of the game in the video after the break, but it’s a pretty impressive job nonetheless, especially when you realize that [phckopper] did this project when he was just sixteen! There are a couple of other oscilloscope projects here at Hackaday, like this one, a great version of pong played on the ‘scope, or this one, showing off some great graphics.

Continue reading “Playing Mario On An Oscilliscope”

Thwomp Drops Brick On Retro Gaming

[Geeksmithing] wanted to respond to a challenge to build a USB hub using cement. Being a fan of Mario Brothers, a fitting homage is to build a retro-gaming console from cement to look just like your favorite Mario-crushing foe. With a Raspberry Pi Zero and a USB hub embedded in it, [Geeksmithing] brought the Mario universe character that’s a large cement block — the Thwomp — to life.

[Geeksmithing] went through five iterations before he arrived at one that worked properly. Initially, he tried using a 3D printed mold; the cement stuck to the plastic ruining the cement on the face. He then switched to using a mold in liquid rubber (after printing out a positive model of the Thwomp to use when creating the mold). But the foam board frame for the mold didn’t hold, so [Geeksmithing] added some wood to stabilize things. Unfortunately, the rubber stuck to both the foam board and the 3D model making it extremely difficult to get the model out.

Like [Han] in carbonite, that's a Rapsberry Pi Zero being encased in cement
Like [Han] in carbonite, that’s a Raspberry Pi Zero being encased in cement
Next up was regular silicone mold material. He didn’t have enough silicone rubber to cover the model, so he added some wood as filler to raise the level of the liquid. He also flipped the model over so that he’d at least get the face detail. He found some other silicone and used it to fill in the rest of the mold. Despite the different silicone, this mold worked. The duct tape he used to waterproof the Raspberry Pi, however, didn’t. He tried again, this time he used hot glue – a lot of hot glue! – to waterproof the Pi. This cast was better, and he was able to fire up the Pi, but after a couple of games his controller stopped working. He cracked open the cement to look at the Pi and realized that a small hole in the hot glue caused a leak that shorted out the USB port on the Pi. One last time, he thought, this time he used liquid electrical tape to waterproof the Pi.

The final casting worked and after painting, [Geeksmithing] had a finished cement Thwomp console that would play retro games. He missed the deadline for the USB Hub Challenge, but it’s still a great looking console, and his video has a lot of detail about what went wrong (and right) during his builds. There’s a great playlist on YouTube of the other entries in the challenge, check them out along with [Geeksmithing]’s video below!

Continue reading “Thwomp Drops Brick On Retro Gaming”