Some projects take great care to tuck away wire hookups, but not [Roberto Alsina]’s Reloj V2 clock. This desktop clock makes a point of exposing all components and wiring as part of its aesthetic. There are no hidden elements, everything that makes it work is open to view. Well, almost.
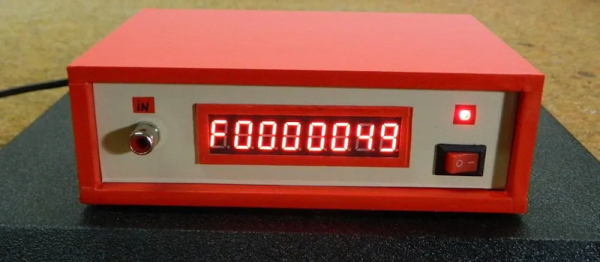
The exception is the four MAX7219 LED matrices whose faces are hidden behind a featureless red panel, and for good reason. As soon as the clock powers up, the LEDs shine through the thin red plastic in a clean glow that complements the rest of the clock nicely.
[Roberto]’s first version was a unit that worked similarly, but sealed everything away in a wedge-shaped enclosure that was just a little too sterile, featureless, and ugly for his liking. Hence this new version that takes the opposite approach. Clocks have long showcased their inner workings, and electronic clocks — like this circuit-sculpture design — are no exception.
The only components, besides the Raspberry Pi Zero W and the LED matrices, are the 3D-printed enclosure with a few hex screws and double-sided tape. Design files and code (including the FreeCAD project file) are available should you want to put your own spin on [Roberto]’s design.