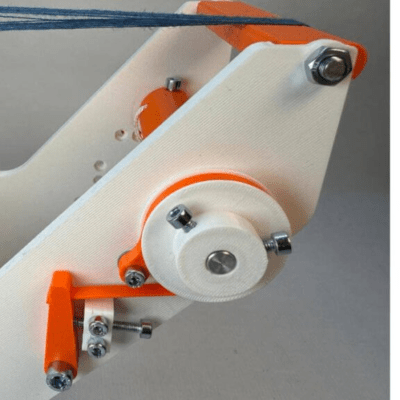
3D Printed Hardware Sorter Keeps It Simple

If you’re like us, you’ve got at least one bin dedicated to keeping the random hardware you just can’t bear to part with. In our case it’s mostly populated with the nuts and bolts left over after finishing up a car repair, but however it gets filled, it’s a mess. The degree to which you can tolerate this mess will vary, but for [EmGi], even a moderately untidy pile of bolts was enough to spur this entirely 3D-printed mechanical bolt sorter.

The elements of this machine bear a strong resemblance to a lot of the sorting mechanisms we’ve seen used on automated manufacturing and assembly lines. The process starts with a hopper full of M3 cap head bolts of varying lengths, which are collated by a pair of elevating platforms. These line up the bolts and lift them onto a slotted feed ramp, which lets them dangle by their heads and pushes them into a fixture that moves them through a 90° arc and presents them to a long sorting ramp. The ramp has a series of increasingly longer slots; bolts roll right over the slots until they find the right slot, where they fall into a bin below. Nuts can also feed through the process and get sorted into their own bin.

What we like about [EmGi]’s design is its simplicity. There are no motors, bearings, springs, or other hardware — except for the hardware you’re sorting, of course. The entire machine is manually powered, so you can just grab a handful of hardware and start sorting. True, it can only sort M3 cap head bolts, but we suspect the design could be modified easily for other sizes and styles of fasteners. Check it out in action in the video below.

Just because it’s simple doesn’t mean we don’t like more complicated hardware sorters, like the ones [Christopher Helmke] builds.

Continue reading “3D Printed Hardware Sorter Keeps It Simple”

Mechanical Logic Gates With Amplification

One of the hardest things about studying electricity, and by extension electronics, is that you generally can’t touch or see anything directly, and if you can you’re generally having a pretty bad day. For teaching something that’s almost always invisible, educators have come up with a number of analogies for helping students understand the inner workings of this mysterious phenomenon like the water analogy or mechanical analogs to electronic circuits. One of [Thomas]’s problems with most of these devices, though, is that they don’t have any amplification or “fan-out” capability like a real electronic circuit would. He’s solved that with a unique mechanical amplifier.

Digital logic circuits generally have input power and ground connections in addition to their logic connection points, so [Thomas]’s main breakthrough here is that the mechanical equivalent should as well. His uses a motor driving a shaft with a set of pulleys, each of which has a fixed string wrapped around the pulley. That string is attached to a second string which is controlled by an input. When the input is moved the string on the pulley moves as well but the pulley adds a considerable amount of power to to the output which can eventually be used to drive a much larger number of inputs. In electronics, the ability to drive a certain number of inputs from a single output is called “fan-out” and this device has an equivalent fan-out of around 10, meaning each output can drive ten inputs.

[Thomas] calls his invention capstan lever logic, presumably named after a type of winch used on sailing vessels. In this case, the capstan is the driven pulley system. The linked video shows him creating a number of equivalent circuits starting with an inverter and working his way up to a half adder and an RS flip-flop. While the amplifier pulley does take a minute to wrap one’s mind around, it really helps make the equivalent electronic circuit more intuitive. We’ve seen similar builds before as well which use pulleys to demonstrate electronic circuits, but in a slightly different manner than this build does.

Continue reading “Mechanical Logic Gates With Amplification”

Hackable Ham Radio Gives Up Its Mechanical Secrets

Reverse-engineered schematics are de rigeur around these parts, largely because they’re often the key to very cool hardware hacks. We don’t get to see many mechanical reverse-engineering efforts, though, which is a pity because electronic hacks often literally don’t stand on their own. That’s why these reverse-engineered mechanical diagrams of the Quansheng UV-K5 portable amateur radio transceiver really caught our eye.

Part of the reason for the dearth of mechanical diagrams for devices, even one as electrically and computationally hackable as the UV-K5, is that mechanical diagrams are a lot less abstract than a schematic or even firmware. Luckily, this fact didn’t daunt [mdlougheed] from putting a stripped-down UV-K5 under a camera for a series of images to gather the raw data needed by photogrammetry package RealityCapture. The point cloud was thoughtfully scaled to match the dimensions of the radio’s reverse-engineered PC board, so the two models can work together.

The results are pretty impressive, especially for a first effort, and should make electromechanical modifications to the radio all the easier to accomplish. Hats off to [mdlougheed] for the good work, and let the mechanical hacks begin.

Noodles Time Themselves While Cooking

Despite the name, so-called “instant” noodles still need to sit for a few minutes before they’re actually ready to eat. Most people would likely use a simple kitchen timer to let them know when it’s time to chow down, but this unique mechanical timer uses the weight of the noodles themselves to power a timing mechanism.

The timer acts in much the same way that a pendulum clock would, in that a weight provides the energy to drive the clock’s mechanism which releases that energy in discrete steps. Besides a few metal parts and some magnets, the majority of the clock is 3D printed with a small platform on the side where the noodles rest. As the platform falls the weight drives the clock mechanism which will finally alert the user when they finish their descent three minutes later with the help of a small bell. There’s even an analog display which shows the number of minutes remaining before the noodles are ready to eat.

As far as single-purpose kitchen appliances go, this is one that we might find ourselves sacrificing some counter space for not only for the usefulness but also for the aesthetic appeal of the visible clock movements and high-quality design. It could even go beside the automatic ramen cooker for when we’re too busy (or lazy) to even boil the water for instant noodles ourselves.

Continue reading “Noodles Time Themselves While Cooking”

Mechanical 7-Segment Display Looks Clean

[Jens] wanted a subscriber counter for his YouTube channel. He could have gone with a simple OLED, LCD, or LED display, but he wanted something more tactile and interesting. So he built a mechanical 7-segment display instead!

Currently, [Jens]’s channel is in the four-digit subscriber range, so he planned to build a four-digit display. He started by searching for existing projects in this space, and came across the designs of [shiura] on Thingiverse. [shiura] had a 3D printed cam-driven 7-segment digit that runs on a single servo motor. Once armed with four of the digits, he hooked them up to a Pi Pico W to drive them all with four servo outputs. The Pico W is responsible for querying the channel subscriber count online, and updating the display in turn.

It’s a neat build, and [Jens] learned some things along the way—like how Super Lube seemed to ruin filament for him. Ultimately, the build came good, and it looks great. We’ve seen some other mechanical 7-segment builds before, too!

Continue reading “Mechanical 7-Segment Display Looks Clean”

[Thomas Sanladerer] Gets New Threads

If you do much practical 3D printing, you eventually need some sort of fastener. You can use a screw to bite into plastic. You can create a clearance hole to accommodate a bolt and a nut or even build in a nut trap. You can also heat-set threaded inserts. Which is the best? [Thomas] does his usual complete examination and testing of the options in a recent video you can watch below.

[Thomas] uses inserts from [CNCKitchen] and some cheap inserts for 3D printing and some for injection molding. There are differences in the configuration of the teeth that bite into the plastic. [Thomas] also experimented with thread adapters that grab a 3D-printed thread.

Continue reading “[Thomas Sanladerer] Gets New Threads”

Physical Neural Network Can Be Trained Like A Digital One

Here’s an unusual concept: a computer-guided mechanical neural network (video, embedded below.) Why would one want a mechanical neural network? It’s essentially a tool to explore what it would take to make physical materials work in nonstandard ways. The main part is a lattice of interlinked mechanical components. When one applies a certain force in a certain direction on one end, it causes the lattice to deform in a non-intuitive way on the other end.

To make this happen, individual mechanical elements  in the lattice need to have their compliance carefully tuned under the guidance of a computer system. The mechanisms shown can be adjusted on demand while force is applied and cameras monitor the results.

This feedback loop allows researchers to use the same techniques for training neural networks that are used in machine learning applications. Ultimately, a lattice can be configured in such a way that when side A is pressed like this, side B moves like that.

We’ve seen compliant structures that move in unexpected ways before, and they are always fascinating. One example is this 3D-printed door latch that translates a twisting motion into a linear one. Research into physical neural networks seems like it might open the door to more complex systems, or provide insights into metamaterial design.

You can watch the video below just under the page break, or if you prefer, skip the intro and jump straight into How It Works at [2:32].

Continue reading “Physical Neural Network Can Be Trained Like A Digital One”