An Arcade Cabinet With Displays To Spare

We’ve all got a pretty good mental image of what an arcade cabinet looks like, so you probably don’t need to be reminded that traditionally they are single-screen affairs. But that idea dates back to when they were built around big and bulky CRT displays. Now that we have modern LCD, LED, and OLED panels, who says you have to follow the old rules?

That’s precisely the sort of out of the box thinking that lead [Al Linke] to build this unique multi-display arcade cabinet. The game itself is still played on a single screen, but several smaller sub-displays are dotted all around the cabinet to indicate various bits of ancillary information. Are they necessary? Hardly. But we can’t deny it’s a clever idea, and we wouldn’t be surprised if we start seeing something similar in other DIY cabinets.
The build started with a commercially available cabinet from Arcade1Up, which at this point are popular enough that some of the Big Box retailers have them in stock. All of the electronics except for the display were stripped out, and replaced with a Dell OptiPlex 9020 computer and high-quality joysticks and buttons. [Al] then installed his various displays all over the cabinet, including a gorgeous LED marquee that we’ve featured previously.

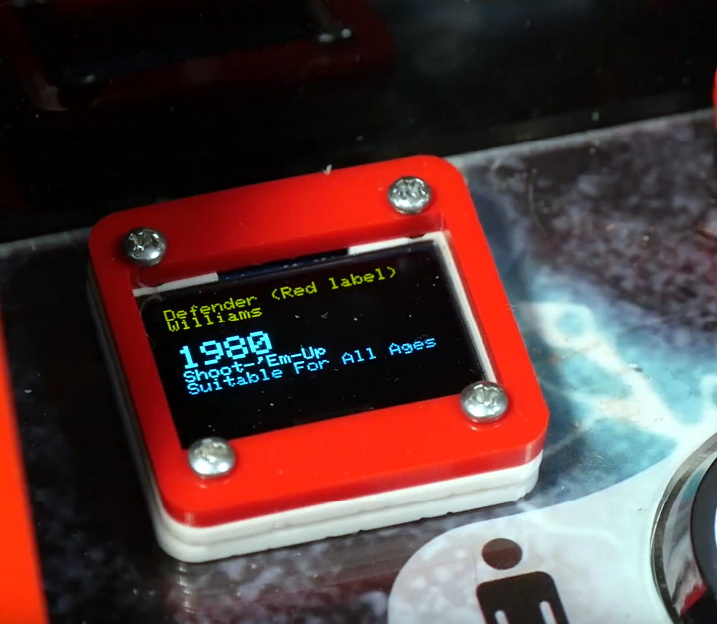
So what do all these little screens do? [Al] explains them in the video after the break, but the general idea is that they provide contextual information about the game you currently have loaded up. A two-color OLED display shows the name of the game and what it’s rated, while a seven segment LED display shows the year the game was released. The displays are located both by the controls and where you’d expect the coin slot to be, so whether you’re actively playing or across the room, you can see all the information.

We’re always amazed to see how builders find ways to make their own personal arcade cabinets stand out. While it’s an idea that at this point we’ve seen quite a lot of, no two projects have ever been quite the same.
Continue reading “An Arcade Cabinet With Displays To Spare”

Feel The Force With A Pocket Magnetometer

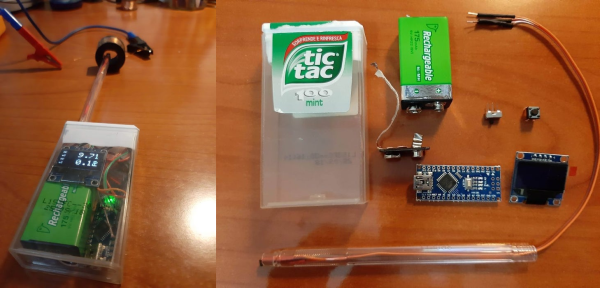
With the rise of affordable 3D printers, we just don’t see the projects in Tic Tac boxes that we used to. That’s kind of a shame. Not only are you upcycling existing plastic when you use one, they’re decently sized component vessels for pocket builds such as [rgco]’s portable magnetometer, especially if you can get the 100-count box. Best of all, they’re see-through!

Sure, you could get a magnetometer app for your phone to test out the strength of your Buckyballs, but this is more fun, and you can use it in more places. This build doesn’t take much — an Arduino Nano reads from a Hall effect sensor and outputs the magnetic flux density in militeslas (mT) on an OLED. Fortifying the sensor by mounting it inside the body of an old (also see-through!) ballpoint pen body is a nice touch.

In order to calibrate it, [rgco] made a solenoid by wrapping a length of PVC with magnet wire. The code for this very portable and low-cost magnetometer measures the magnetic field 2000 times in under three-tenths of a second, and outputs both the mean and the standard deviation of these measurements.

Magnetometers can ID all kinds of things from submarines to Suburbans. Here’s an ESP8266 magnetometer that opens a driveway gate when it detects the car.

Lovebox Gives Infinite Treats Sweeter Than Chocolate

Want to make a special Valentine’s Day gift that keeps on giving well past the holiday? We do too, especially if it’s something as cute as [Marcel Stör]’s Lovebox. This is a relatively simple build, but it’s the kind that lets you make someone’s day over and over again.

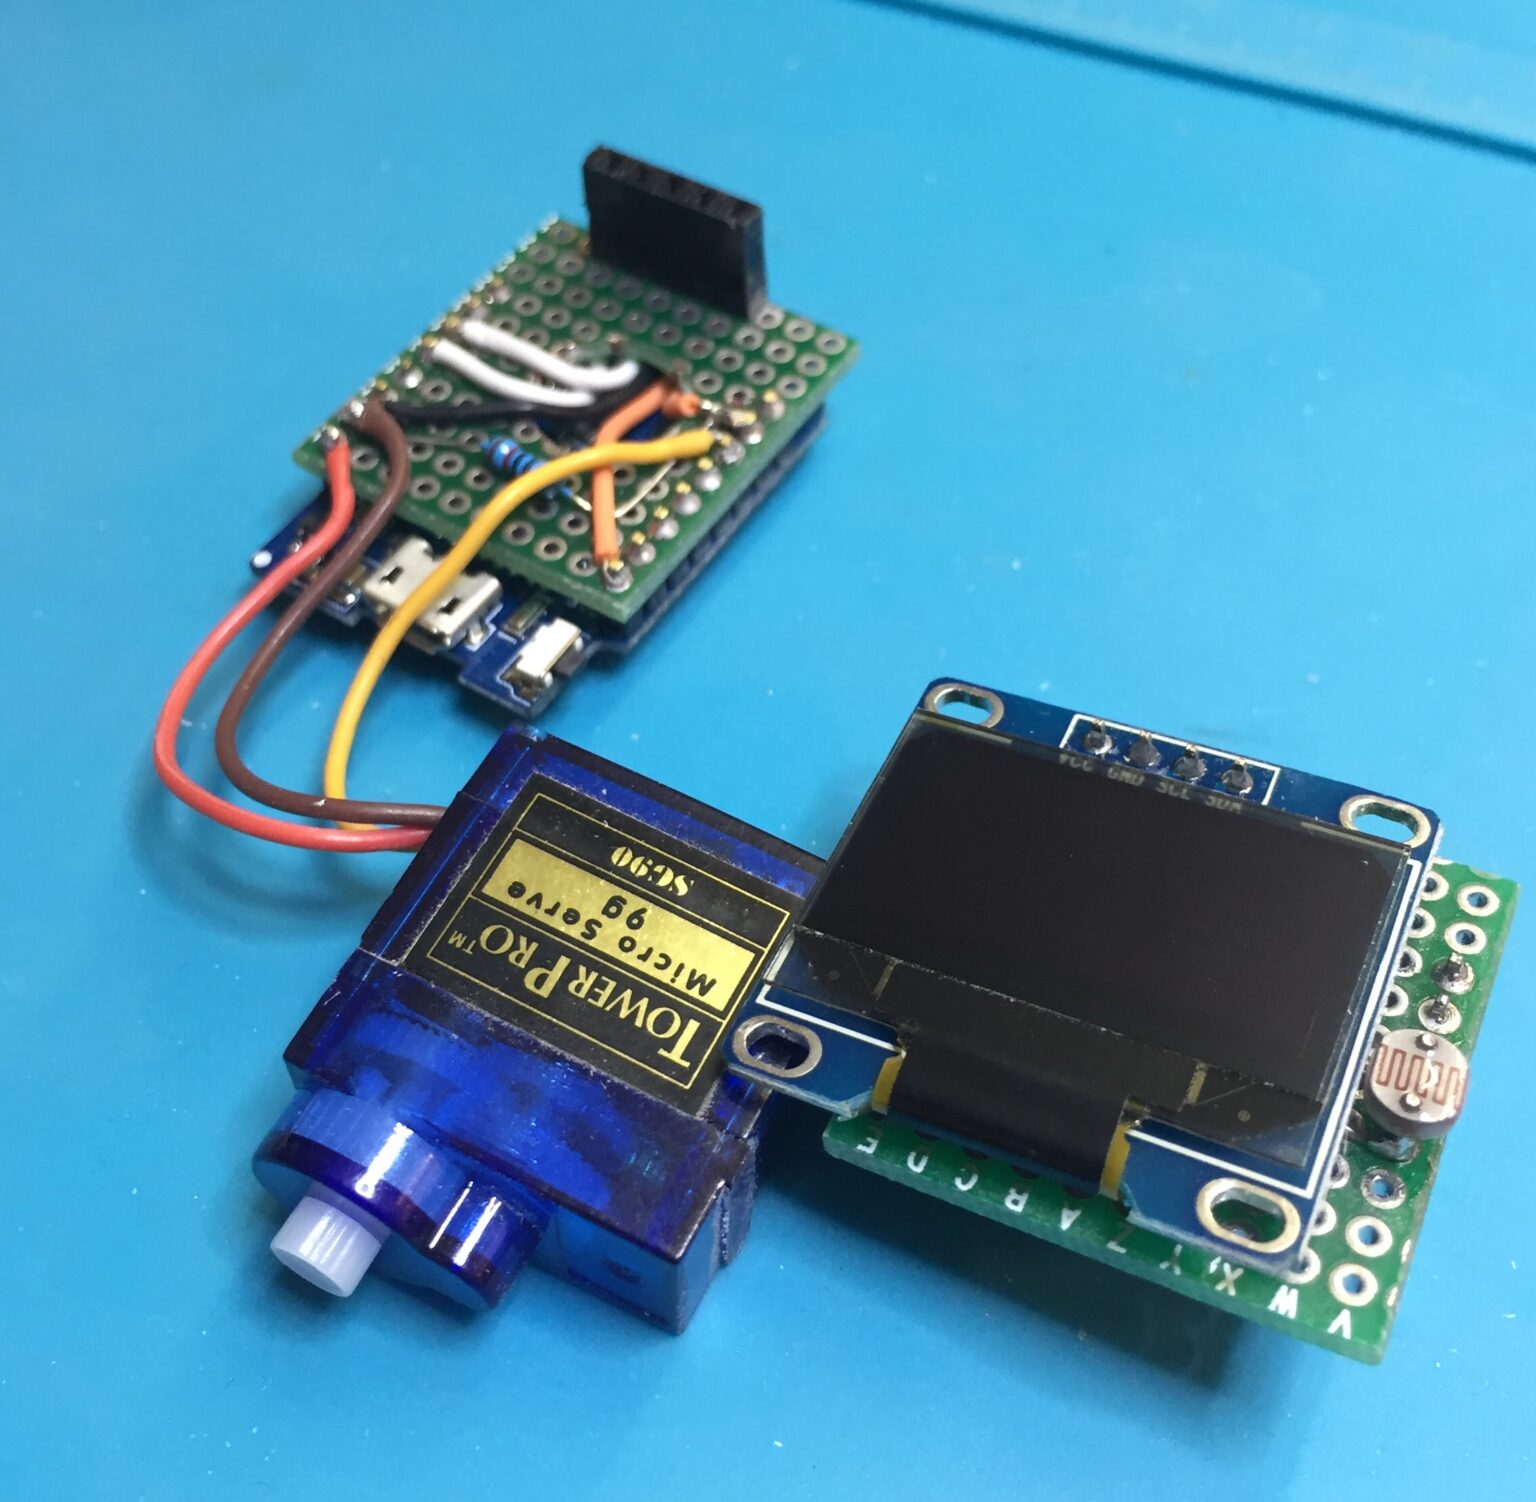
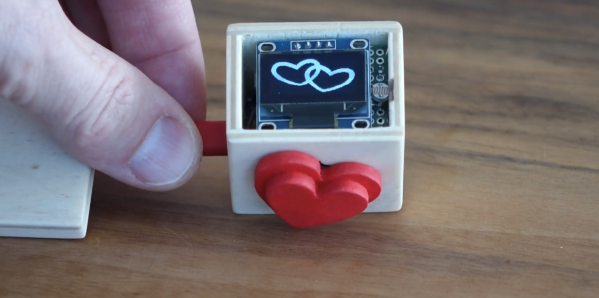
The sender composes their love note in a secret GitHub gist, either as a text message or a binary image, and updates the gist. Whenever the Wemos D1 mini inside the box receives a new message, a micro servo slowly wiggles the hearts up and down to notify the recipient.

Once they remove the lid to read it, a light-dependent resistor senses the flood of light on its face and tells the servo it can stop wiggling. We think it’s neat that the heart nudges upwardly at the box lid a bit as it moves, because it increases the cuteness factor.

Everybody loves to hear from that special someone throughout the day. The idea of sending an intimate message remotely is quite romantic, and there’s something thrilling and urgent about a physical notification. Show the break button a little love, and you’ll see a truffle-sized demo featuring both an incoming image and a text message.

[Marcel] was happy to ply his woodworking skills rather than use a laser cutter. If you have neither of these, hit up a craft store or two and you’ll find unfinished wooden boxes and pre-cut hearts galore. Or, you could just say it with copper.

Continue reading “Lovebox Gives Infinite Treats Sweeter Than Chocolate”

Turning OLEDs And Acrylic Into Faux Nixie Tubes

Love ’em or hate ’em, Nixies and the retro clocks they adorn are here to stay. At least until the world’s stock of surplus Soviet tubes is finally depleted, that is. The glow discharge tubes were last mass manufactured in the 1980s, and while they’re not too hard to get a hold of yet, they will be eventually. And what better way to get ready for that dreaded day than by rolling your own OLED faux Nixie tubes?

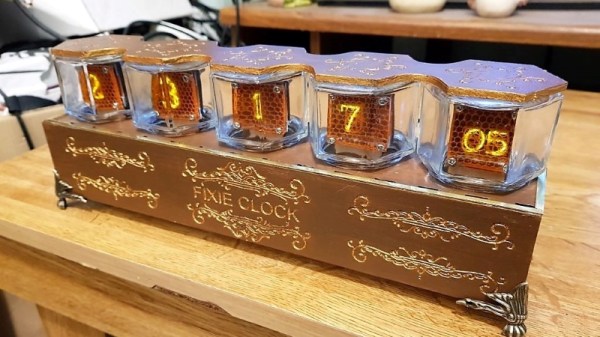
Granted, [Derek]’s faux Nixies, appropriately dubbed “Fixies,” require just a touch of willing suspension of disbelief. We’ve never see Nixies with tiny jam jars as envelopes, so that’s probably the first giveaway. But looking past that, the innards of these fake displays do a pretty convincing job of imitating the texture of the real thing.

The numbers themselves are displayed on a 128×64 white OLED display using a Nixie-like True Type font. An orange acrylic filter in front of the display gives it that warm amber Nixie glow, with laser etchings mimicking both the fine hexagonal anode grid and the ghostly cathodes of the non-illuminated numerals. The tubes looked convincing enough that a clock was in order, and after sorting through an I2C bottleneck with the help of a multiplexer, [Derek] had a pretty decent faux-Nixie clock, complete with a solenoid-actuated mechanical gong. The double-digit display for the seconds will no doubt cause some consternation among Nixie purists, but that’s probably part of the fun.

Of course, just because Nixies aren’t being mass-produced today doesn’t mean you can’t get new ones. You just have to be willing to pay for them, and [Dalibor Farný] will gladly set you up with his handmade artisanal Nixies, or even a clock kit using them.

Continue reading “Turning OLEDs And Acrylic Into Faux Nixie Tubes”

PrintEye Gives You Stats In A Blink

Once upon a time, most things were single-purpose, like the pocket watch. Then somebody made a watch with a date function, and next thing you know, we had TV/VCR combos and Swiss army knives. Now, people pull computers out of their pockets just to check the time or the bed temperature of their RepRap.

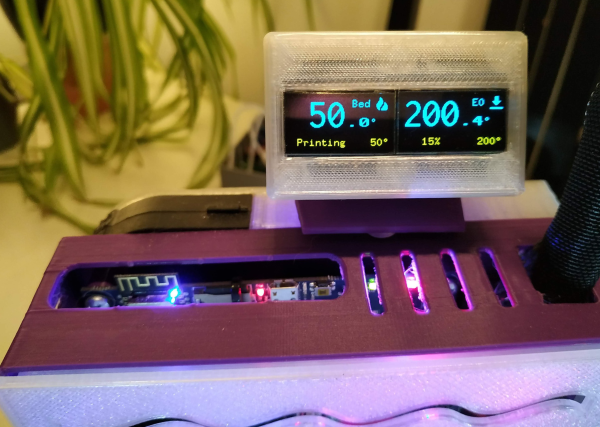
[Owen]’s antidote for this multi-function madness is PrintEye, a simple interface that queries his printer and displays its vital signs on a pair of OLED peepers. It’s a parts bin special, and you know how much we love those. PrintEye connects to the Duet controller over UART, and does its firmware whispering with an ATMega328P. The ‘Mega sends a single M-command and gets back all the status and temperature data in JSON format. Then it parses the info and displays it on twin OLED screens.

Want to make one? [Owen]’s got all the files you need over on IO, but offers no hand-holding services. If you’ve never spun a board before, this could be your introduction. Have to have an internet connection? Check out the Octoprint monitor that inspired PrintEye.

DIY Thermal Imager Uses DIY Gaussian Blur

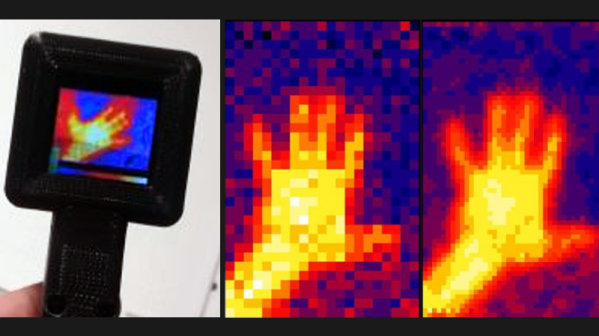
Under the right circumstances, Gaussian blurring can make an image seem more clearly defined. [DZL] demonstrates exactly this with a lightweight and compact Gaussian interpolation routine to make the low-resolution thermal sensor data display much better on a small OLED.

[DZL] used an MLX90640 sensor to create a DIY thermal imager with a small OLED display, but since the sensor is relatively low-resolution at 32×24, displaying the data directly looks awfully blocky. Gaussian interpolation to improve the display looks really good, but it turns out that the full Gaussian interpolation isn’t a trivial calculation write on your own. Since [DZL] wanted to implement it on a microcontroller, the lightweight implementation was born. The project page walks through the details of Gaussian interpolation and how some effective shortcuts were made, so be sure to give it a look.

The MLX90640 sensor also makes an appearance in the Open Thermal Camera, one of the entries for the 2019 Hackaday Prize. If you’re interested in thermal imaging, don’t miss this teardown of a thermal imaging camera.

Hello: A Mini Badge For CCCamp

Badgelife culture is our community’s very own art form, with a plethora of designs coming forth featuring stunning artwork, impressive hardware, and clever software tricks. But sometimes a badge doesn’t need a brace of LEDs or a meme-inspired appearance to be a success, it just needs to be very good at what it does.

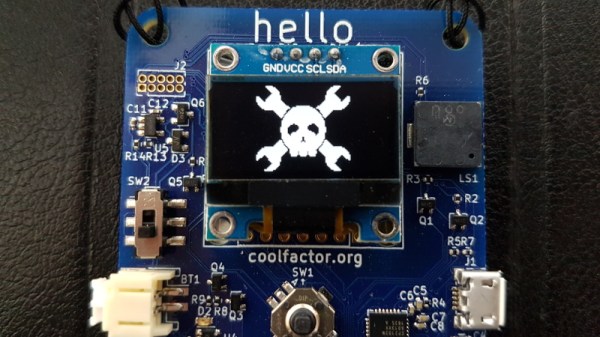
A perfect example is [Gavan Fantom]’s Hello mini badge. The hardware is fairly straightforward, it’s just a small square PCB sporting a LPC1115 microcontroller, 8Mb Flash chip, piezo speaker, and an OLED display. Its functionality is pretty simple as well, in that it exists to display text, images, or short animations. But the badge hides a very well-executed firmware that provides a serial terminal and zmodem file upload capability as well as an on-device interface via a small joystick. Power comes from a 500 mAh lithium-polymer cell, for which the badge integrates the usual charger and power management hardware.

There’s a variety of possibilities for the badge, but we’d guess that most owners will simply use it to display their name with perhaps a little animation. A bit of nifty processing of some video could perhaps get something approaching watchable video on it though, opening up the entertaining possibility of displaying demos or other video content.

[Gavan] will have some of the Hello badges at the upcoming CCCamp hacker camp in Germany if you’re interested, and should be easy enough to find in the EMF village.