Create Custom Gridfinity Boxes Using Images Of Tools

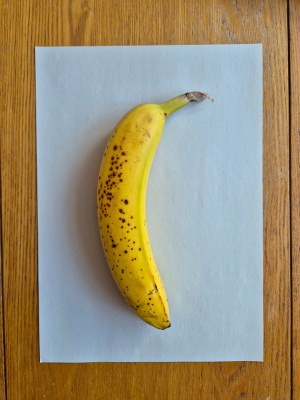
Exhibit A: A standard-issue banana.

We love it when a community grabs hold of an idea and runs wild with it despite obvious practicality issues. Gridfinity by YouTuber [Zach Freedman] is one of those concepts. For the unaware, this is a simple storage system standard, defining boxes to hold your things. These boxes can be stacked and held in place in anything from a desk drawer to hanging off the side of a 3D printer. [Georgs Lazdāns] is one such Gridfinity user who wanted to create tool-specific holders without leaving the sofa. To do so, they made a web application using node.js and OpenCV to extract outlines for tools (or anything else) when photographed on a blank sheet of paper.

The OpenCV stack assumes that the object to be profiled will be placed on a uniformly colored paper with all parts of its outline visible. The first part of the stack uses a bilateral filter to denoise the image whilst keeping edge details.

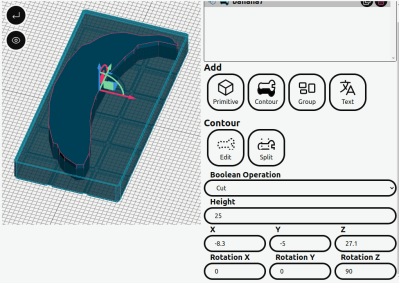
Make a base, then add a banana. Easy!

Next, the image is converted to greyscale, blurred, and run through an adaptive threshold. This converts the image to monochrome, again preserving edge details. Finally, the Canny algorithm pulls out the paper contour. The object outline can be given an accurate scale with the paper contour and paper size specified. The second part of the process works similarly to extract the object outline. The second contour should follow the object pretty accurately. If it doesn’t, it can be manually tweaked in the editor. Once a contour is captured, it can be used to modify a blank Gridfinity base in the model editor.

Continue reading “Create Custom Gridfinity Boxes Using Images Of Tools”

Using OpenCV To Catch A Hungry Thief

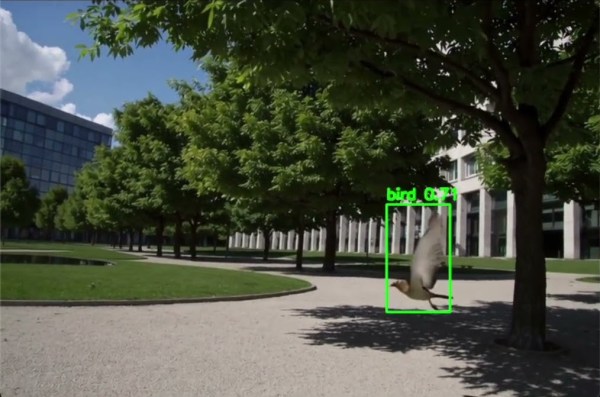
Rory, the star of the show

[Scott] has a neat little closet in his carport that acts as a shelter and rest area for their outdoor cat, Rory. She has a bed and food and water, so when she’s outside on an adventure she has a place to eat and drink and nap in case her humans aren’t available to let her back in. However, [Scott] recently noticed that they seemed to be going through a lot of food, and they couldn’t figure out where it was going. Kitty wasn’t growing a potbelly, so something else was eating the food.

So [Scott] rolled up his sleeves and hacked together an OpenCV project with a FLIR Boson to try and catch the thief. To reduce the amount of footage to go through, the system would only capture video when it detected movement or a large change in the scene. It would then take snapshots, timestamp them, and optionally record a feed of the video. [Scott] originally started writing the system in Python, but it couldn’t keep up and was causing frames to be dropped when motion was detected. Eventually, he re-wrote the prototype in C++ which of course resulted in much better performance!

Continue reading “Using OpenCV To Catch A Hungry Thief”

This Piano Does Not Exist

A couple of decades ago one of *the* smartphone accessories to have was a Bluetooth keyboard which projected the keymap onto a table surface where letters could be typed in a virtual space. If we’re honest, we remember them as not being very good. But that hasn’t stopped the idea from resurfacing from time to time.

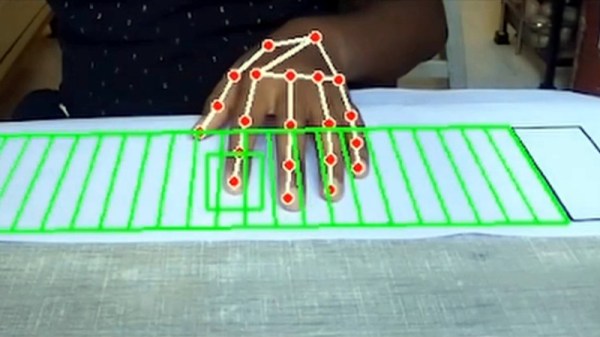
We’re reminded of it by [Mayuresh1611]’s paper piano, in which a virtual piano keyboard is watched over by a webcam to detect the player’s fingers such that the correct note from a range of MP3 files is delivered.

The README is frustratingly light on details other than setup, but a dive into the requirements reveals OpenCV as expected, and TensorFlow. It seems there’s a training step before a would-be virtual virtuoso can tinkle on the non-existent ivories, but the demo shows that there’s something playable in there. We like the idea, and wonder whether it could also be applied to other instruments such as percussion. A table as a drum kit would surely be just as much fun.

This certainly isn’t the first touch piano we’ve featured, but we think it may be the only one using OpenCV. A previous one used more conventional capacitive sensors.

Bone-Shaking Haunted Mirror Uses Stable Diffusion

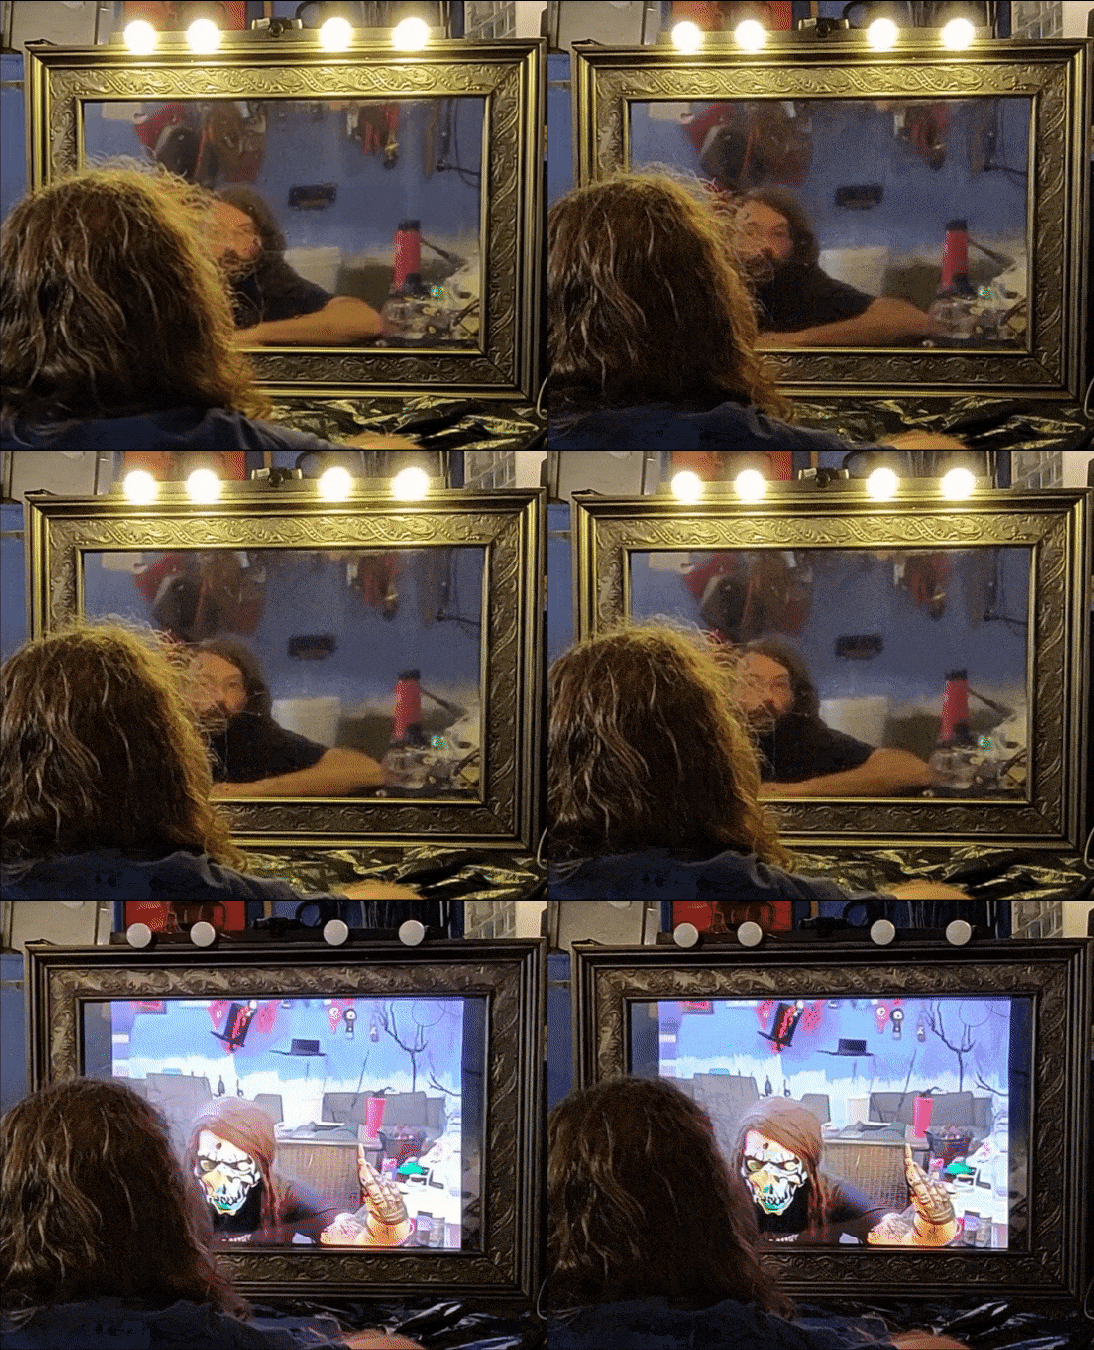
We once thought that the best houses on Halloween were the ones that gave out full-size candy bars. While that’s still true, these days we’d rather see a cool display of some kind on the porch. Although some might consider this a trick, gaze into [Tim]’s mirror and you’ll be treated to a spooky version of yourself.

Here’s how it works: At the heart of this build is a webcam, OpenCV, and a computer that’s running the Stable Diffusion AI image generator. The image is shown on a monitor that sits behind 2-way mirrored glass.

We really like the frame that [Tim] built for this. Unable to find something both suitable and affordable, they built one out of wood molding and aged it appropriately.

We also like the ping pong ball vanity globe lights and the lighting effect itself. Not only is it spooky, it lets the viewer know that something is happening in the background. All the code and the schematic are available if you’d like to give this a go.

There are many takes on the spooky mirror out there. Here’s one that uses a terrifying 3D print.

A Controller For More Than Thumbs

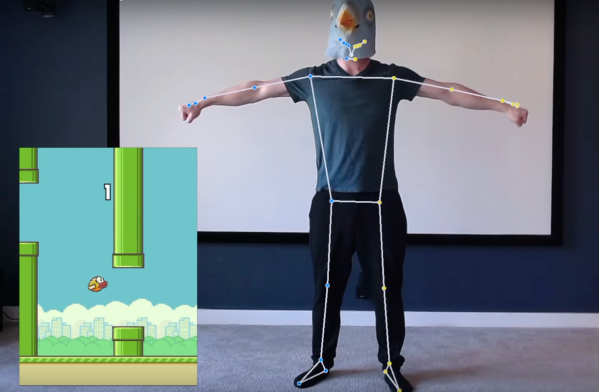
As virtual reality continues to make headway into the modern zeitgeist, it is still lacking in a few key ways. There’s not yet an accepted standard for correlating body motion to movement within a game, with most of the mainstream VR offerings sidestepping this problem by requiring the user to operate some sort of handheld controller to navigate the virtual world. And besides a brief Kinect fad from the 2010s, there hasn’t been too much innovation in this area. But computers have continued to increase in capabilities and algorithms for tracking movement have improved, so [Fletcher Heisler] aka [Everything Is Hacked] leveraged these modern tools into a full-body controller configurable for any video game.

This project builds heavily on a previous project by [Fletcher] which took body position information and turned it into keyboard input, leveraging OpenCV and posture detection software to map keys to specific body positions. It only needed slight modification to work for gaming with regards to the ability to hold down keys or mash buttons, but essentially works by mapping certain keystrokes from the previous project to commands in games. In addition to that step he also added support for multiplayer by splitting the image captured by the camera into two halves so it can keep track of two people simultaneously.

Continue reading “A Controller For More Than Thumbs”

Laser Triangulation Makes 3D Printer Pressure Advance Tuning Easier

On its face, 3D printing is pretty simple — it’s basically just something to melt plastic while being accurately positioned in three dimensions. But the devil is in the details, and there seems to be an endless number of parameters and considerations that stand between the simplicity of the concept and the reality of getting good-quality prints.

One such parameter that had escaped our attention is “pressure advance,” at least until we ran into [Mike Abbott]’s work on automating pressure advance calibration on the fly. His explanation boils down to this: the pressure in a 3D printer extruder takes time to both build up and release, which results in printing artifacts when the print head slows down and speeds up, such as when the print head needs to make a sharp corner. Pressure advance aims to reduce these artifacts by adjusting filament feed speed before the print head changes speed.

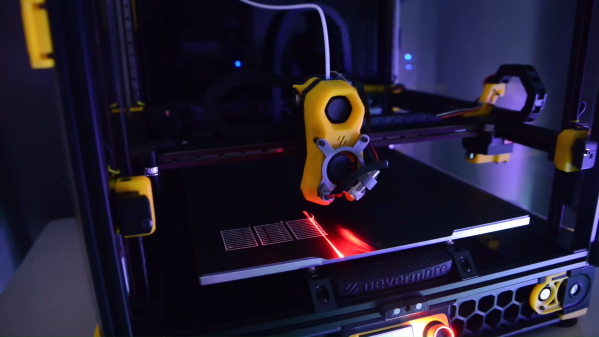
The correct degree of pressure advance is typically determined empirically, but [Mike]’s system, which he calls Rubedo, can do it automatically. Rubedo uses a laser line generator and an extruder-mounted camera (a little like this one) to perform laser triangulation. Rubedo scans across a test print with a bunch of lines printed using different pressure advance values, using OpenCV to look for bulges and thinning caused when the printer changed speed during printing.

The video below gives a lot of detail on Rubedo’s design, some shots of it in action, and a lot of data on how it performs. Kudos to [Mike] for the careful analysis and the great explanation of the problem, and what looks to be a quite workable solution.

Continue reading “Laser Triangulation Makes 3D Printer Pressure Advance Tuning Easier”

Hackaday Prize 2023: Eye Tracking On A Budget

There is a lot to be learned from the experience of building something functional, and even better if doing so doesn’t break the bank. [Sergej Stoetzer]’s 20€ DIY-Eyetracker aims to be an educational process that covers everything from hardware to functional software in an accessible way.

Hardware based on an economical USB endoscope, and can be used as-is or repackaged with IR illumination.

The eye tracker is based on an economical USB endoscope, which is a small camera optimized for up-close applications. By attaching the camera to a pair of common safety glasses so that it looks at one’s eye, some OpenCV and Python code can do simple tracking and interfacing with other projects.

Basic eye tracking — like determining whether a user is looking up, down, left, or right — can be all that’s needed depending on one’s application. That means that it’s possible to get something working with very little hardware and some easy-to-use OpenCV functions.

Even better performance can be had by adding IR illumination and repackaging the camera into a 3D printed enclosure. The pupil of the eye is an aperture in the iris that appears as a black circle, and that’s even more true under IR illumination which is invisible to the naked eye. If you’re curious about what’s inside those USB endoscope cameras and how to remove their IR filter, there are some good pictures of that process in this project.

The ability to get something prototyped quickly and working well enough to learn new things is a valuable skill, and that’s why re-engineering Education is one of the challenges in the 2023 Hackaday Prize.