Cell phones have killed many industries. It is getting harder and harder to justify buying an ordinary watch, a calculator, or a day planner because your phone does all those things at least as well as the originals. Cell phones have cameras too, so the days of missing a shot because you don’t have a camera with you are over (although we always wonder where the flood of Bigfoot and UFO pictures are). However, you probably still have a dedicated camera tucked away somewhere because, let’s face it, most cell phone cameras are just not that good.
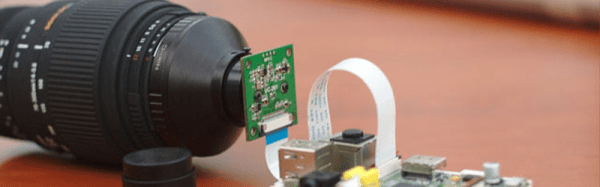
The Raspberry Pi camera is about on par with a cheap cell phone camera. [Martijn Braam] has a Nikon camera, and he noticed that he could get a Raspberry Pi camera with a C-mount for lenses. He picked up a C to F adapter and proceeded to experiment with Nikon DSLR lenses on the Raspberry Pi camera.