Custom LED Signage From Household Items

We’ll admit it: sometimes we overthink things. We imagine some of you are the same way; there seems to be something in the hacker mentality that drives us to occasionally over-engineer ideas to the point of unrecognizability. There’s nothing inherently wrong with this, but sometimes it does keep us from seeing easier solutions.

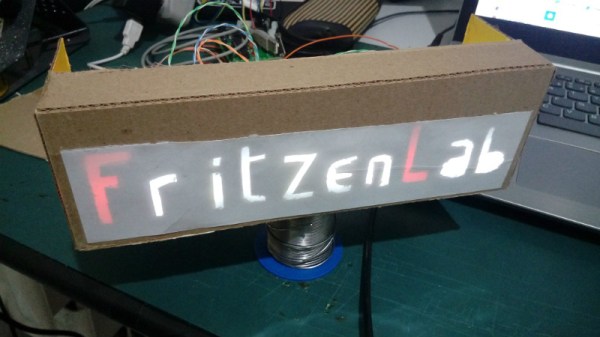
For example, the very slick looking personalized LED sign (Google Translate) that [Clovis Fritzen] recently wrote in to share with us. If we were tasked with creating something like this there would certainly have been a 3D printer and likely a CNC involved before all was said and done, and a few days later we’d still be working out the bugs in our OpenSCAD code. But his approach is very different. Fantastically simple and constructed largely from household items, this is a good project to keep the Junior Hackers entertained on a rainy weekend.

The first step of the process is to draw out the characters you want onto a piece of cardboard, and then carefully cut it out. If you’re worried that you’re not particularly artistic, this step will go a bit better if you print out the design and tape the paper over the cardboard to serve as a template. Once you’ve got your design cut out, you glue or tape a piece of standard printer paper over it. This is the face of the display; it just needs to be lit from behind.

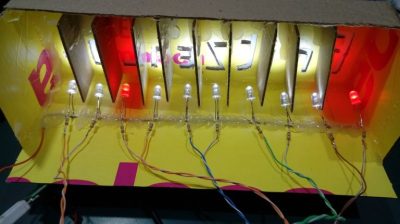
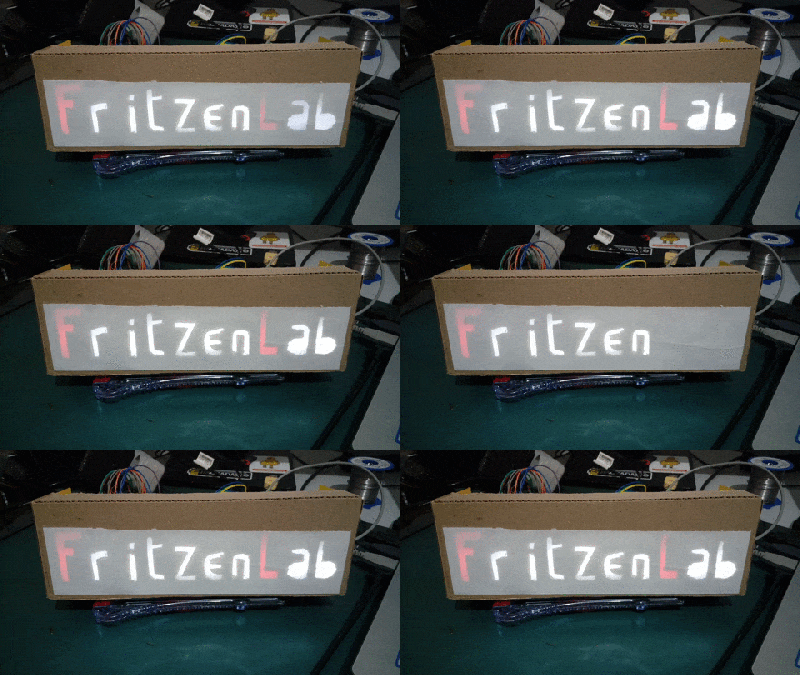
If you wanted to make a sign that was just a single color and didn’t have individually addressable elements, then it would be enough to illuminate the whole cutout with a single light source. But where’s the appeal in that? As [Clovis] shows, you can get much better results by constructing a segmented box, with one LED in each cell. By wiring each LED to a pin on an Arduino or other microcontroller, you’ll have control over the color and brightness of each section of the sign.

Of course, if you’re not big on the whole cardboard aesthetic, you could even recreate this design with the aforementioned CNC and 3D printer. [Clovis] shows how the basic concept works, and that it can be scaled pretty easily depending on the kind of materials you have access to.

RC Paper Airplane From Guts Of Quadcopter

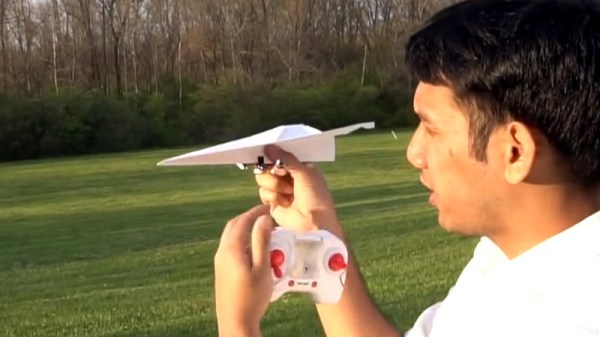
Mini indoor drones have become an incredibly popular gift in the last few years since they’re both cool and inexpensive. For a while they’re great fun to fly around, until the inevitable collision with a wall, piece of furniture, or family member. Often not the most structurally sound of products, a slightly damaged quad can easily be confined to a cupboard for the rest of its life. But [Peter Sripol] has an idea for re-using the electronics from a mangled quad by building his own RC controlled paper aeroplane.

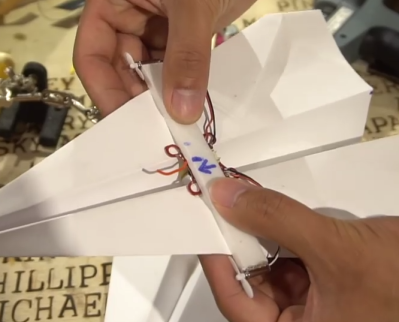
[Peter] uses the two rear motors from a mini quadcopter to provide the thrust for the aeroplane. The key is to remove the motors from the frame and mount them at 90 degrees to their original orientation so that they’re now facing forwards. This allows the drone’s gyro to remain facing upwards in its usual orientation, and keep the plane pointing forwards.

The reason this works is down to how drones yaw: because half of the motors spin the opposite direction to the other half, yaw is induced by increasing the speed of all motors spinning in one direction, mismatching the aerodynamic torques and rotating the drone. In the case of the mini quadcopter, each of the two rear motors spin in different directions. Therefore, when the paper plane begins to yaw off-centre, the flight controller increases power to the appropriate motor.

Mounting the flight controller and motors to the paper plane can either be achieved using a 3D-printed mount [Peter] created, or small piece of foam. Shown here is the foam design that mounts the propellers at wing level but the 3D printed version has then under the fuselage and flies a bit better.

Making paper planes too much effort? You could always use the one-stroke paper plane folder, or even the paper plane machine gun.

Continue reading “RC Paper Airplane From Guts Of Quadcopter”

Turn Failed Prints Into Office Fun With A Paper Airplane Maker

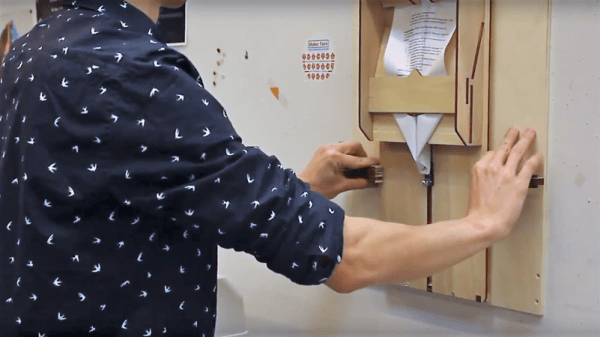
If you’re anything like us, you feel slightly guilty when you send a job to a printer only to find that twenty pages have printed wrong. Maybe it’s a typo, maybe it’s the dreaded landscape versus portrait issue. Whatever it is, trees died for your mistake, and there’s nothing you can do about it except to recycle the waste. But first, wipe that guilt away by using this one-stroke paper airplane maker to equip the whole office for an epic air battle.

We have to admit, automated paper handling has always fascinated us. The idea that a printer can reliably (sometimes) feed individual sheets of a stack is a testament to good design, and don’t even get us started about automatic paper folding. [Jerry de Vos]’ paper airplane maker doesn’t drive the sheets through the folder — that’s up to the user. But the laser-cut plywood jig does all the dirty work of creating a paper airplane. The sheet is clipped to an arm that pulls the paper through a series of ramps and slots that force the paper gently into the five folds needed for the classic paper dart. It’s fascinating to watch, and even though everyone seems to be using it very gingerly lest the paper tear, we can see how adding some rollers and motors from a scrapped printer could entirely automate the process. Think of the fun a ream of paper could provide around the office then.

Oh, wait…

Continue reading “Turn Failed Prints Into Office Fun With A Paper Airplane Maker”

Zen And The Art Of Foam Core

Some of our pastimes are so deeply meditative that we lose ourselves for hours. Our hands seem to perform every step, and sequence like a pianist might recite her favorite song. If [Eric Strebel]’s voice and videos are any indications, working with foam core can have that effect.

Foam core is a staple of art stores, hobby stores, and office supply stores. It comes in different colors, but the universal trait is a sheet of foam sandwiched between a couple of layers of paper. This composition makes a versatile material which [Eric] demonstrates well in his advanced tutorial making a compound surface and later on a speaker mockup.

After the break, you can catch a couple of beginner tutorials which explain the differences between a slapdash foam core model, and one which will draw appreciation. Proper tools and thoughtful planning might be the biggest takeaways from the first two videos unless you count the Zen narration. The advanced videos, linked above, show some ingenious ways to use foam core like offset scoring, adjustable super-structures, and paper transfers.

Each video is less than ten minutes long, so if you just started your coffee break, you can complete a video right now. Or look at another 2D material turned into amazingness with a papercraft strandbeest, then step up your game with another look at vinyl cutters.
Continue reading “Zen And The Art Of Foam Core”

Running Programs On Paper

It’s a simple fact that most programs created for the personal computer involve the same methods of interaction, almost regardless of purpose. Word processors, graphics utilities, even games – the vast majority of interaction is performed through a keyboard and mouse. However, sometimes it can be fun to experiment with alternative technologies for users to interact with code – Paper Programs is an exciting way to do just that.

Paper Programs is a combination of a variety of existing technologies to create a way of interacting with code which is highly tangible. The setup consists of a projector, and a webcam which can see the projected area, combined with Javascript programs running in a browser. Programs can be edited in the browser, then printed out with special coloured dots around the page. When the page is placed in the projection area, these dots identify the unique program and are picked up by the webcam, and the server executes the relevant code, projecting back onto the page.

It’s a system that creates a very tactile way of interacting with a program – by moving the page around or placing different pages next to each other, programs can interact in various ways. The system is setup for collaboration as well, allowing users to edit code directly in the browser.

The project reminds us of earlier works on DIY multitouch screens, but with a greater focus on direct engagement with the underlying code. What other unique ways exist to interact with code? Let us know in the comments.

Continue reading “Running Programs On Paper”

Pneumatic Origami

Odds are that if you’ve been to the beach or gone camping or somewhere in between, you are familiar with inflatable products like air mattresses. It’s nothing spectacular to see a rectangle inflate into a thicker, more comfortable rectangle, but what if your air mattress inflated into the shape of a crane?

We’ve seen similar ideas in quadcopters and robots using more mechanical means, but this is method uses air instead. To make this possible, the [Tangible Media Group] out of [MIT’s Media Lab] have developed aeroMorph — a program that allows the user to design inflatable constructs from paper, plastic or fabric with careful placement of a few folding joints.

These designs are exported and imprinted onto the medium by a cartesian coordinate robot using a heat-sealing attachment. Different channels allow the medium to fold in multiple directions depending on where the air is flowing, so this is a bit more complicated than, say, a bouncy castle. That, and it’s not often you see paper folding itself. Check it out!

Continue reading “Pneumatic Origami”

Cardboard And Paper Gun Shows Off Clever Construction

This project by [blackfish] shows off a cardboard lookalike of an MP5 that loads from a working magazine, has a functional charging handle, and flings paper projectiles with at least enough accuracy to plink some red party cups. It was made entirely from corrugated cardboard, paper, rubber bands, and toothpicks.

In the video (embedded below) you can see some clever construction techniques. For example, using a cyanoacrylate adhesive to saturate areas of wood, cardboard, or paper to give them added strength and rigidity. The video is well-edited and worth a watch to see the whole process; [blackfish] even uses a peeled piece of cardboard — exposing the corrugated part — as a set of detents (6:56) to retain the magazine.

Continue reading “Cardboard And Paper Gun Shows Off Clever Construction”