A Baby Grand Gets MIDI

Like a lot of people, [Jacques] doesn’t think a big hunk of plastic light enough to carry under your arm is a piano, even if it does have 88 keys. A piano is supposed to be a hefty piece of furniture that you have to buy people pizza to help you move. So he bought a used baby grand piano. It wasn’t in very good shape, though, so while restoring it, he also added MIDI to it. You can see the finished result in the video below.

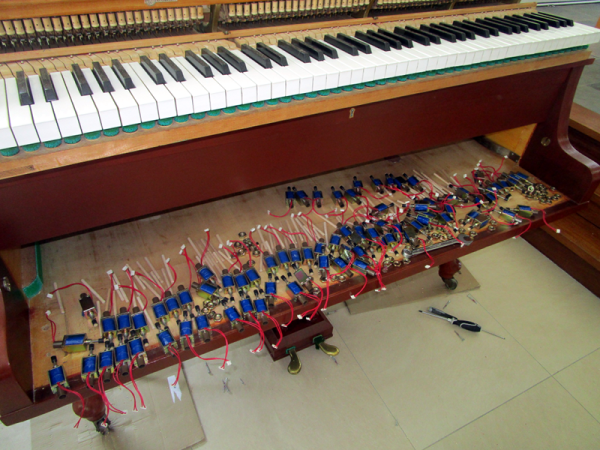
At $100, the price was right, although it cost more to move it. Between water damage, moth attacks, and storage in a garage, the piano — an old Zimmerman — needed a lot of tender loving care. When it came to MIDI, [Jacques] found a used Disklavier — a very expensive piece of kit — but it didn’t fit the Zimmerman or another piano at hand. The solenoids and optical sensors are set up for a particular piano, so what can you do? Easy! Rebuild the bar that holds the solenoids and sensors.

Continue reading “A Baby Grand Gets MIDI”

Bottle Organ Breakdown

A keen-eyed commenter pointed us to a homemade bottle organ that plays like a piano. The complexity gets turned up with foot-powered bellows and custom keys, but the magic of [Mike] and [Simon Haisell]’s garage-built instrument is not lost in the slightest. We also have the video below the break and there is a bottle organ performance by [Coyote Merlot].

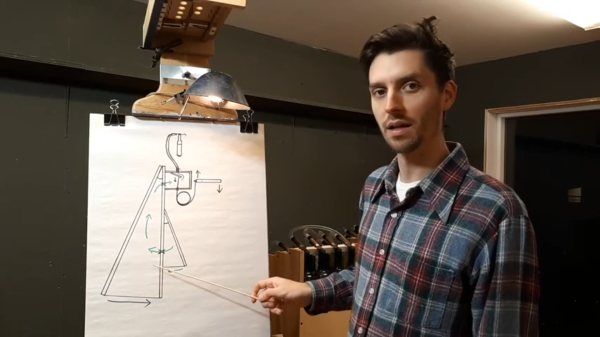
The working concepts are explained well in the video, and that starts with the bellows. In the first few seconds of the video, we see an organist swaying as he plays, and it would be accurate to say the music moves him. The wobbling is to pedal a couple of levers that squeeze a pair of air sacs and slide under wheels that look like a hardware store purchase. The spring-return mechanism is a repurposed bungee cord and you know we dig that kind of resourcefulness. Each bellow valve is made with traditional leather flaps of the type that predate bungee cords and camera phones. These air pumps inflate a big reservoir in the back that provides continuous pressure to a manifold where each of the thirty-six keys control a valve responsible for one bottle. The pair built every wooden part we mentioned with the explicit purpose of creating this organ.

Continue reading “Bottle Organ Breakdown”

Repairdown: Disklavier DKC500RW Control Unit

If you’ve been kind enough to accompany me on these regular hardware explorations, you’ve likely recognized a trend with regards to the gadgets that go under the knife. Generally speaking, the devices I take apart for your viewing pleasure come to us from the clearance rack of a big box retailer, the thrift store, or the always generous “AS-IS” section on eBay. There’s something of a cost-benefit analysis performed each time I pick up a piece of gear for dissection, and it probably won’t surprise you to find that the least expensive doggy in the window is usually the one that secures its fifteen minutes of Internet fame.

DKC500RW installed on right side.

But this month I present to you, Good Reader, something a bit different. This time I’m not taking something apart just for the simple joy of seeing PCB laid bare. I’ve been given the task of repairing an expensive piece of antiquated oddball equipment because, quite frankly, nobody else wanted to do it. If we happen to find ourselves learning about its inner workings in the process, that’s just the cost of doing business with a Hackaday writer.

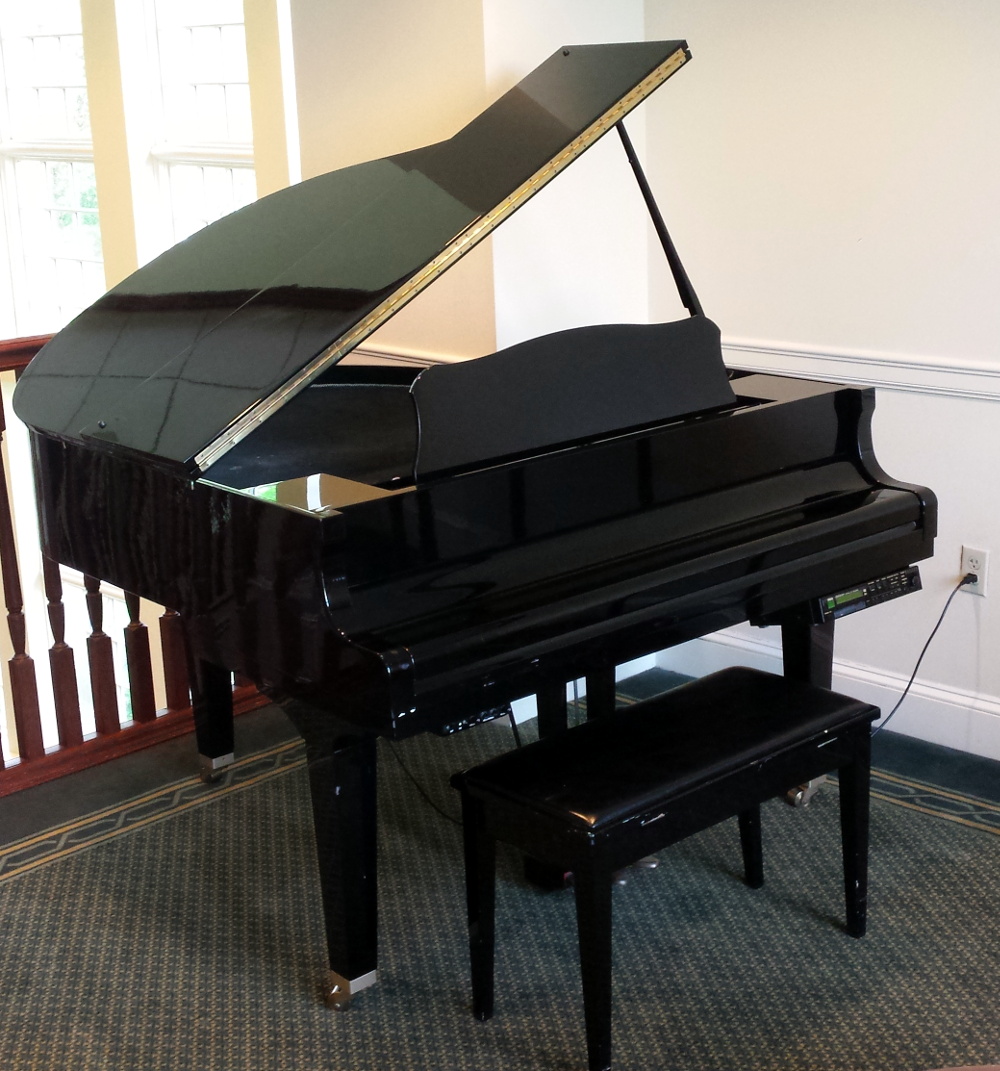
The situation as explained to me is that in the late 1990’s, my brother’s employer purchased a Yamaha Mark II XG “Baby Grand” piano for somewhere in the neighborhood of $20,000. This particular model was selected for its ability to play MIDI files from 3.5 inch floppy disks, complete with the rather ghostly effect of the keys moving by themselves. The idea was that you could set this piano up in your lobby with a floppy full of Barry Manilow’s greatest hits, and your establishment would instantly be dripping with automated class.

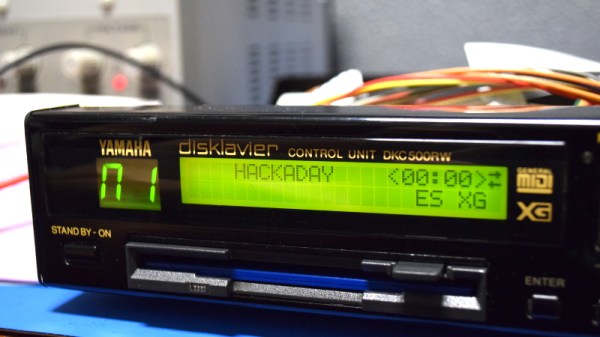
Unfortunately, about a month or so back, the piano’s Disklavier DKC500RW control unit stopped reading disks. The piano itself still worked, but now required a human to do the playing. Calls were made, but as you might expect, most repair centers politely declined around the time they heard the word “floppy” and anyone who stayed on the line quoted a price that simply wasn’t economical.

Before they resorted to hiring a pianist, perhaps a rare example of a human taking a robot’s job, my brother asked if he could remove the control unit and see if I could make any sense of it. So with that, let’s dig into this vintage piece of musical equipment and see what a five figure price tag got you at the turn of the millennium.

Continue reading “Repairdown: Disklavier DKC500RW Control Unit”

3D Prints Turn Any Keyboard Isomorphic

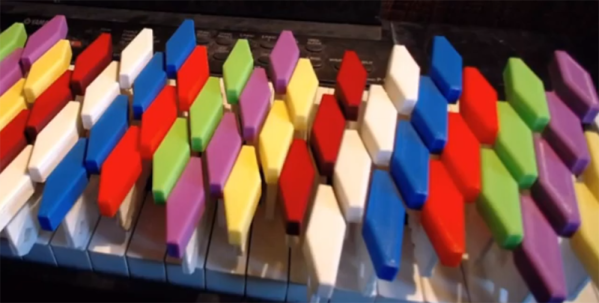
In the history of weird musical instrument interfaces, isomorphic keyboards are a favorite. These keyboards look like a grid of buttons, but when you play them, the relative shapes of chords are always the same. The benefit? Just say no to five hundred years of clavier tradition. It looks cool, too. Theoretically, it’s easier to play independent of whatever key you’re in. [John Moriarty] has built one of these isomorphic keyboards, and unlike everything we’ve ever seen, there are no electronics. It’s all 3D printable and turns any MIDI keyboard into an isomorphic keyboard.

We have seen isomorphic (piano) keyboards before, from a slew of Cherry keyboard switches to a bunch of arcade buttons. There is one downside to these builds, and that is that it’s really just building a MIDI controller. [John]’s build is simply a 3D printable overlay for a traditional piano that turns any standard keyboard into an isomorphic keyboard. The advantage being that this is really just a few pounds of plastic to be printed out and not a mess of wiring and electronics. Simple, removable, reversible. Not bad.

This keyboard effectively adds two differently colored keytops to each key on a keyboard. The best explination of how this keyboard works is in this video, but the basic idea is that all the note names are grouped together by color; C flat, C natural, and C sharp are all blue, for example. This means a third interval is two colors away, and a minor third is two colors to the right and one ‘row’ down. Yeah, it’s weird but that’s what an isomorphic keyboard is.

Since this is just a bunch of 3D printed parts meant to fit on any piano keybed, this is something that’s extremely easy to replicate. All the files for this keyboard overlay are available on Thingiverse, and [John] is offering to print these key tops for others without a 3D printer.

DIY Piano: Look, Ma, No Moving Parts

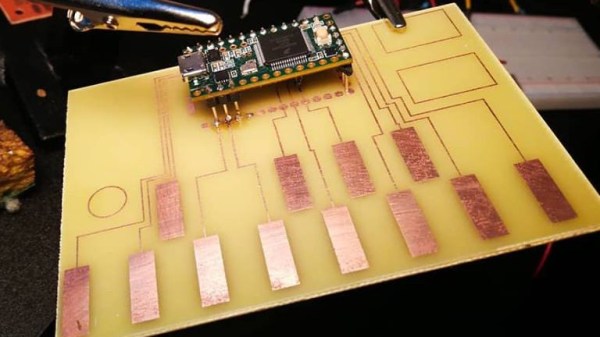
[Michael Sobolak] has a penchant for pianos, concern for capacitive touch, and special sentiment for solid state. This alliterate recipe results in a DIY PCB piano that leaves out the levers and is barren of buttons unless you count the stock RESET button on the Teensy. A real stickler might point out that speakers have moving cones. Beyond these tangential parts, which have motionless options, it is an electronic instrument with no moving parts.

The heart of the project is a Teensy 3.2 which natively supports twelve capacitive touch sensors. The infamous demo board is mounted to a homemade PCB featuring twelve keys but is actually an incomplete octave plus another key one octave above the first. If you look sharp, you already noticed the missing and extra touchpads. PCB traces were made in Illustrator because if you have a familiar tool, you use what you know and you cannot argue that it works. The design was transferred to a copper board using the old magazine page trick that we love and reliable old ferric acid.

We couldn’t help but notice that the posts of the Teensy were soldered to the top of the board, rather than drilling through, IMT-style. Again, the results speak, even if there is room for improvement. Reportedly, there is a second version on the way which includes every expected key.

Continue reading “DIY Piano: Look, Ma, No Moving Parts”

Simple Hack Completely Changes The Sound Of This Piano

We’re partial to musical instrument hacks around here, mainly because we find instruments to be fascinating machines. Few are more complex than the piano, and, as it turns out, few are quite so hackable. Still, we have to admit that this ragtime piano hack took us by surprise.

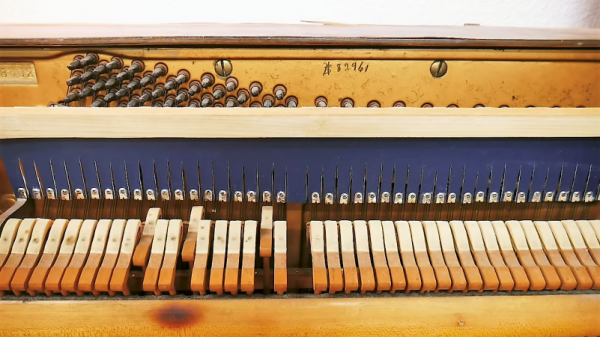
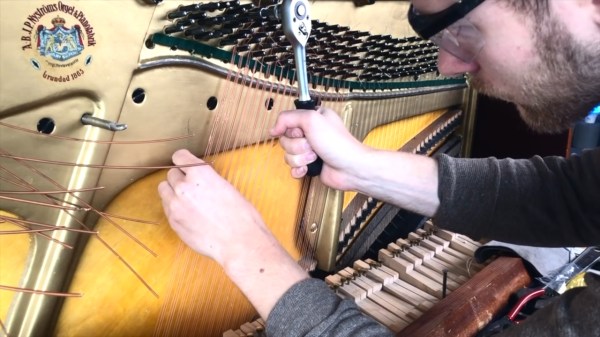
We always thought that the rich variety of tones that can be coaxed from a piano, from the tinny sound of an Old West saloon piano to the rich tones of a concert grand, were due mainly to the construction of the instrument and the way it’s played. Not so, apparently, as [Measured Workshop] demonstrated by installing a “mandolin rail” in a small upright piano. The instrument had seen better days, so step one was disassembly and cleaning. A wooden rail spanning the entire width of the string board was added, with a curtain of fabric draping down to the level of the hammers. The curtain was cut into a fringe in the same spacing as the hammers – marking the hammer locations with cornstarch was a nice trick – and metal clips were crimped to each fringe. The completed mandolin rail can be raised and lowered using a new foot pedal, completely changing the tone as the hammers hit the strings with the metal clips rather than their soft felt heads. It makes the piano sound a little like a harpsichord, or the aforementioned saloon instrument, and at the touch of a foot, it’s back to its original tone.

Most of the piano hacks we offer tend toward the electronic variety, so it’s nice to see a purely mechanical piano hack for a change. And if the hacked piano doesn’t work out as an instrument, you can always turn it into a workbench.

Continue reading “Simple Hack Completely Changes The Sound Of This Piano”

Recycled Piano Becomes Upcycled Workbench

Pianos are free, in case you’re not hip to the exciting world of musical instrument salvage. Yes, the home piano, once the pinnacle of upper middle class appreciation of the arts, is no longer. The piano your great aunt bought in 1963 is just taking up space, and it’s not like the guy on Craigslist giving away a free piano has a Bösendorfer.

It’s out of this reality of a surplus of cheap used pianos that [luke] built a new desk. He got it a while ago, but after getting it into his house, he realized it was too old to be tuned anymore. Or at least it was uneconomical to do so. This piano became a workbench, but after a while [luke] wanted something with a little more storage.

The process of converting this piano to a desk began with taking a few photos and putting them into Fusion 360. A series of panels and brackets were modeled in box jointed plywood, and the entire thing was cut out of 6mm Baltic birch plywood at the Vancouver Hack Space.

There are a few nice features that make this desk a little better than an Ikea special. There’s a Raspberry Pi mounted to the shelves, because the Pi still makes a great workbench computer. There’s a power supply, and hookups for 12 V, 5 V, and 3.3 V from an ATX power supply. This is controlled with an awesome antique power switch mounted to the side of the piano. Slap a few coats of black paint on that, and [luke] has an awesome, functional workbench that also has out-of-tune sympathetic strings. Not bad.

You can check out the entire build video below. Thanks [Jarrett] for sending this one in.

Continue reading “Recycled Piano Becomes Upcycled Workbench”